
AI Foundry – Content Understanding Part 2
In my first blog post about AI Foundry Content Understanding, I have showed you my first impression of this new service offering. In detail, I have used a built-in template for extracting financial details of my travel expense documents. Furthermore, I added new fields to this schema to extract and generate additional information. This worked extremely good for my use case where I want to extract travel information from my passenger itineraries and invoices.
This time I show you, how I can utilize content understanding and build a template from scratch. In detail, I will upload my own template file. My template file contains fields to extract the flight details from my passenger itinerary documents. In addition, I will explain how I’m increasing accuracy and improve the outcome by labeling my data. For this I will adjust the recognized location of my schema field and tell my analyzer the right location.
Let’s dive in!
Creating a Schema from Scratch
I’m starting again with AI Foundry Content Understanding. I have already uploaded my document in my content understanding task.
Now, I’m selecting Document analysis in Content Understanding where my uploaded file is present:
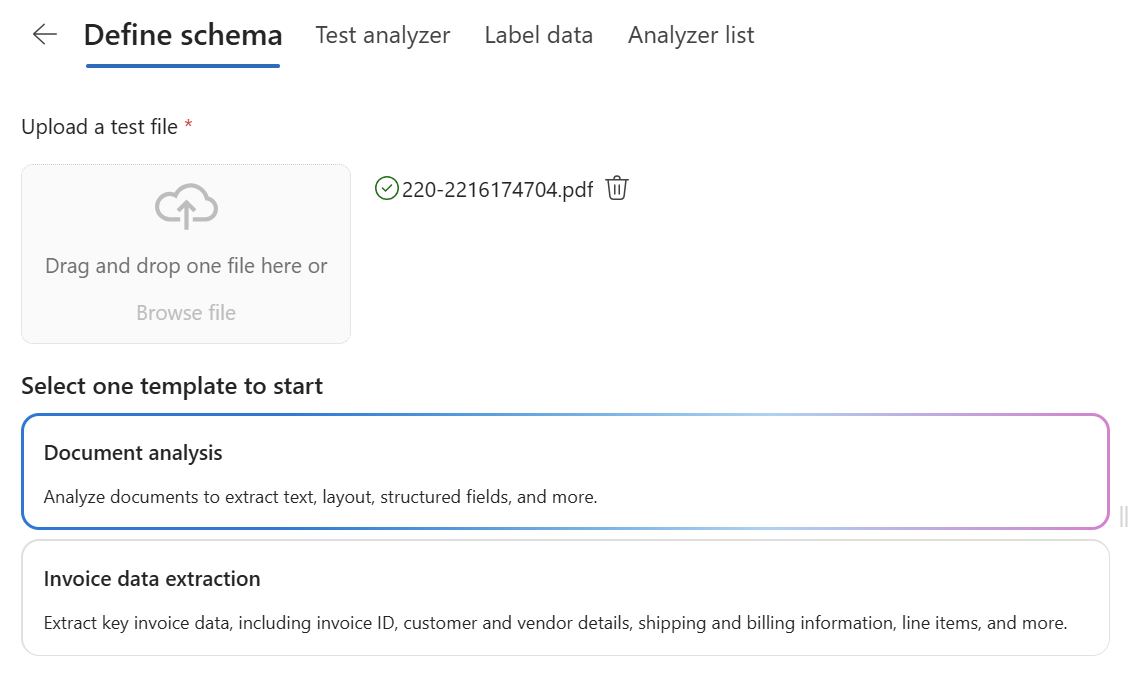
As result, I get an empty schema:
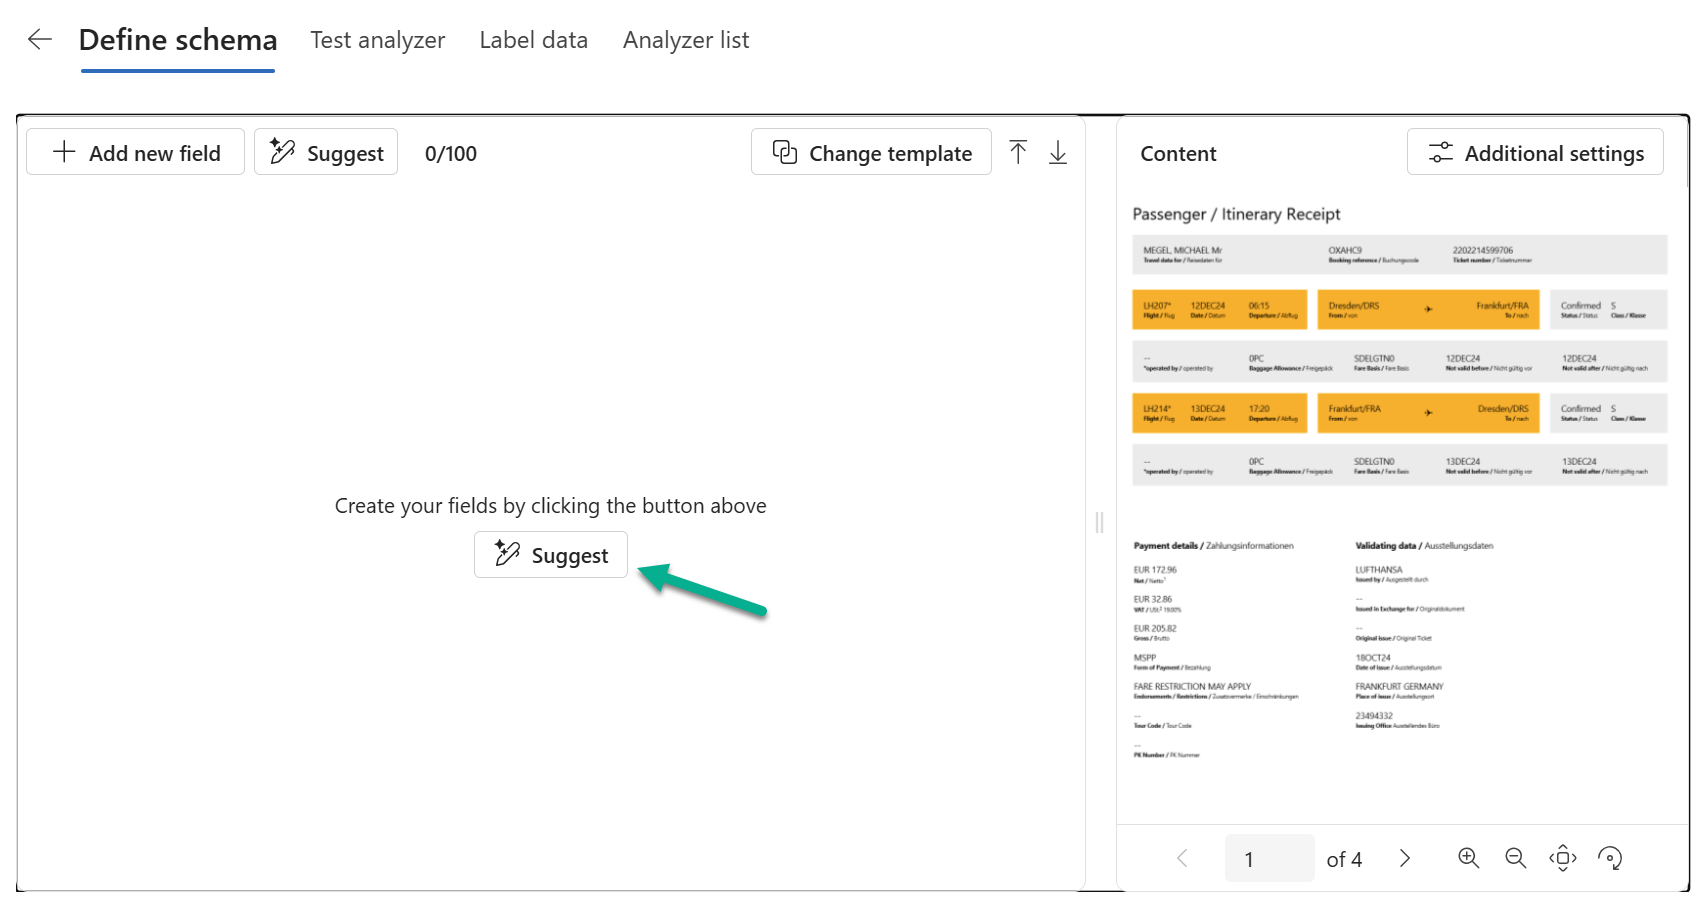
I could directly use the Suggest method and allow Content Understanding to generate a Schema based on my document. But I’m skipping this and upload my prepared template file.
Here is my template JSON:
{
"fieldSchema": {
"fields": {
"Flights": {
"type": "array",
"items": {
"type": "object",
"properties": {
"DepartureDate": {
"type": "date",
"method": "extract",
"description": "The departure date of the flight."
},
"DepartureTime": {
"type": "time",
"method": "extract",
"description": "The departure time of the flight."
},
"DepartureAt": {
"type": "string",
"method": "extract",
"description": "The departure location of the flight."
},
"ArrivalAt": {
"type": "string",
"method": "extract",
"description": "The arrival location of the flight"
},
"FlightNumber": {
"type": "string",
"method": "extract",
"description": "The number of the flight"
}
},
"method": "extract"
},
"method": "generate",
"description": "A list of flights in this document."
},
"Total": {
"type": "number",
"method": "extract",
"description": "The total price of the flights."
},
"TotalTax": {
"type": "number",
"method": "extract",
"description": "The tax price of the flights."
},
"TotalFare": {
"type": "number",
"method": "extract",
"description": "The total fare price of the flight."
},
"TransactionDate": {
"type": "date",
"method": "extract",
"description": "The date of transaction."
},
"TicketNumber": {
"type": "string",
"method": "extract",
"description": "The number of the ticket"
},
"BookingCode": {
"type": "string",
"method": "extract",
"description": "The booking code of the flight"
}
},
"definitions": {}
},
"baseAnalyzerId": "prebuilt-documentAnalyzer"
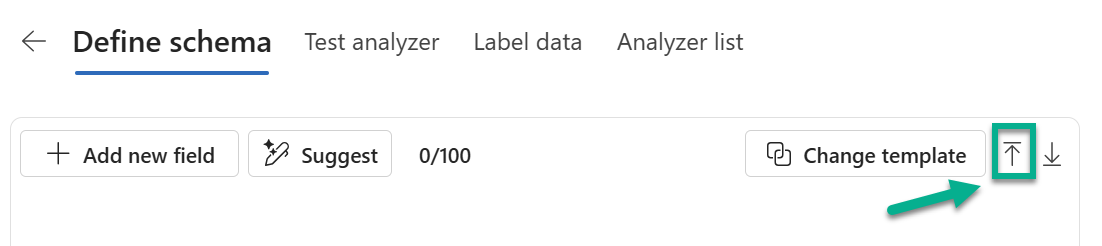
}I’m uploading my template file by clicking on the upload template button at the right corner of my view:
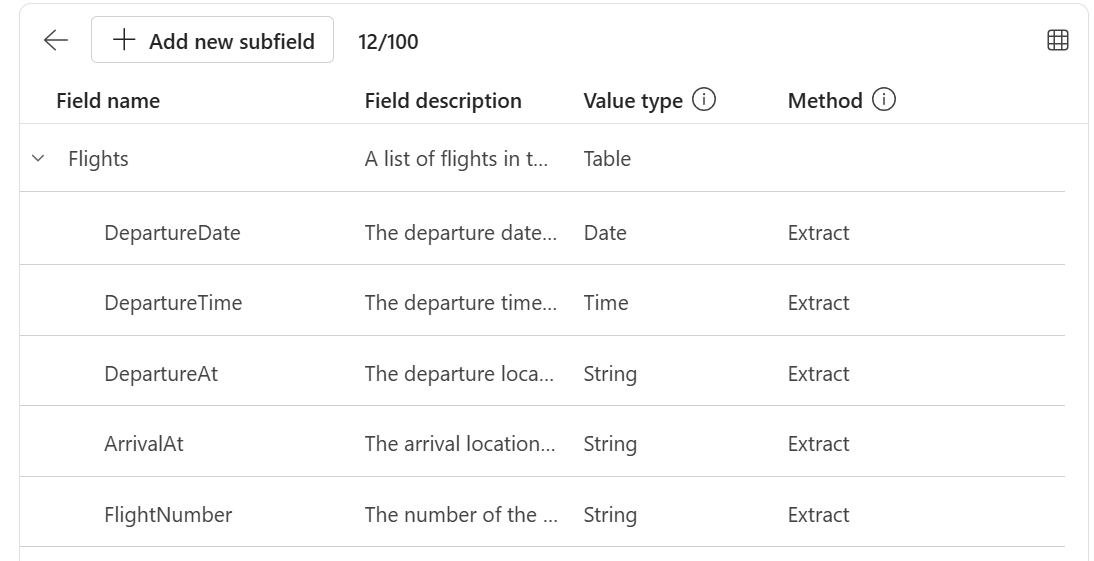
As result my fields are now shown in my schema designer:
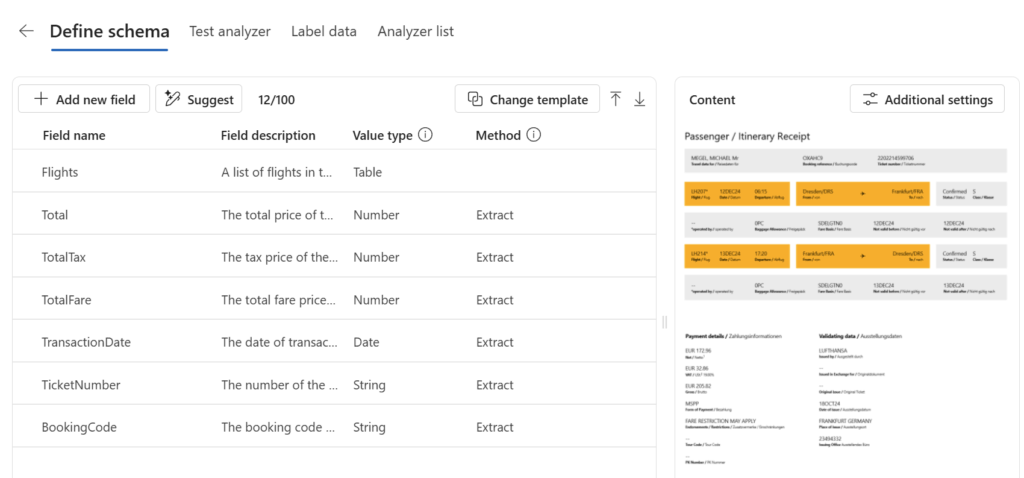
First my schema I will extract a table Flights. Furthermore, I have added the fields TransactionDate, Total, TotalTax, TotalFare, TicketNumber, and BookingCode. My table Flights will contain information about all flights in my document. In detail, I’m extracting date, location, and flight number:
Well done, let’s continue with testing.
Review and Testing the Analyzer
As usual, I’m testing my Content Understanding analyzer as the next step. Here I can review the extraction results of my uploaded documents:
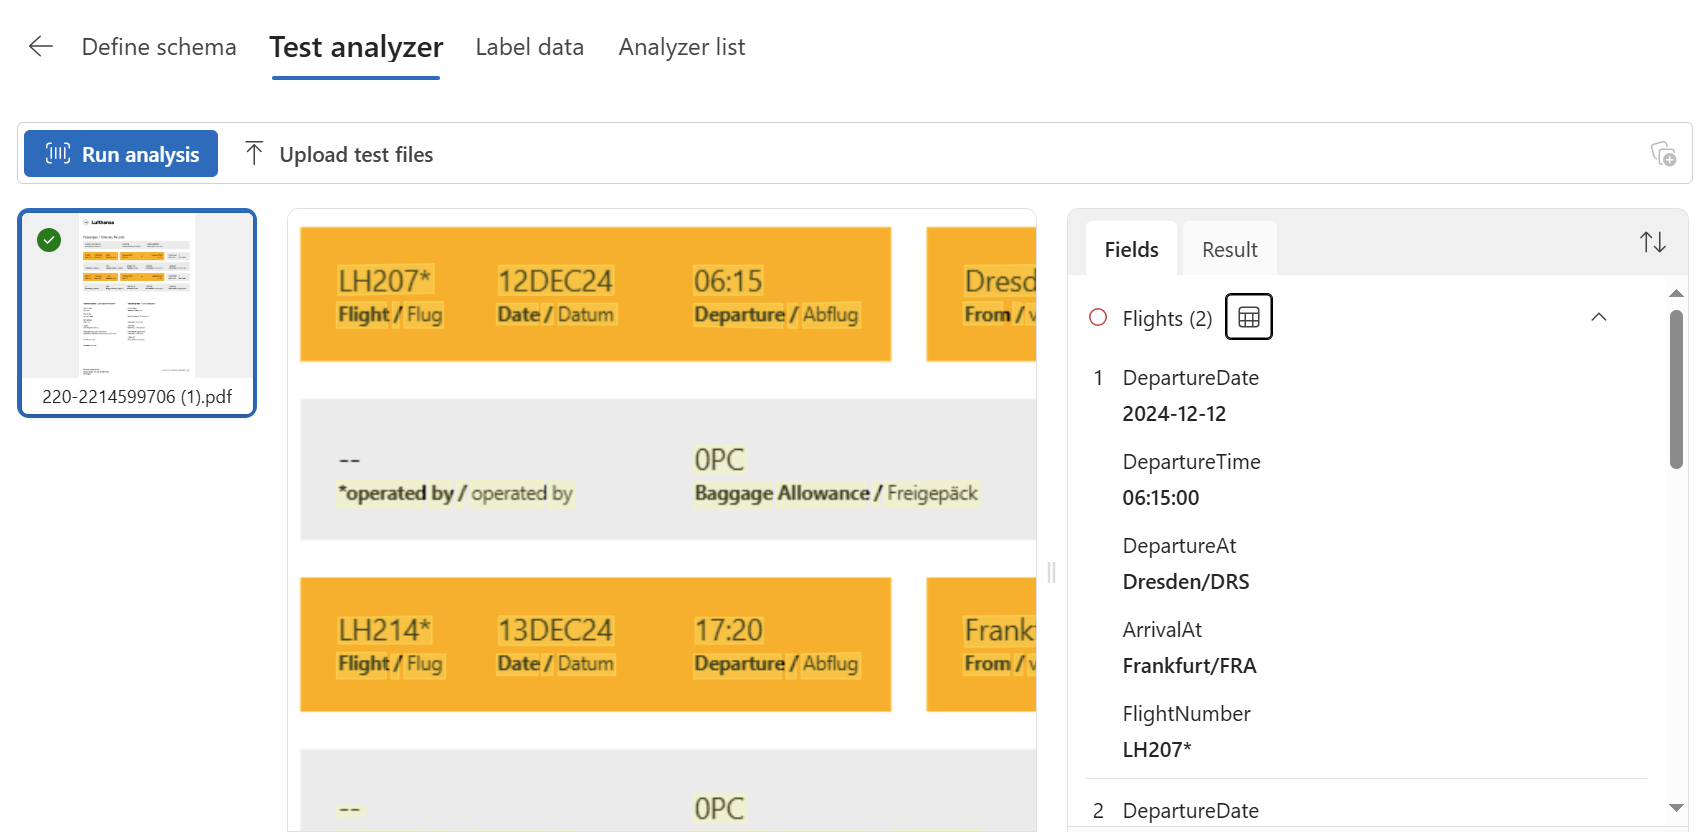
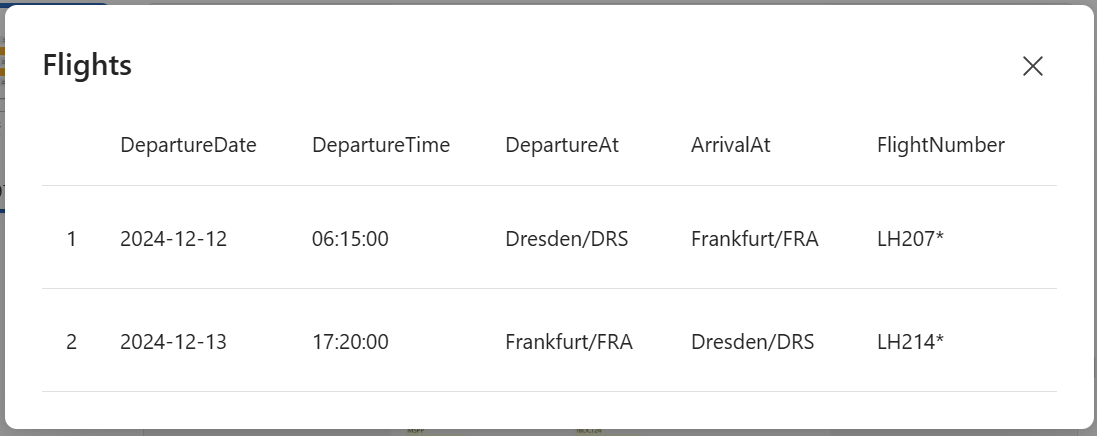
Clicking on the table icon in the preview shows me that my flights are correctly recognized:
Also, the information from page 3 in my document are nearly correct:
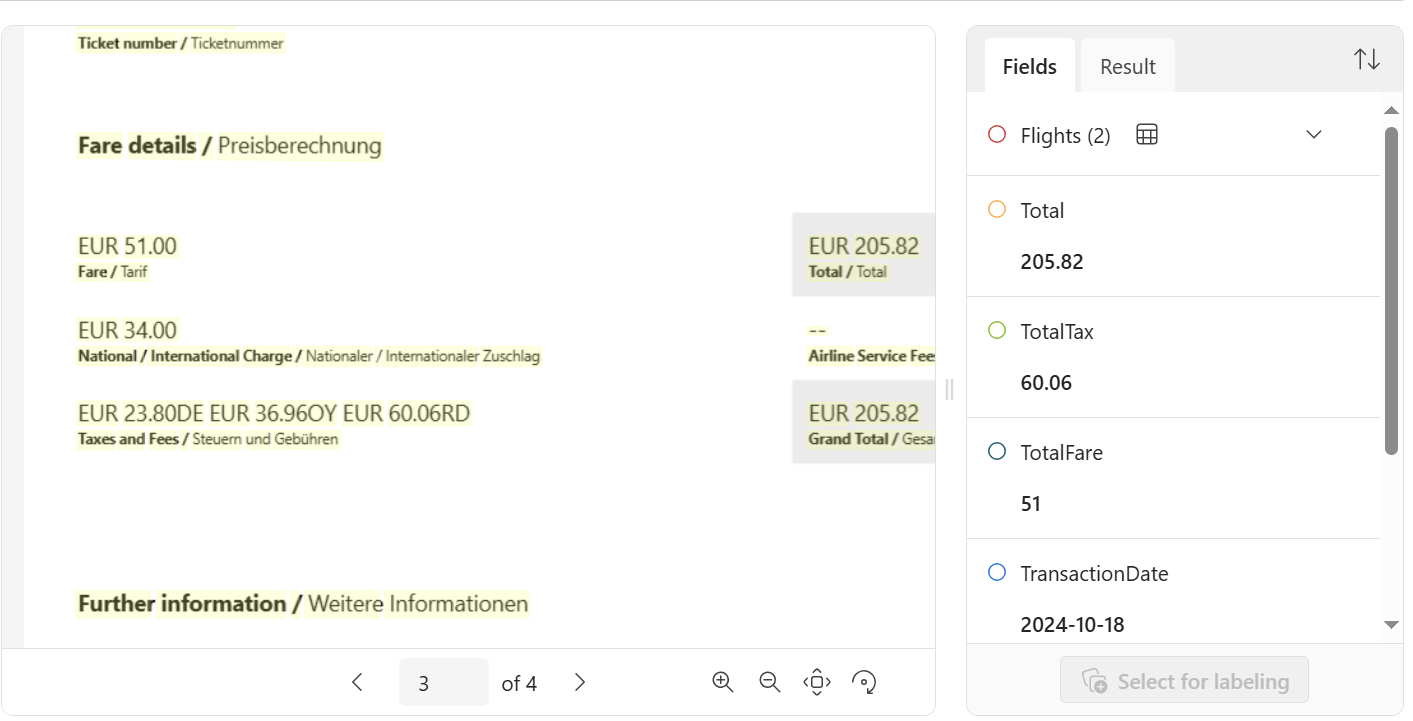
A tax value from this page was used but this seems not correct to me. I want the TotalTax to be recognized from a different field. Therefore, I teach my analyzer and label some data.
Labeling my data
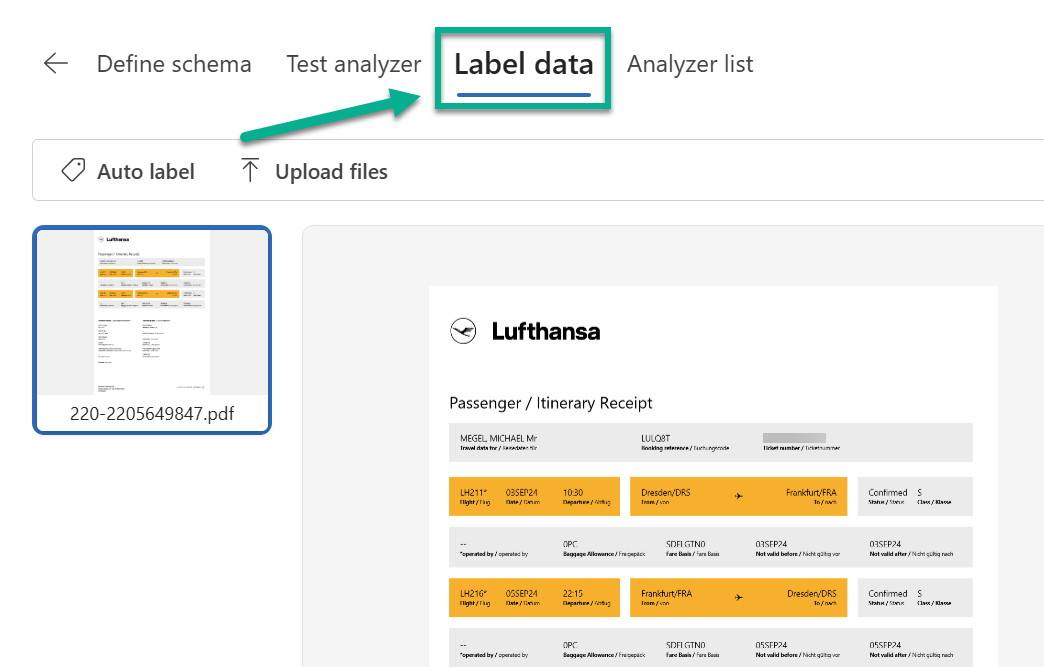
I move to the next page in Content Understanding. Here, I can start improving the accuracy of my Analyzer in AI Foundry Content Understanding. I’m clicking on Label data and uploading other documents:
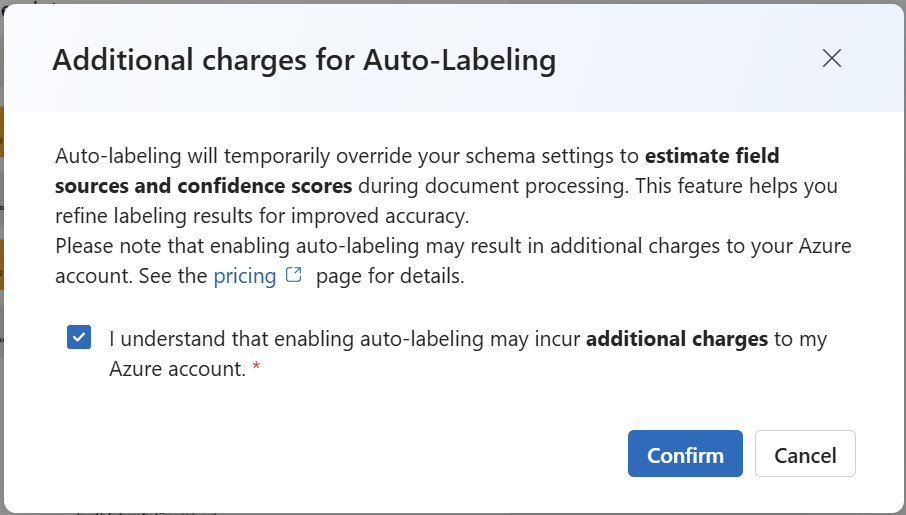
Afterwards, I’m clicking on Auto label. Furthermore, I confirm this dialog and accept the additional cost:
Afterwards, the labeling process starts. This takes a while. As result, I can review the extracted data:
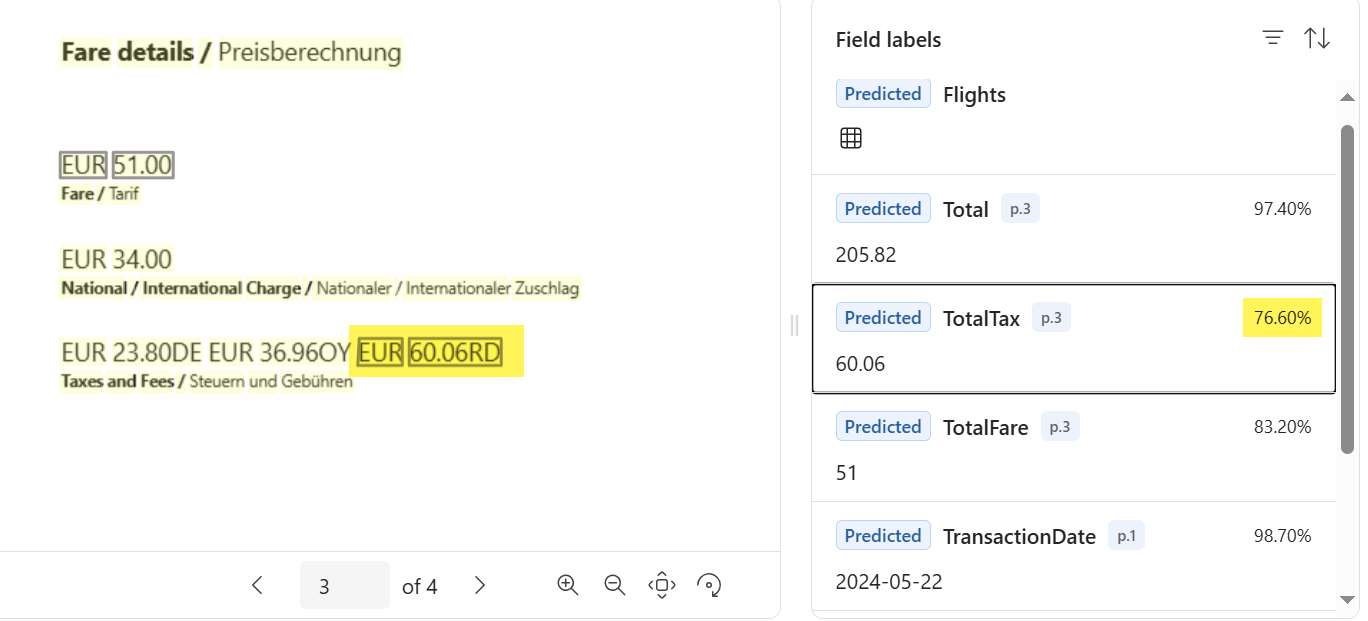
In addition, I can also adjust the location of the extracted information. For this I’m editing the field TaxTotal selecting the VAT information from the first page and accept my changes:

This is really simple! I can repeat this step for every field that is not recognized at the right position.
Building my Analyzer
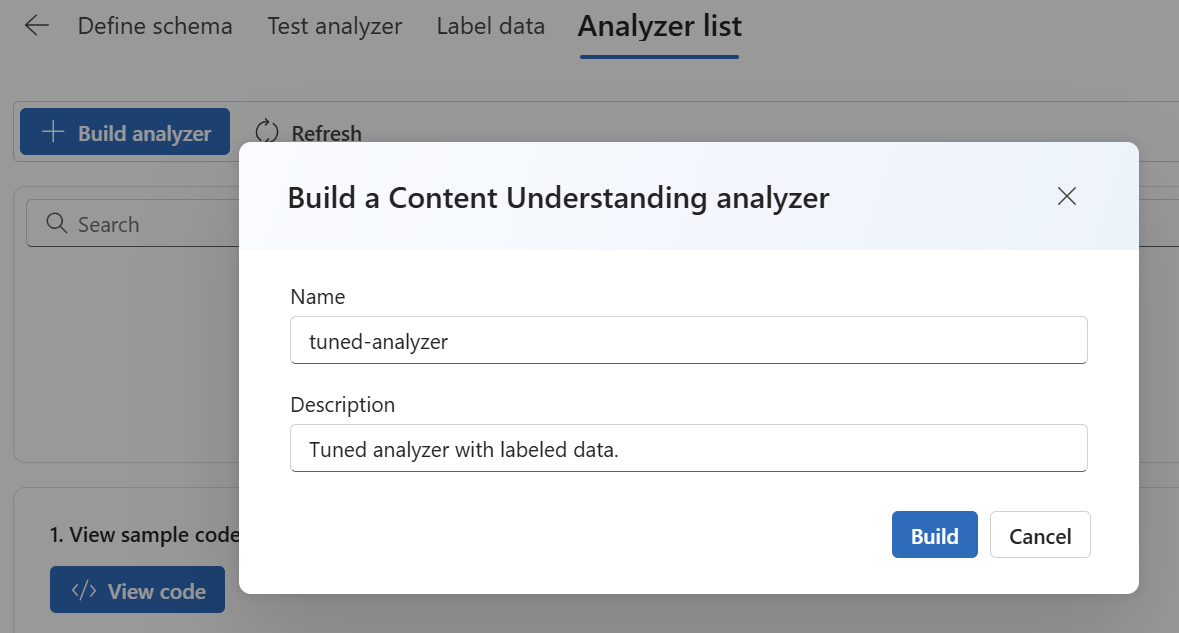
Finally, I must build my analyzer. For that I’m navigating here in AI Foundry Content Understanding in my task to my Analyzer list. Here I’m clicking on Build Analyzer:
After some seconds, my deployment is ready. Now I can upload again my documents and the result. Wow, you see that my field TotalTax is now recognized with the value from the adjusted location:
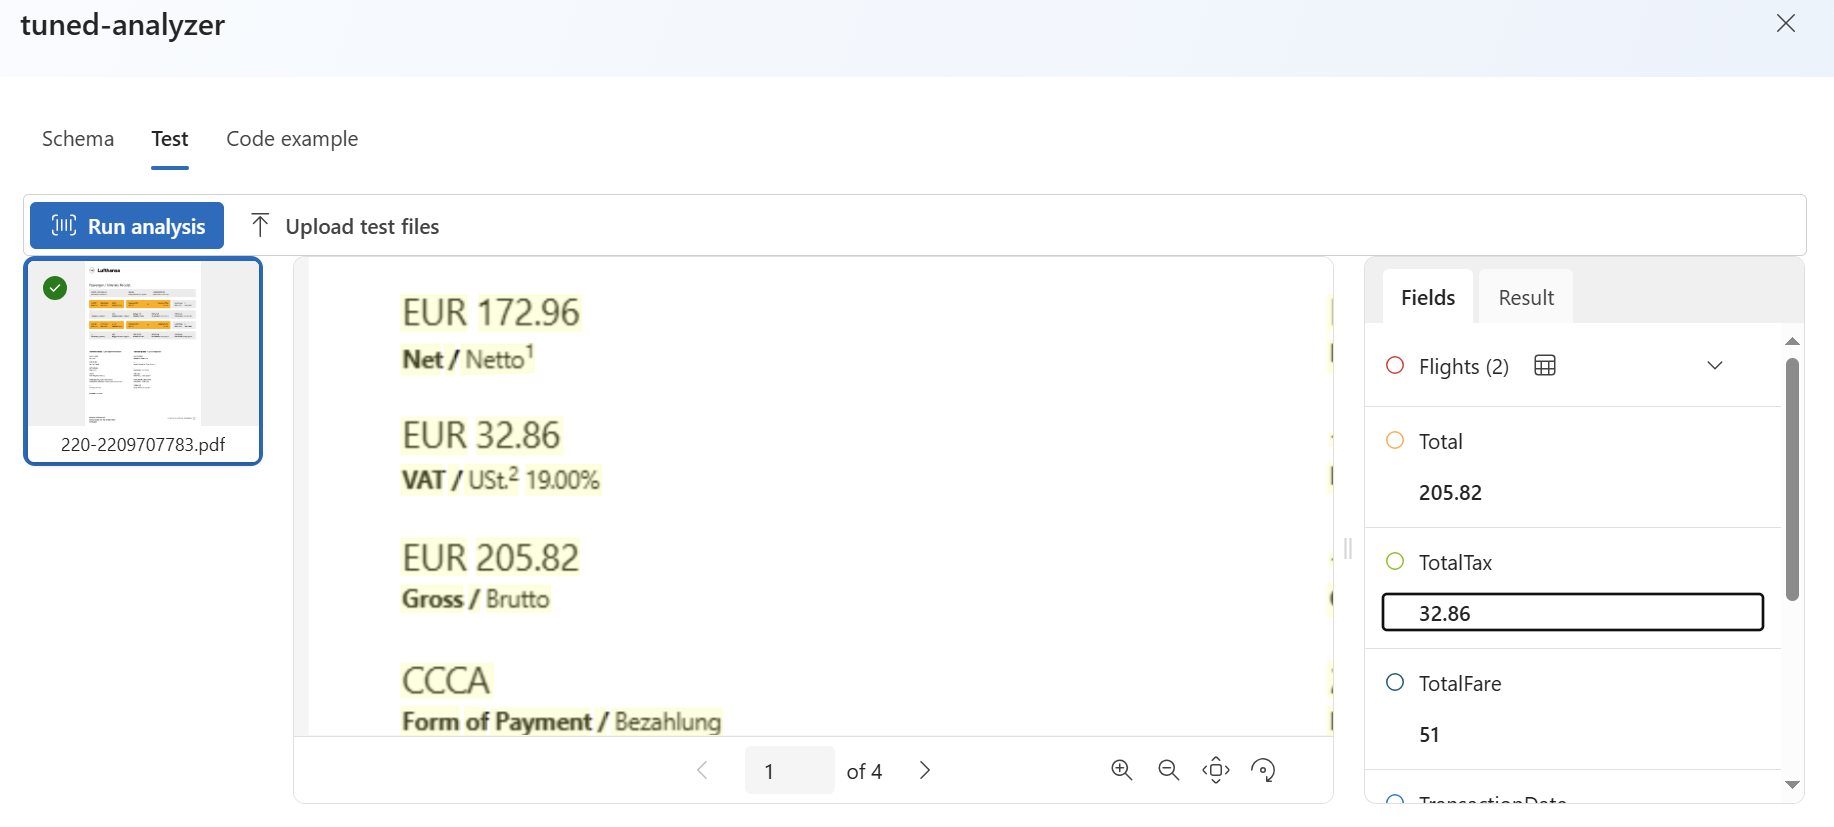
Perfect, my trained content understanding analyzer is ready!
Summary
Today I have shown another example, how I utilize Microsoft’s new AI Foundry service offering Content Understanding. My goal was to analyze similar documents such as my flight passenger itinerary receipts from my airline. Furthermore, I aimed to show you how easily I can change the predicted location of my captured fields by using labeling.
First, I have defined a new schema from scratch in my content understanding task. In detail, I have added a table to my schema that extracts all my flight information as a list. Furthermore, I added fields to extract financial data. Here I discovered that my field TotalTax was captured at not at the expected location. Therefore, I re-labeled the recognized data and trained my analyzer. Finally, I deployed and tested my resulting analyzer.
This example shows me again how fast I can set up and finetune a Content Understanding analyzer. Furthermore, I can directly test my new analyzer instance in Azure AI Foundry. The whole training and deployment process took only a couple seconds. This is extremely valuable for developing and realizing my business use cases!