
Deploy your Prompty as Docker Container
In my last blog post, I started using Prompty for VS Code, and it was an amazing experience. I realized how easily I can define and write my prompts in a single Prompty file. This solves one of the basic problems I encounter when starting to create a new AI solution. However, there is another challenge: How do I deploy my Prompty – maybe within a Docker container?
Yes, for sure, this is possible. Moreover, this is a good practice to containerize an AI solution. This method is robust and scalable. Furthermore, within a Docker container I can run my AI solution cost efficient for instance as Azure Container App.
Prompty
Today, I use a very simple Prompty as an example AI solution. My JokeGeneratorPrompt is designed to create customized jokes for users by incorporating their names into the humor. In addition, I will use the new gpt-4o-mini OpenAI Deployment (MS-Docs) in my Azure subscription. For that reason, I configure the api_version to one of the latest API versions.
Here is my Prompty:
---
name: JokeGeneratorPrompt
description: A prompt that generates a personalized joke.
authors:
- Michael Megel
model:
api: chat
configuration:
type: azure_openai
azure_endpoint: ${env:AZURE_OPENAI_ENDPOINT}
azure_deployment: gpt-4o-mini
api_version: 2024-02-15-preview
parameters:
max_tokens: 500
inputs:
userName:
type: string
description: The name of the user.
sample:
userName: Michael
---
system:
You are an AI assistant that tells a joke.
user:
{{userName}} ask you to make a joke.
Please answer **{{userName}}** with a personal greeting. Try to add emojis to make the joke funnier.
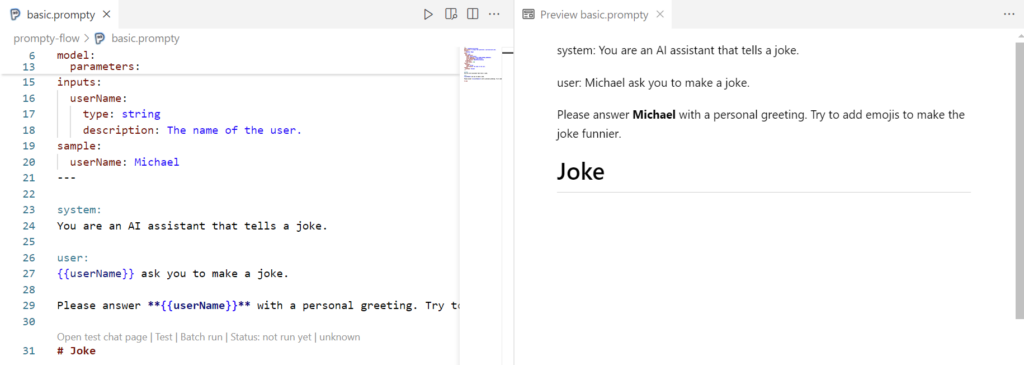
# JokeYou see, my prompt starts with the line “system:” followed by the system message, that gives the model instructions about how it should behave. Afterwards, starts with “user:” my conversation. In other words, here starts the user’s prompt. You see also, the input parameter userName is directly included in the prompt.
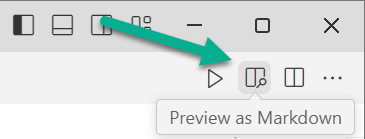
Let me double check my prompt in Prompty MarkDown preview:
The Prompty preview shows me what my LLM will get, and I see that my userName is correctly included in the text:
Finally, a short execution in VS Code by pressing F5 shows me that my Prompty works as expected:

Building a Prompt Flow
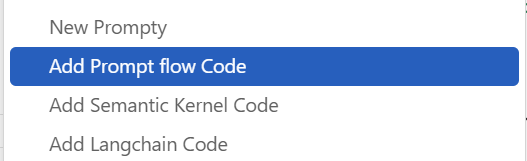
Next, I will generate a Prompt flow integration. This means, I right-click my Prompty file in VS Code file explorer and select Add Prompt flow Code:
The generated code in my file basic_promptflow.py is this:
import json

from pathlib import Path
folder = Path(__file__).parent.absolute().as_posix()

from promptflow.core import tool, Prompty

@tool
def flow_entry(
      userName: any
) -> str:
  # path to prompty (requires absolute path for deployment)
  path_to_prompty = folder + "/basic.prompty"

  # load prompty as a flow
  flow = Prompty.load(path_to_prompty)

  # execute the flow as function
  result = flow(
    userName = userName
  )

  return result

if __name__ == "__main__":
   json_input = '''{
  "userName": "Michael"
}'''
   args = json.loads(json_input)

   result = flow_entry(**args)
   print(result)
Again, this is nothing special because Prompty is well integrated into AI frameworks such as Prompt flow, Langchain, and Semantic Kernel.
Within this file, I can also run and debug the generated code in VS Code:

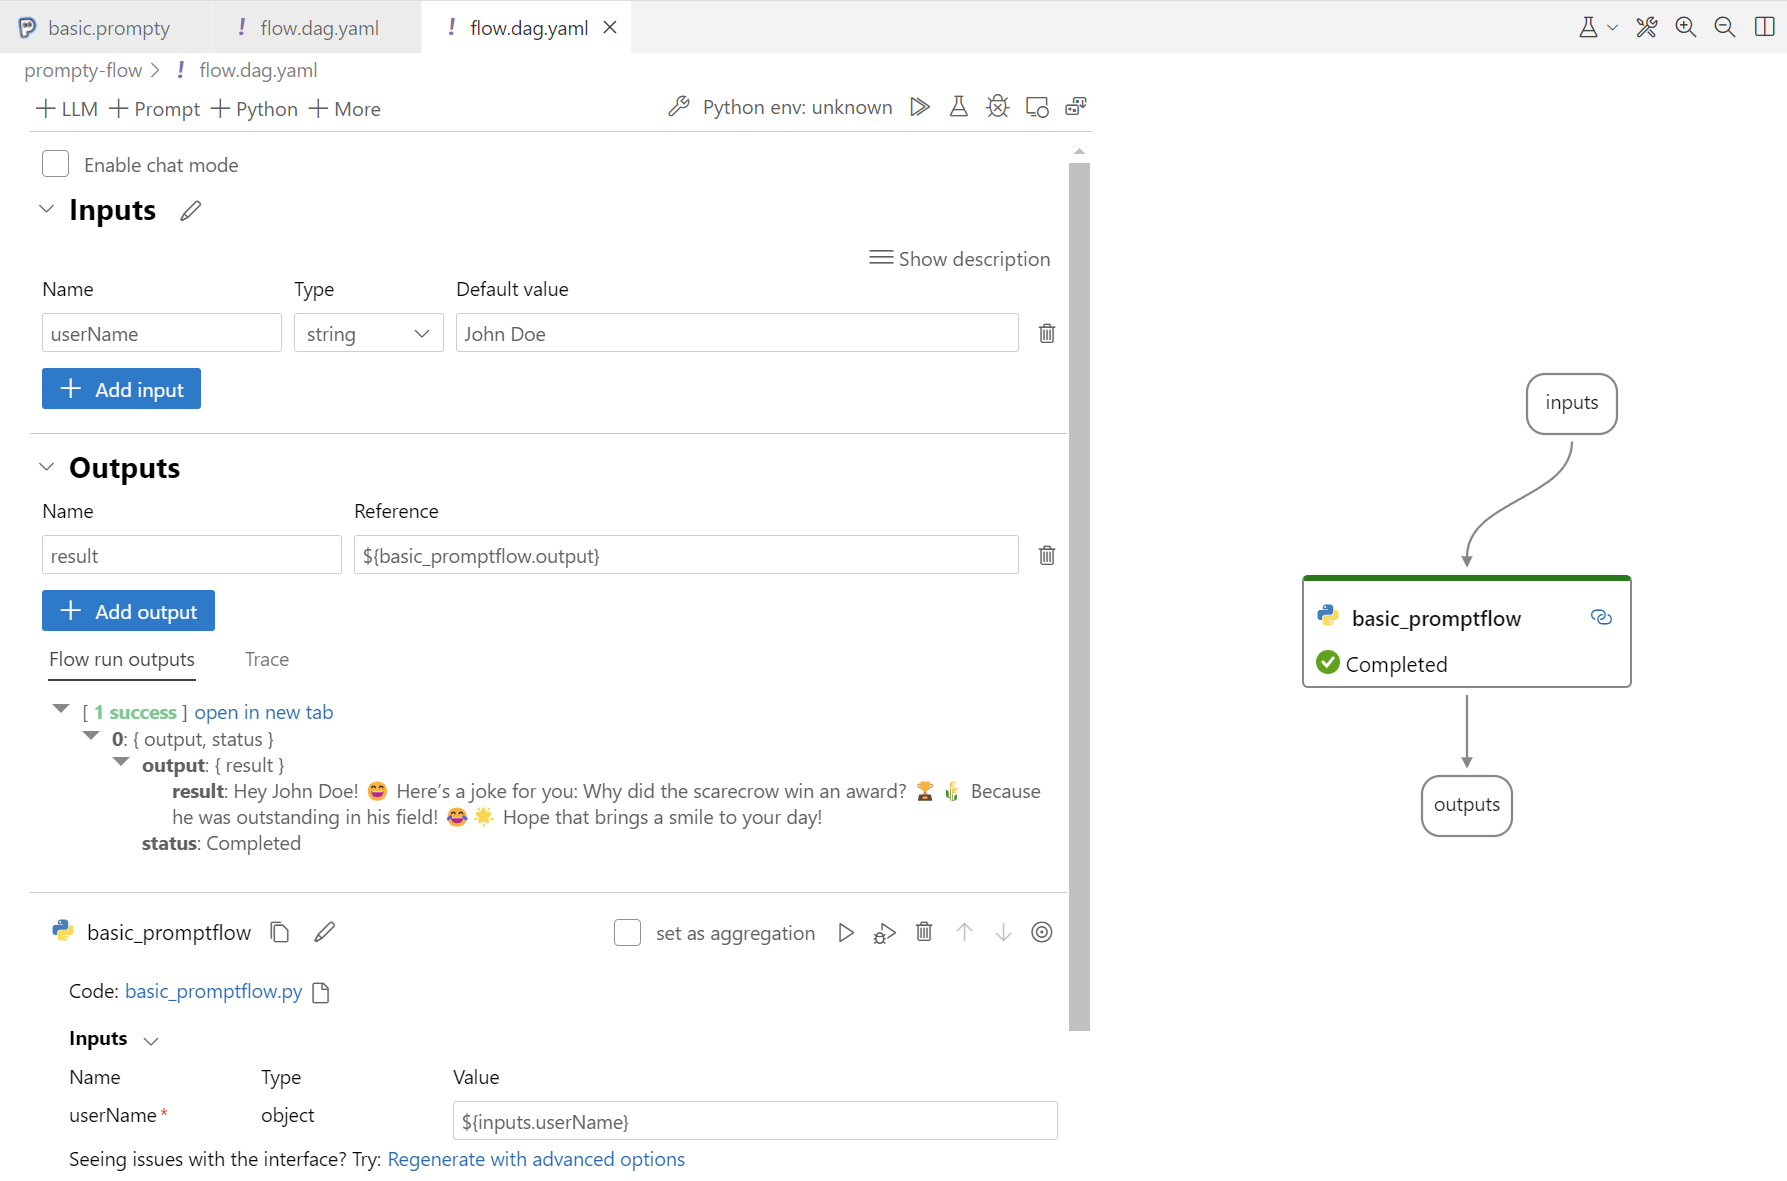
Next, I create an empty Prompt flow flow.dag.yaml file in the same folder where my other Prompty files exist. Here in my Prompt flow definition file, I define firstly the inputs and outputs of my flow. In addition, I configure a single node in my Prompt flow that runs my generated Python file basic_promptflow.py. I also setup the parameter referenced for my node and my output parameter result:
inputs:
  userName:
    type: string
    default: John Doe
outputs:
  result:
    type: string
    reference: ${basic_promptflow.output}
nodes:
- name: basic_promptflow
  type: python
  source:
    type: code
    path: basic_promptflow.py
    entry: flow_entry
  inputs:
    userName: ${inputs.userName}
Finally, I load and run my Prompt flow in VS Code. As you see, my flow is connected correctly and generates a joke for me:
Wait, there is one more step. I add and configure the needed python packages in the file requirements.txt:
azure.identity
promptflow
Note: The package azure.identity is used later by Prompt flow runtime to configure authentication and access my LLM model endpoint.
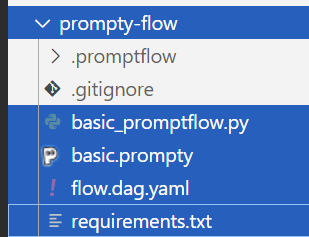
As result, my prompty-flow directory in VS Code contains now these 4 files:
Containerize Prompt Flow
Ok, everything is in place. My Prompt flow works as expected and I have defined the required python packages. This means, I’m ready to build for Prompt flow and Prompty a Docker container. In other words, I can start with deploying my flow using Docker.
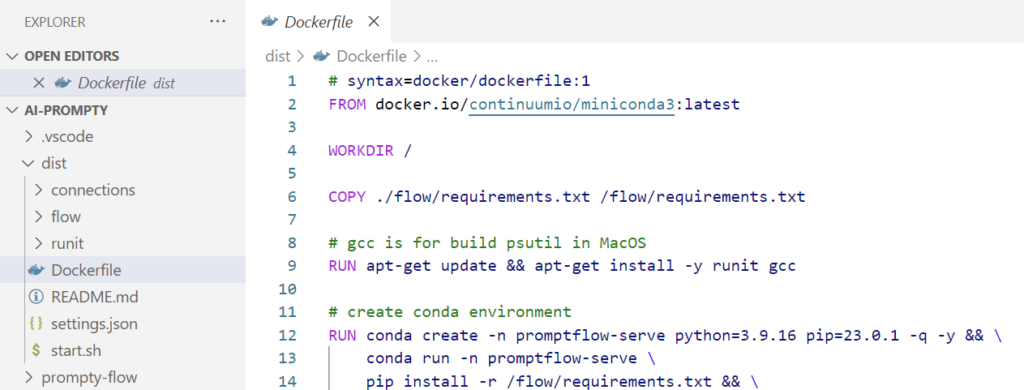
I run this command to generate the distribution and the needed Dockerfile in folder dist:
pf flow build --source .\prompty-flow\ --output dist --format dockerThe result is a copy of my Prompt flow in the dist folder including my Prompty together with some scripts needed to start and stop the services in my Docker container:
Ok, this was straight forward. Now, I build my container image by running this command:
docker build dist -t promptyThis might take a while…

Perfect, my container image is generated. Now I want to run my container.
Setup Authentication
Wait, there is something that I must prepare before I can run my container locally. Correctly, I must setup the authentication mechanism. Mostly during development I’m using the API key, but there is another option.
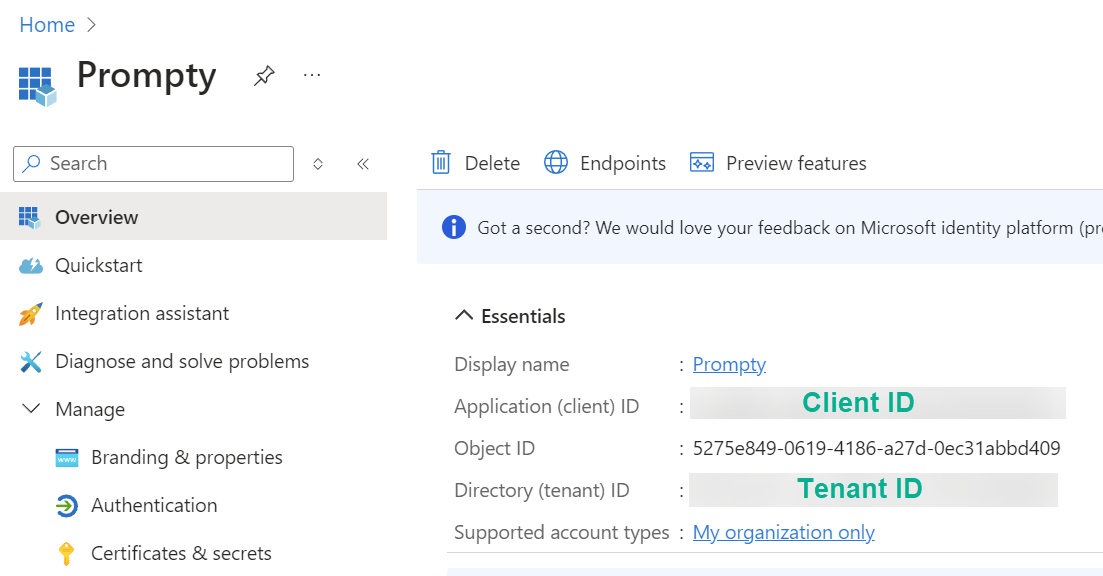
I set up an Application Registration in Entra ID to use the EnvironmentCredential‘s for my Docker container. In other words, my container will use the Client ID, the Client Secret, and my Azure Tenant ID from environment variables to authenticate.
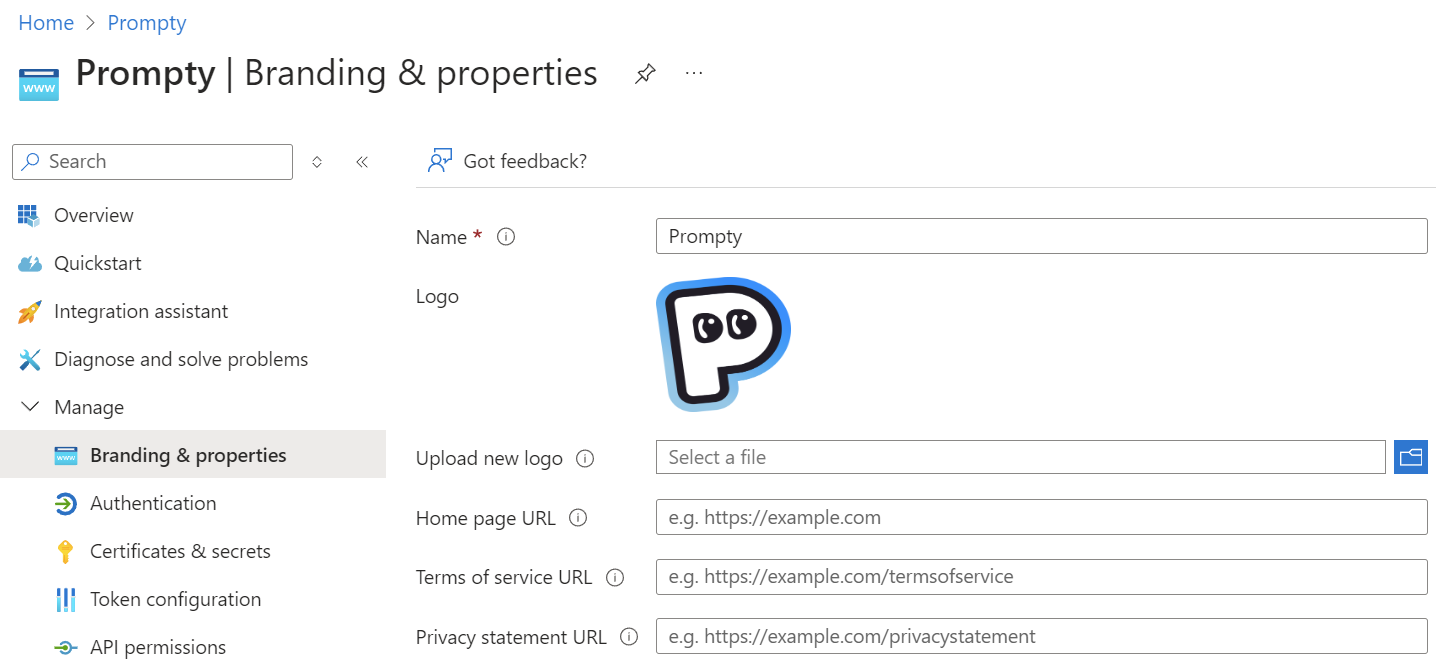
First, I create a new Application Registration in my Microsoft Entra ID and call it Prompty:
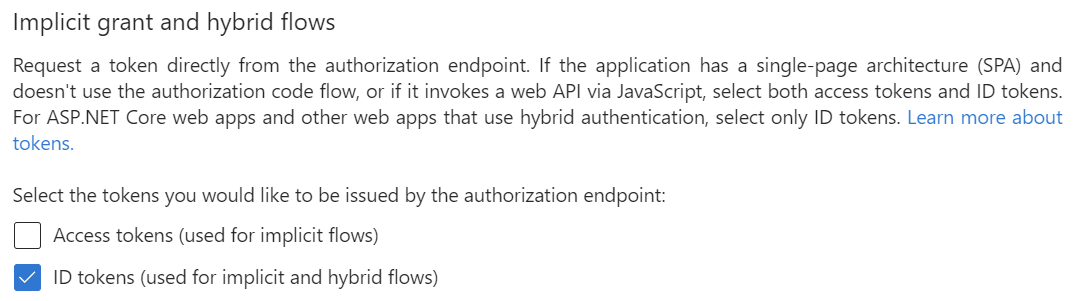
In addition, I configure Implicit grant and hybrid flows with ID tokens in Prompty | Authentication:
As usual, I copy Client ID, and Tenant ID from Overview, and set up a new Client Secret in Certificates and Secrets:
Next, I start to configure my Azure OpenAI service. I open in my Azure OpenAI service the Access control (IAM), add a new role assignment for the role Cognitive Service OpenAI User to my Prompty Application:
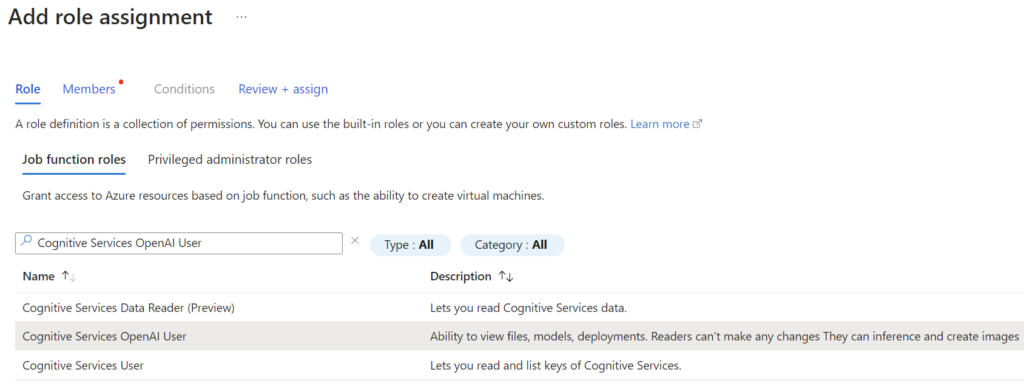
Here is the result:

Running Prompty in a Docker container
Now, with the previously collected information I start to configure my docker run command. Here is my PowerShell script:
$AZURE_CLIENT_ID       = "<client-id>"
$AZURE_TENANT_ID       = "<tenant-id>"
$AZURE_CLIENT_SECRET   = "<client-secret>"
$AZURE_OPENAI_ENDPOINT = "https://<your-deployment>.openai.azure.com/"

# Start the container with automatic deletion and a specific name
docker run --name Prompty --rm -p 8080:8080 `
    -e AZURE_OPENAI_ENDPOINT=$AZURE_OPENAI_ENDPOINT `
    -e AZURE_CLIENT_ID=$AZURE_CLIENT_ID `
    -e AZURE_TENANT_ID=$AZURE_TENANT_ID `
    -e AZURE_CLIENT_SECRET=$AZURE_CLIENT_SECRET `
    prompty
You see, I add Client ID, Client Secret, and my Tenant ID as environment variable to my container. In addition, I set up the Azure OpenAI endpoint information from my service deployment as environment variable AZURE_OPENAI_ENDPOINT.
After running this command, my container starts on my local environment…

Testing my Prompty Container
Cool, my container is up and running. Now I can test my AI solution in the browser. I open this URL:
http://localhost:8080After some seconds, a Chatbot as a test user interface appears and I enter my name:
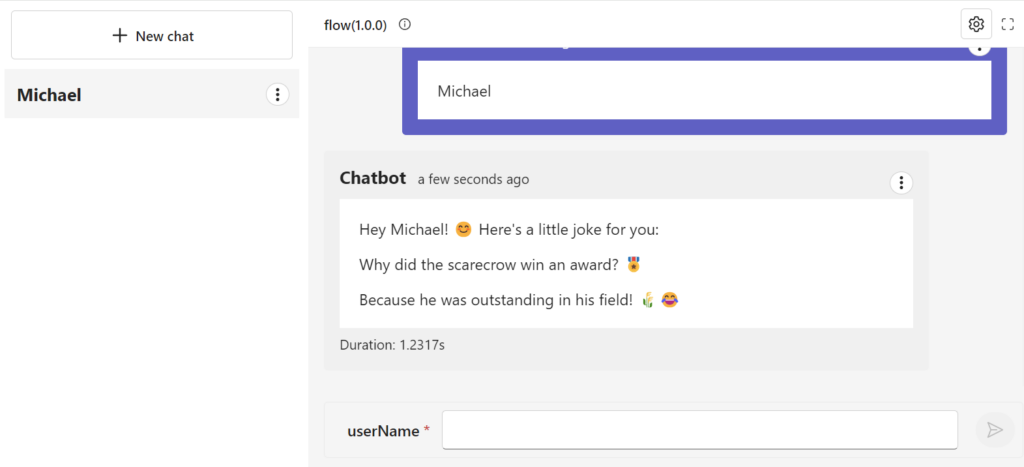
Perfect, my AI solution works as expected. But there is even more behind the scenes in my Docker container. Correctly, there is an API in my container.
With my current container configuration (EnvironmentCredential‘s) I can discover this API locally without Authentication. This means, I can get the full API as swagger.json with this call:
### Get Open API information
GET http://localhost:8080/swagger.json
In addition, I can also invoke my AI solution within the /score route and my input parameters:
### Execute my Prompty
POST http://localhost:8080/score
Content-Type: application/json

{
    "userName": "John Doe"
}
Moreover, I can use the /feedback route to provide feedback with key-value pairs that is passed to my AI solution telemetry:
### Send Feddback
POST http://localhost:8080/feedback
Content-Type: application/json

{
  "exampleKey": "exampleValue",
  "anotherKey": "anotherValue"
}
Finally, there is the /health route which I can use later when I deploy my container to Kubernetes:
### Health Check
GET http://localhost:8080/health
What should I say … successfully tested!
Summary
Prompty is a fast and simple method for building AI solutions. For instance, you can do this locally with your VS Code. Furthermore, it integrates perfectly with common AI frameworks such as Prompt Flow. I have demonstrated this in my example where I created a Prompt Flow that utilizes my Promptly file.
Prompt Flow also addresses one of the next challenges for me – deployment. This is because Prompt Flow provides commands to generate a deployment as a Docker container directly from my Prompt flow files. You have seen this in my example, as I have created the distribution including the Dockerfile, my Prompt Flow, my Prompty file, and the defined Python requirements in requirements.txt.
Furthermore, I have shown you how I utilized an Application Registration in Entra ID. I did this to configure the authentication of my AI solution in my local Docker container using provided environment variables. Finally, I started my container, which includes my Promptly AI solution, and tested it successfully with my browser and from VS Code using REST Client HTTP calls.
Prompty successfully containerized!