Application Lifecycle Management for PowerApps: Tools
Manual work vs. automation? I am definitely someone who automates as much as possible! For this reason I am always looking for Cmdlet’s or suitable APIs. Most important for me is that I can use these tools and scripts for build automation and application lifecycle management.
In Dataverse, my manual work is importing and exporting solutions when I transport my canvas apps between my DEV, TEST, and PROD environments. In addition, I want to store the source code of my solution in my Git repository to track the changes. For this, I must unpack my solution as well as the components it contains.
To automate all these tasks, I need to introduce some useful tools to you.
Power Platform CLI
The most important tool for all these tasks related to Dataverse is Microsoft’s Power Platform CLI. It’s amazing and provide currently everything, what I need to work with solutions and canvas apps.

Let’s look at the whole workflow. My first manual tasks are exporting and extracting my Dataverse solution. For this I use the Power Platform CLI to:
- Export my solution from Dataverse
- Unpack my downloaded solution zip-file
- Unpack all included msapp-files into canvas app source code
For my opposite tasks, packing and importing my solution into a Dataverse environment, I must do this:
- Pack my canvas apps source code into msapp-files
- Pack my solution files into a managed or unmanaged solution zip-file
- Import my solution zip-file in my Dataverse environment
OK that’s clear. In addition, I prefer to use the pure Power Platform CLI commands, because I also use these commands in my build automation and Azure DevOps pipelines. So what are the first steps with the Power Platform CLI?
Download, Install and Update the Power Platform CLI
To get the standalone Power Platform CLI, I use this download link: https://aka.ms/PowerAppsCLI. Another option is the available NuGet package. The link is: https://www.nuget.org/packages/Microsoft.PowerApps.CLI/.
Once the Power Platform CLI is installed, I can update by using this command:
pac install latestSometimes, it’s useful to stay on a specified version. Then, I use for this:
pac install 1.10.4
pac use 1.10.4
Authenticate & Select Environment
Before I can download any solutions, I must login to my Dataverse environment. Therefore, I need to my organization URL for the following command:
pac auth create --url https://org4xxxxxxx.api.crm4.dynamics.com --name DEVI get my organization URL from Power Platform Developer resources:

Here I find either my organisation ID and my Web API URL:

Additionally, I can add other Dataverse environments by using the same command. I do this normally for all my Dataverse environments (DEV, TEST, PROD).
To switch between my environment I use this command with the previously used environment name:
pac auth select --name "DEV"Export Solution
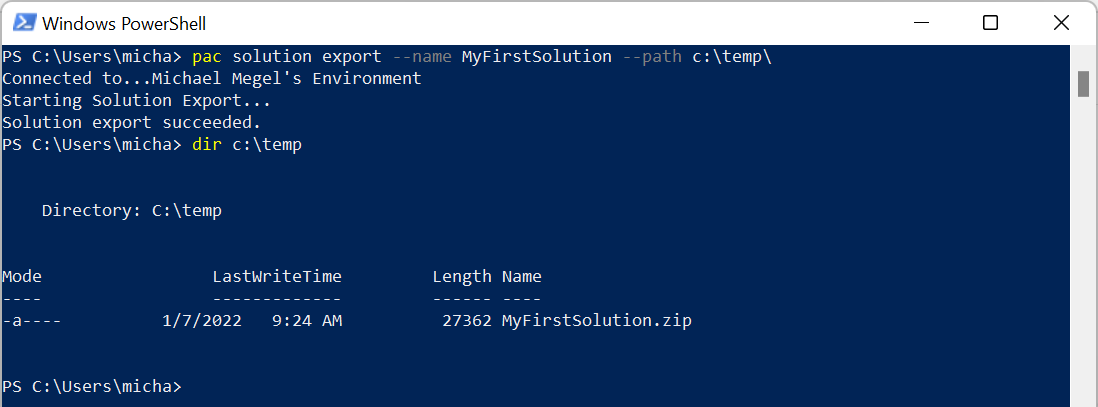
Initially, I authenticated and selected my DEV environment. Now I want to export my solution “MyFirstSolution” (solution name is needed) to my local folder “C:\Temp”. The command is:
pac solution export --name MyFirstSolution --path c:\temp\The result is my downloaded solution zip-file, because my solution in my DEV environment is an unmanaged solution.
Unpack Solution
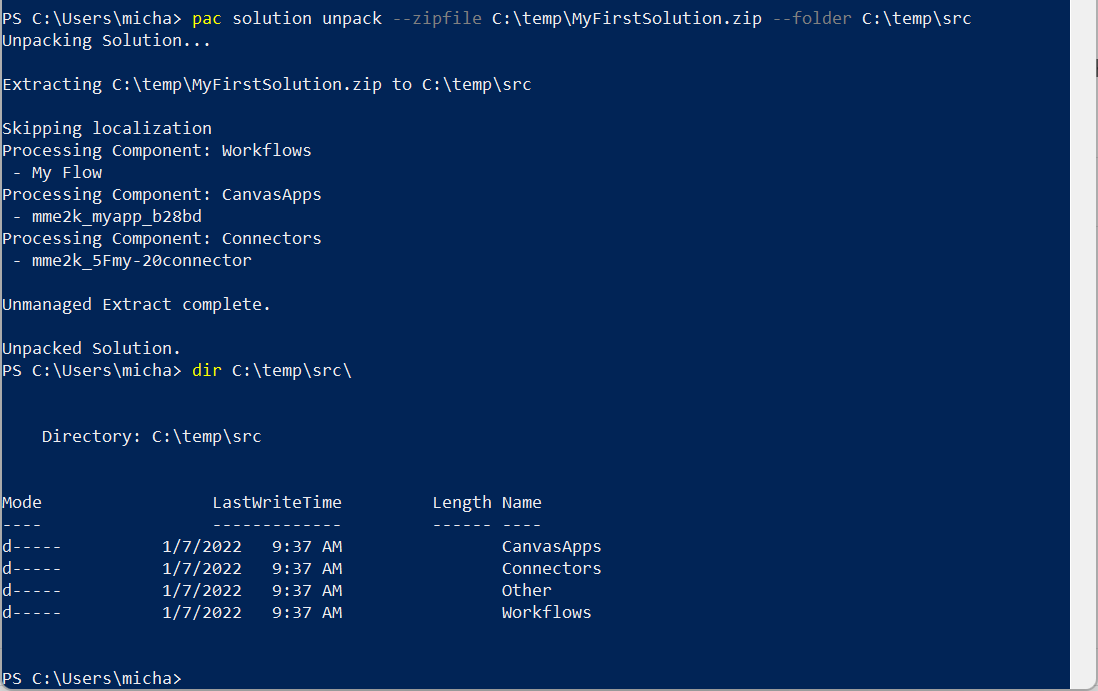
Well, I could unpack the zip-file by using Expand-Archive, but this wouldn’t provide the right folder structure. Because, the Power Platform CLI contains the functionality of the Solution Packager Tool. Therefore, i use the Power Platform CLI:
pac solution unpack --zipfile C:\temp\MyFirstSolution.zip --folder C:\temp\srcAs you can see, my solution is now extracted into multiple folders and files:
Upack Canvas Apps
A deeper look into my result in VS Code shows me, not everything of my solution is unpacked. All my canvas apps are still present as msapp-files:
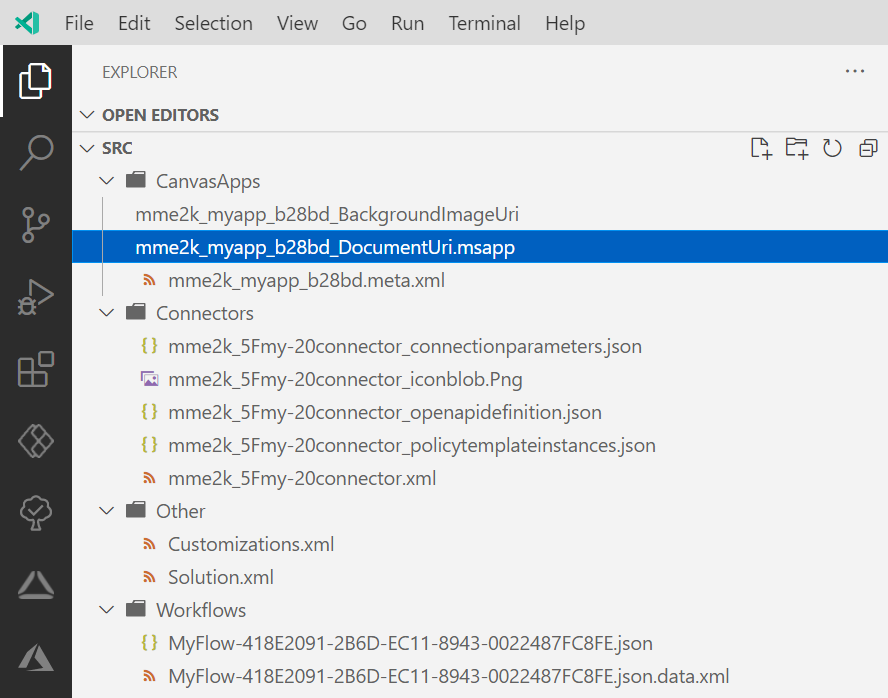
Good news, the Power Platform CLI includes also the functionality of the PowerApps-Language-Tooling. In conclusion, I can also use the CLI to unpack my canvas app file(s) by using this command:
pac canvas unpack --msapp C:\temp\src\CanvasApps\mme2k_myapp_b28bd_DocumentUri.msapp --sources C:\temp\src\CanvasApps\mme2k_myapp_b28bd_DocumentUri
To keep the folder structure, I use the msapp-file name as target directory for the canvas app sources. Additionally, I remove the msapp-files afterwards, because I will not store this binary in my Git repository.
Store the Source Code
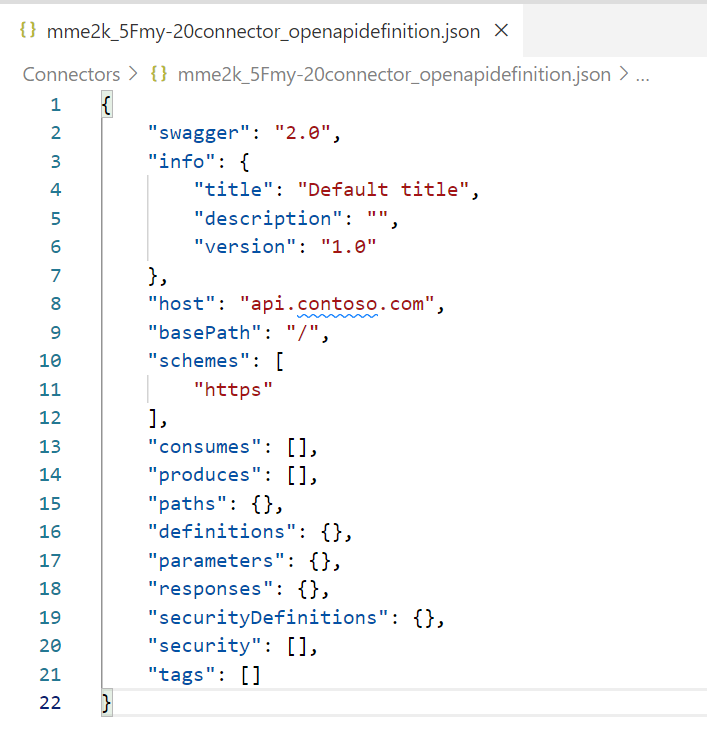
Before I can add all files to my Git repository, I have to fix something. Some of my Json-files are minimized. This isn’t an issue, but make it hard to track changes between multiple Git commits. Therefore it is useful to re-format / pretty print the Json-files from a former minimized Json-file version:

… into a multiline Json-file:
Finally I can stage all my solution source files and commit the changes to my Git-Repository.
Pack Canvas Apps
Now it’s time to do everything in the opposite direction. In detail, I want to show you the way from my extracted source code in my Git Repository to my Dataverse Solution zip-file.
First I need to re-pack all my canvas apps into msapp-files. This means, all folders underneath “CanvasApps” must be packed. The target file name will be “<Folder-Name>.msapp“.
I use the pac canvas pack command as follows:
pac canvas pack --msapp C:\temp\src\CanvasApps\mme2k_myapp_b28bd_DocumentUri.msapp --sources C:\temp\src\CanvasApps\mme2k_myapp_b28bd_DocumentUri
Later I remove all canvas app source folders from my “CanvasApps” folder. The result structure is now:

Pack Solution
After I have packed all my canvas apps and removed their source folders, I can pack my solution. Now I need a managed solution zip-file, because I want to deploy my solution into my TEST environment. Therefore I use the pac solution pack command with this parameters:
pac solution pack --zipfile C:\temp\MyFirstSolution.zip --folder C:\temp\src --packagetype managedBut, the Power Platform CLI processes my command and shows an error:
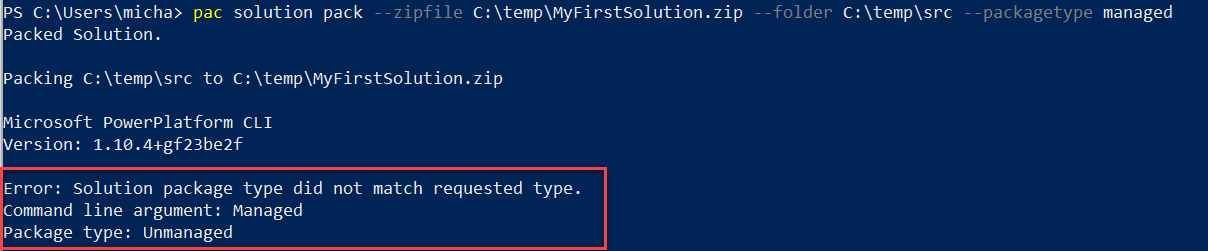
…and this is correct. The error happened, because my solution manifest file “src/Other/Solution.xml” contains this information:
<Managed>0</Managed>I have to fix this and change the value into “1” (managed = true) to get solution manifest for a managed solution:
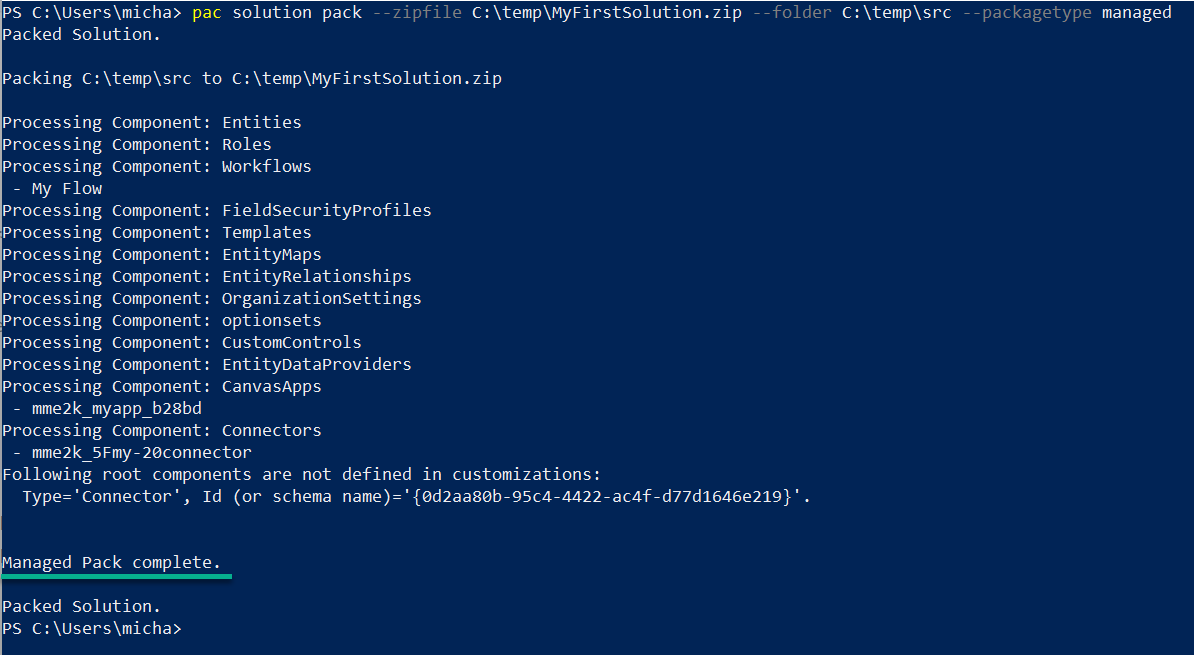
<Managed>1</Managed>Now everything works as expected and I get my solution zip-file from my sources as package type “managed”:
Import Solution
As last step I have to import my managed solution into my TEST environment. For this I select my TEST environment in my Power Platform CLI. Afterwards I use the pac solution import command to import my solution:
pac solution import --path C:\temp\MyFirstSolution.zipPerfect! This worked fine:

In summary, my solution is now imported as a managed solution in my TEST environment. The whole manual workflow with packing and unpacking the source code is done by the Power Platform CLI. In conclusion, I can write PowerShell scripts to optimize my work.
Power Platform VS Code Extension
And again, there is more! Microsoft have created an own Visual Studio Code extension that provide the Power Platform CLI inside of VS Code. The name of this extension in preview is: Power Platform Tools
Right now, the extension install the Power Platform CLI and add new commands to VS Code:
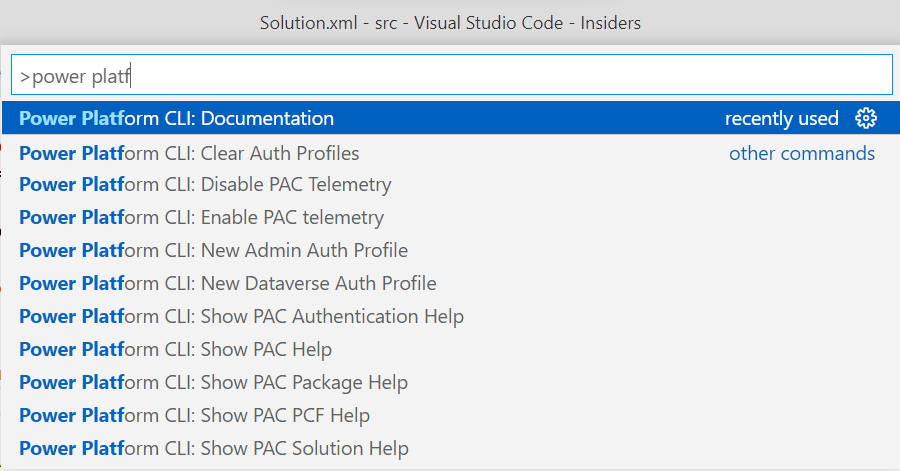
You see, most of these commands show the Power Platform CLI documentation. The biggest benefit is, this extension build is triggered by Microsoft. Therefore, the VS Code extension update mechanism helps to ensure that my local Power Platform CLI is updated frequently.
Therefore, this extension is now a dependency of my own extension – the PowerApps Helper.
Power Apps Helper
The story behind the scenes: In the middle of last year, I discovered there is a way to extract the source code of PowerApps. But there is a little bit more. Because, I want to pack and upload the source code… [read more]
To cut a long story short, I have built my own VSCode extension and called it PowerApps Helper. This extension supports now my manual application lifecycle management workflow in VS Code. It’s available at visual studio marketplace as well as on Github as Open Source.
You may wonder what is the benefit of PowerApps Helper.
PowerApps Helper Commands
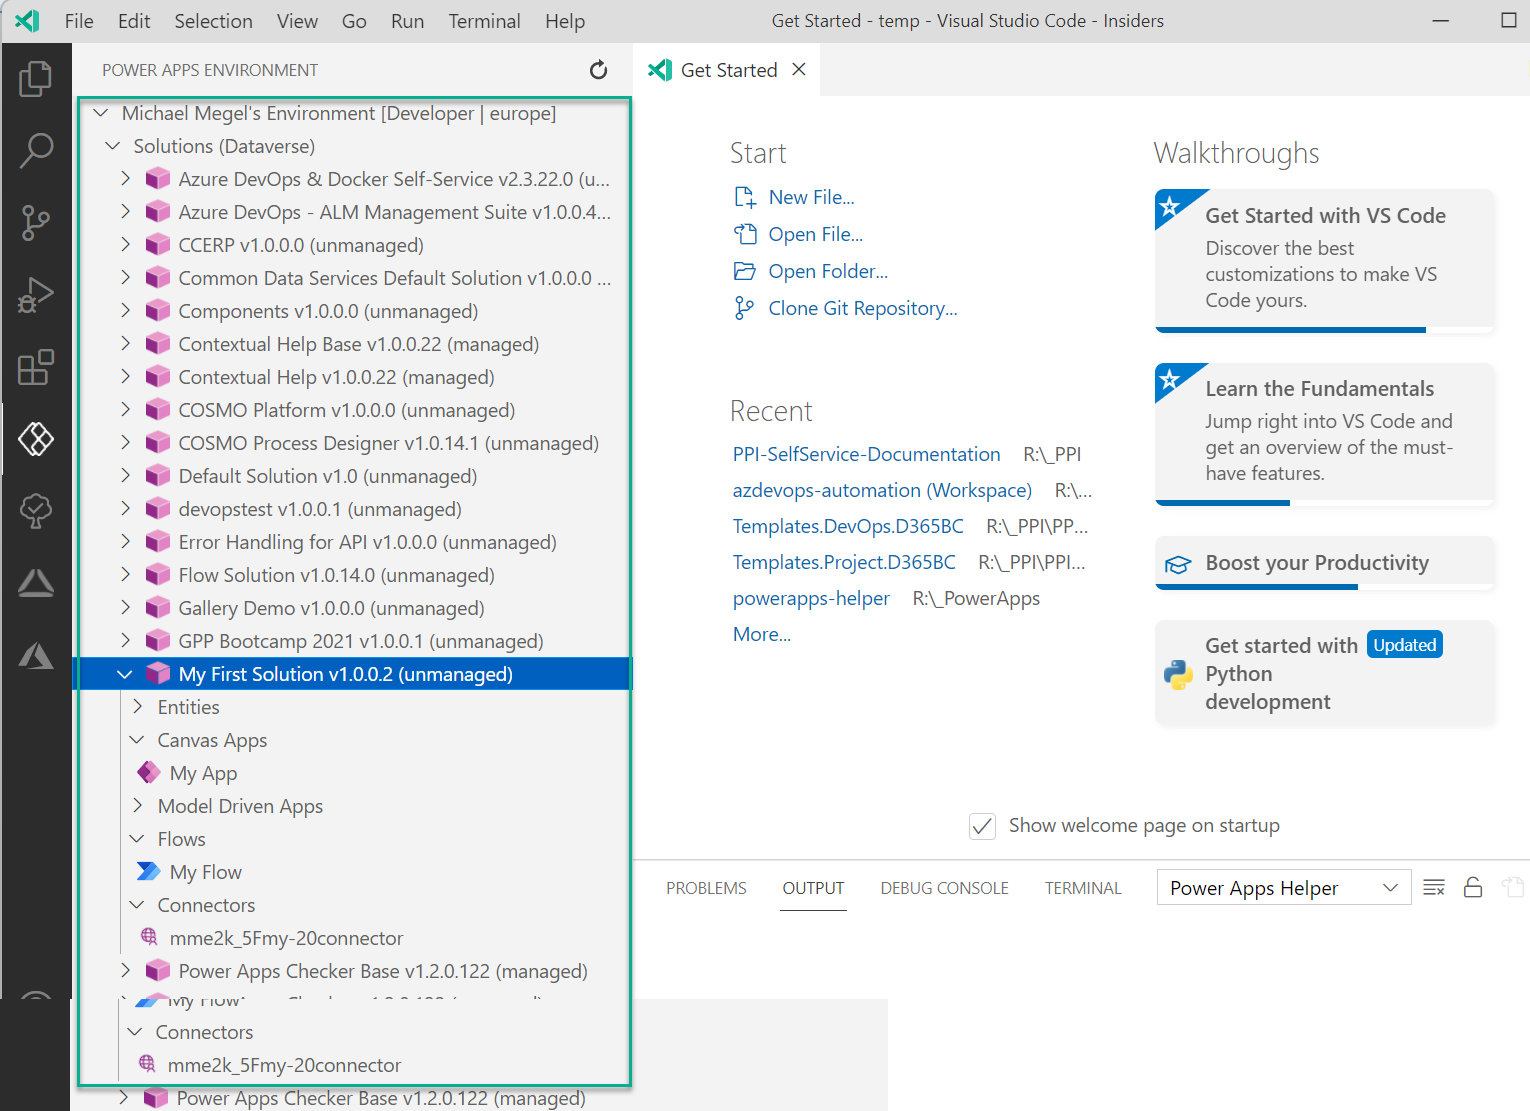
Firstly, I have added a tree view to visualise all my Dataverse environments. The tree shows interesting components like Solutions, Canvas Apps, … from different APIs. In addition, this environment and component tree offers some interesting information within tooltips of the respective nodes. I’m now able to explore my Dataverse environments and it’s components:
This is a perfect starting point, when I want to export one of my solutions. Furthermore, I have added commands to optimize my personal workflows:
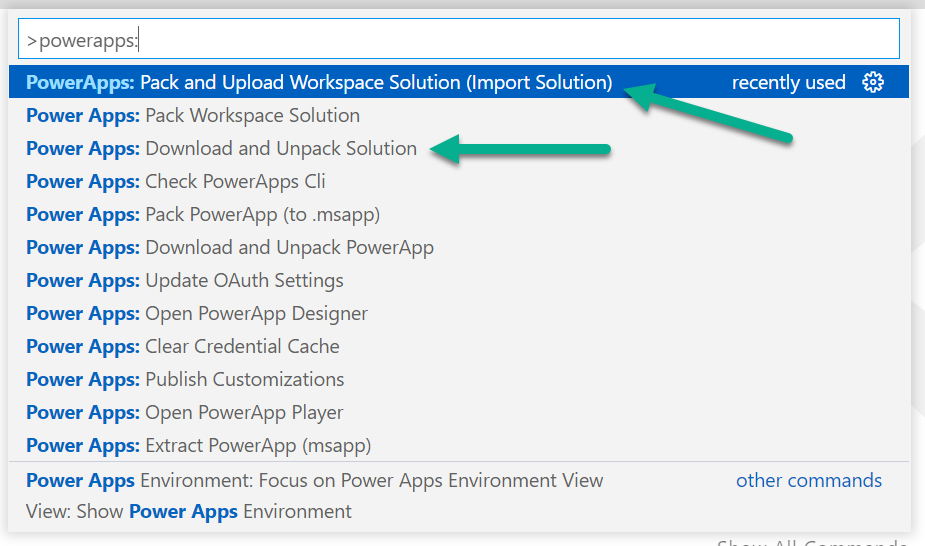
As example, I want to highlight the following commands:
- “Download and Unpack Solution” export my solution in combination of unpacking the included canvas apps and cleaning the folder structure from msapp-files
- “Pack and Upload Workspace Solution” import my workspace solution together with packing all the canvas apps in my solution directory
These two commands are a combination of export and unpack as well as pack and import for a Dataverse solution and its included canvas apps. All the tasks, which I have performed previously with the Power Platform CLI to transport my solution from DEV to TEST.
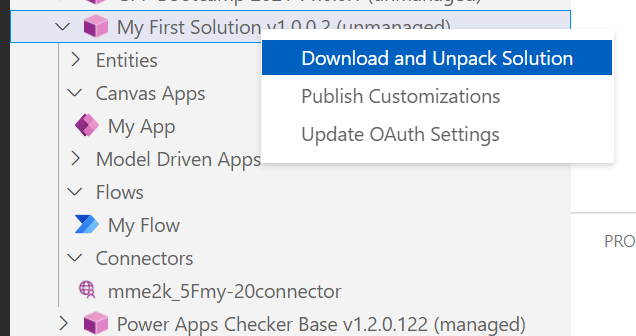
You can invoke these commands direct from VS Code. Another option is to run the command direct by selecting a solution at the tree:
The result of “Download and Unpack Solution” is the fully unpacked solution in my current VS Code workspace folder:

On the other hand, the “Pack and Upload Workspace Solution” command collect all needed parameters to process the import in another environment. Also, with PowerApps Helper, I can specify whether I want to upload a managed or unmanaged solution for new environments, and I can assign a specific solution version when importing.
All this saves me a lot of time. My manual interactions for all the cumbersome tasks are now reduced to a minimum when I run a manual solution transport by using export and import.
Summary
The Power Platform CLI is one tool that provides all necessary commands to start with application lifecycle management. In detail, the CLI helps my to export, unpack, pack, and import my solutions. Furthermore I can unpack and pack also my canvas apps included in my solution. This allows me to store the palin solution source code in my Git repository.
A good way to stay up to date with the latest Power Platform CLI version is to use the Power Platform Tools extension for Visual Studio Code. This extension provide also commands which points you in the right direction by showing the CLI documentation.
Last but not least, there is always room for ideas to improve the Power Platform tooling. I did this by creating my own visual studio code extension (PowerApps Helper). This helps me to shape my personal workflow, when I work with the source code of solutions and canvas apps.
In conclusion Power Platform CLI as well as PowerApps Helper together improve my manual application lifecycle process a lot.