
Adding a Data Source to Azure OpenAI
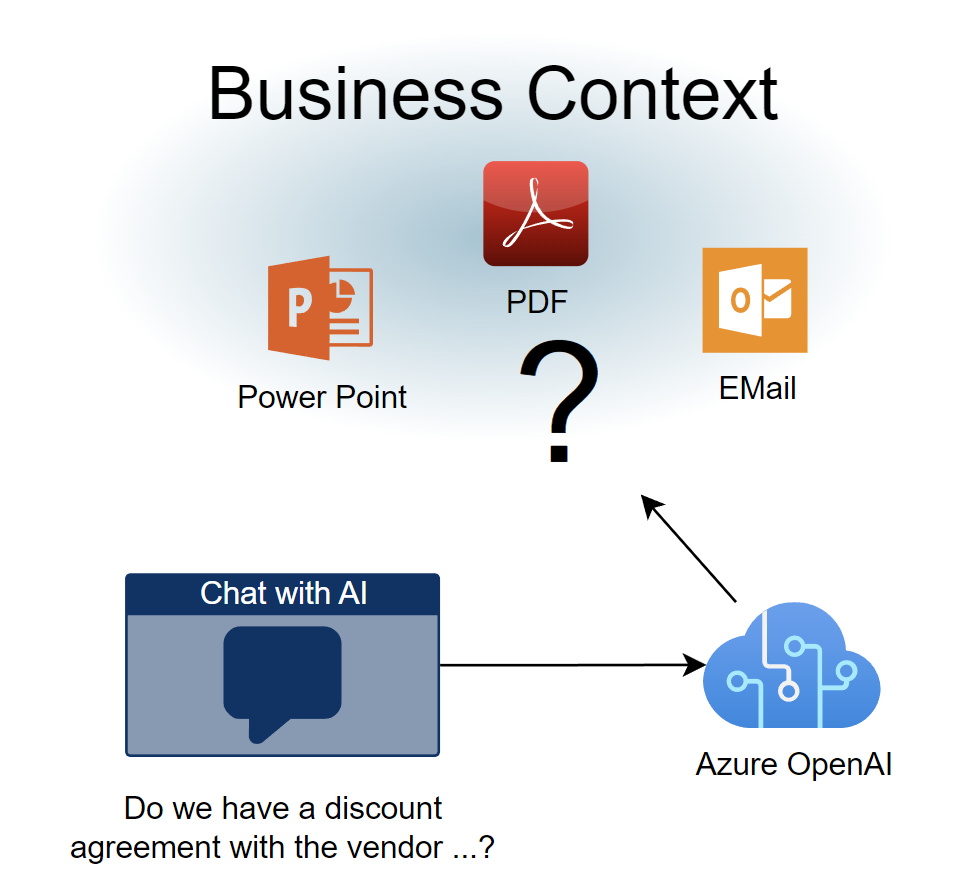
Today I’m going to introduce you to a new feature of Azure OpenAI. I will explain how you can give more business context to your AI chat solution. Let’s say I can ask Azure OpenAI, “Do we have a discount agreement with the vendor XYZ?” and my AI gives me the right answer based on my contracts stored as files. Right, I will show you how easy I configure a Data Source for my Azure OpenAI. As result my AI understands my question and gives me an answer based on my existing documents.
In other words, we are talking about AI based decision-making processes. But as mentioned, I must bring this business information first to Azure OpenAI model. My options are I can train my own Large Language Model (LLM) which might be expensive, or I can add a data sources.
I will focus on the new feature, I will integrate a data source into Azure OpenAI. But the best is, I can do this configuration directly in Azure AI Studio, where I deploy my web application.
Note: The basics of Azure OpenAI are explained in previous blog post: Using Azure OpenAI in Business
Azure Cognitive Search
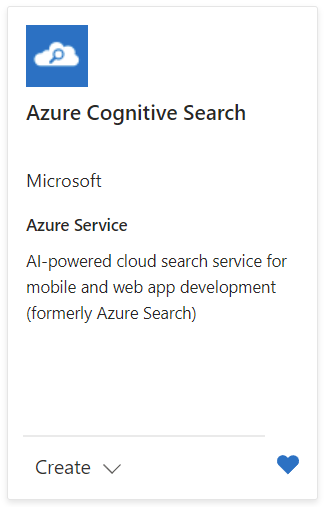
First, I give you a brief introduction to the used technology: Azure Cognitive Search. Azure Cognitive Search is a powerful cloud-based service provided by Microsoft. Furthermore, this service helps me to add intelligent search capabilities to my chatbot application. In detail, Azure Cognitive Search uses artificial intelligence algorithms to analyze and understand the content of my data. This makes it easy for my users to search and discover relevant information. Sounds good, but what do I need to do first?
Yes, I navigate to the Microsoft marketplace and search for “Azure Cognitive Search”:
Afterwards, I start configuring my new service with a Service name, a Location, and a Pricing tier:
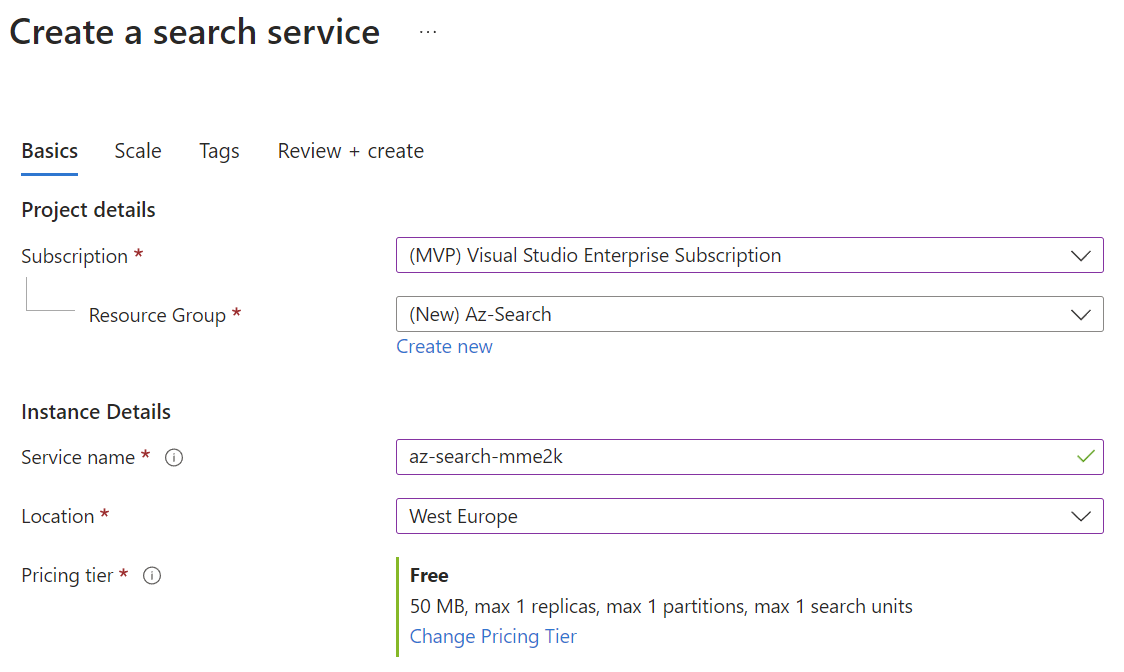
Important: Please keep in mind that you can start small (with the Free tier), but you cannot change the price level. Furthermore, the Free tier is not accepted as data source in Azure OpenAI (you will see this later…).
To be honest, the pricing of the standard tier for a demo is expensive. Especially, when I want to include all the features in my demo. Nevertheless, I recommend that you use at least Basic or Standard tier. This is because the Free tier have a couple of limitations such as file size, number of indexes, etc.:

Note: I first used the Free tier for my blog post, but discovered I must change this for the final demo.
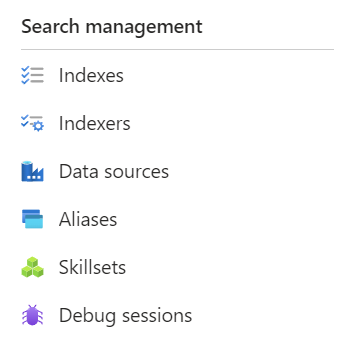
Let’s start and focus on the integration part with Azure OpenAI. After my Azure Search Service was created I navigate to the Search management. Here I can setup a Data sources, Indexes, and Indexers:
Data Source
First, I must add a new Data Source to my Azure Cognitive Search. I can choose one of the integrated data sources:
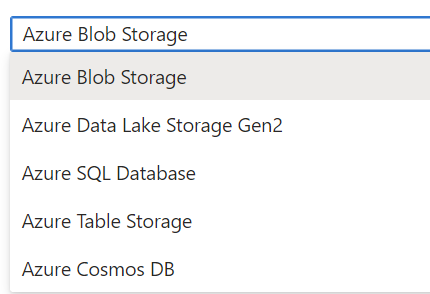
If this is not enough, I can also have a look to the Search data source gallery. Wow, I find also 3rd party integration scenarios for Amazon Aurora, Amazon RDS or Amazon S3 Buckets.
For this example, I will use an Azure Blob Storage. In other words, I’m creating a new storage account in my Azure Subscription. Afterwards, I’m add this account as Data Source to my Azure Cognitive Search. The result is this configuration:
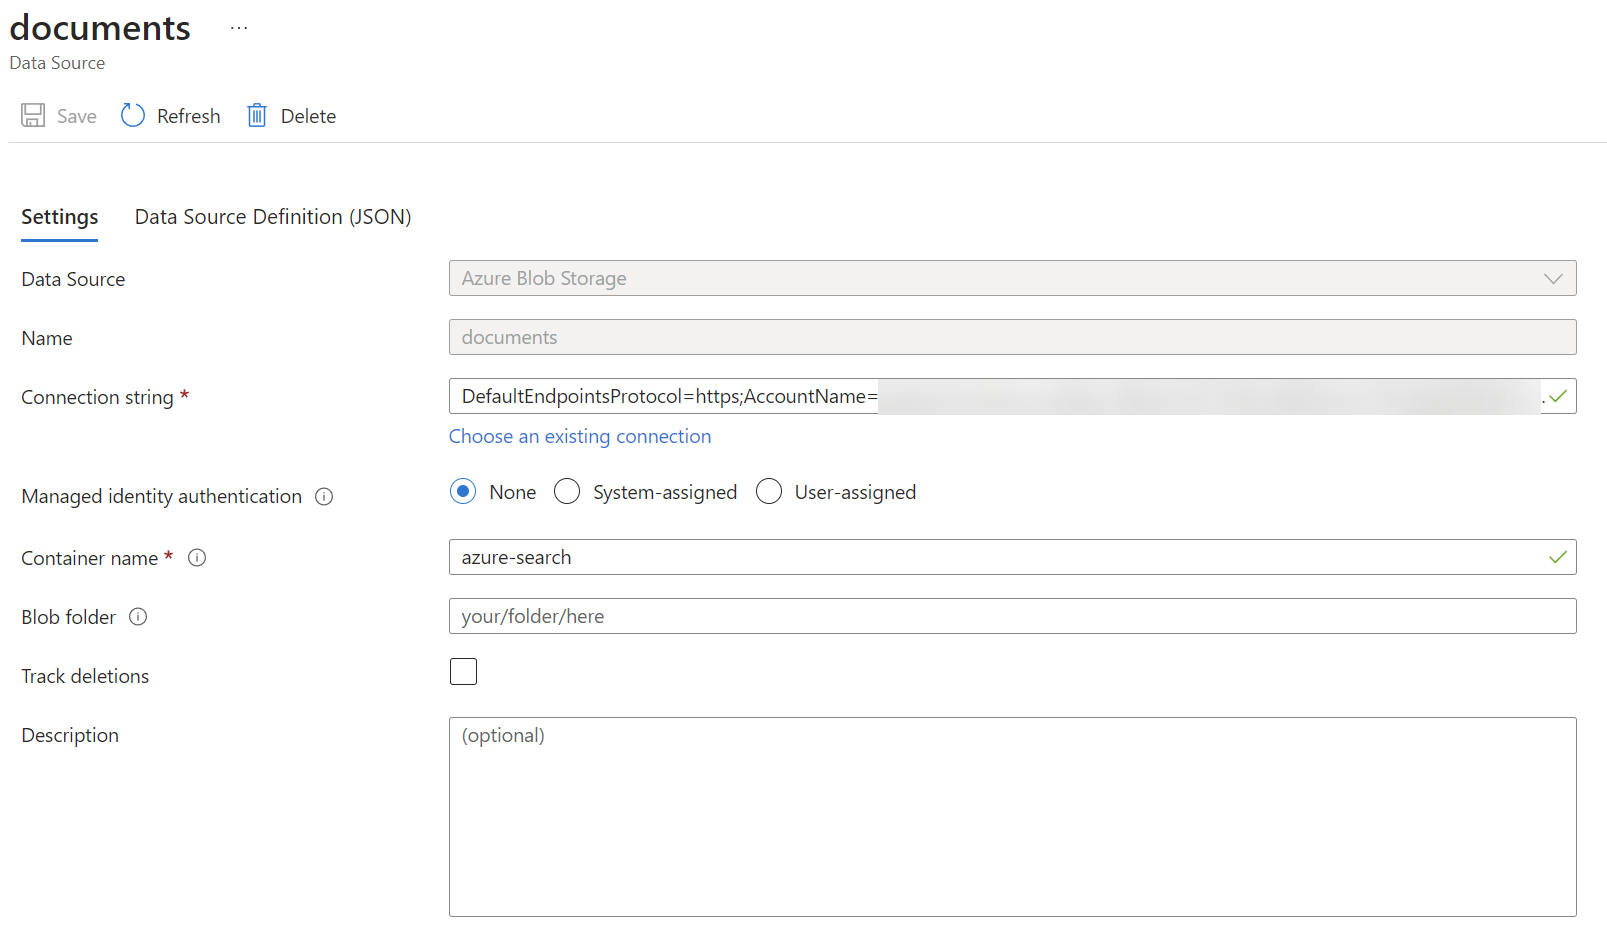
In detail, I have used the name documents. Furthermore, I selected my storage account and entered the Container name azure-search. In addition, I used the Azure Storage Explorer and added some files to my storage account:
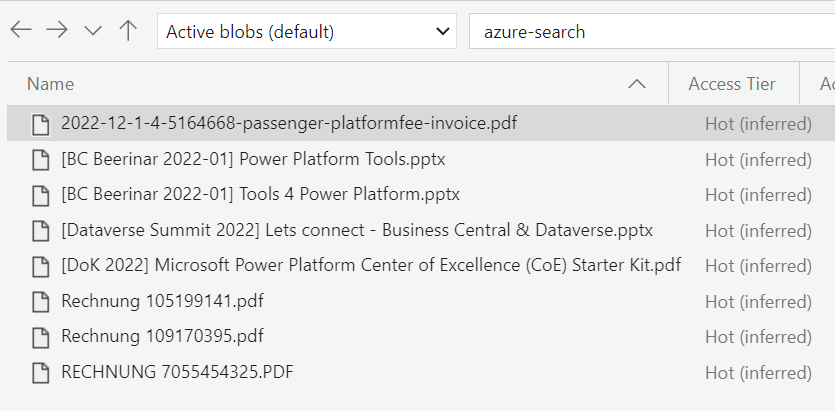
Note: I use for my example some documents from my speeches at conferences (pdf, pptx) and some invoices (pdf).
Well done, my example data source is ready for Azure Cognitive Search.
Search Index
As the next part, I’m setting up my search index. In other words, I specify how information is indexed. Furthermore, I specify the fields of my index:
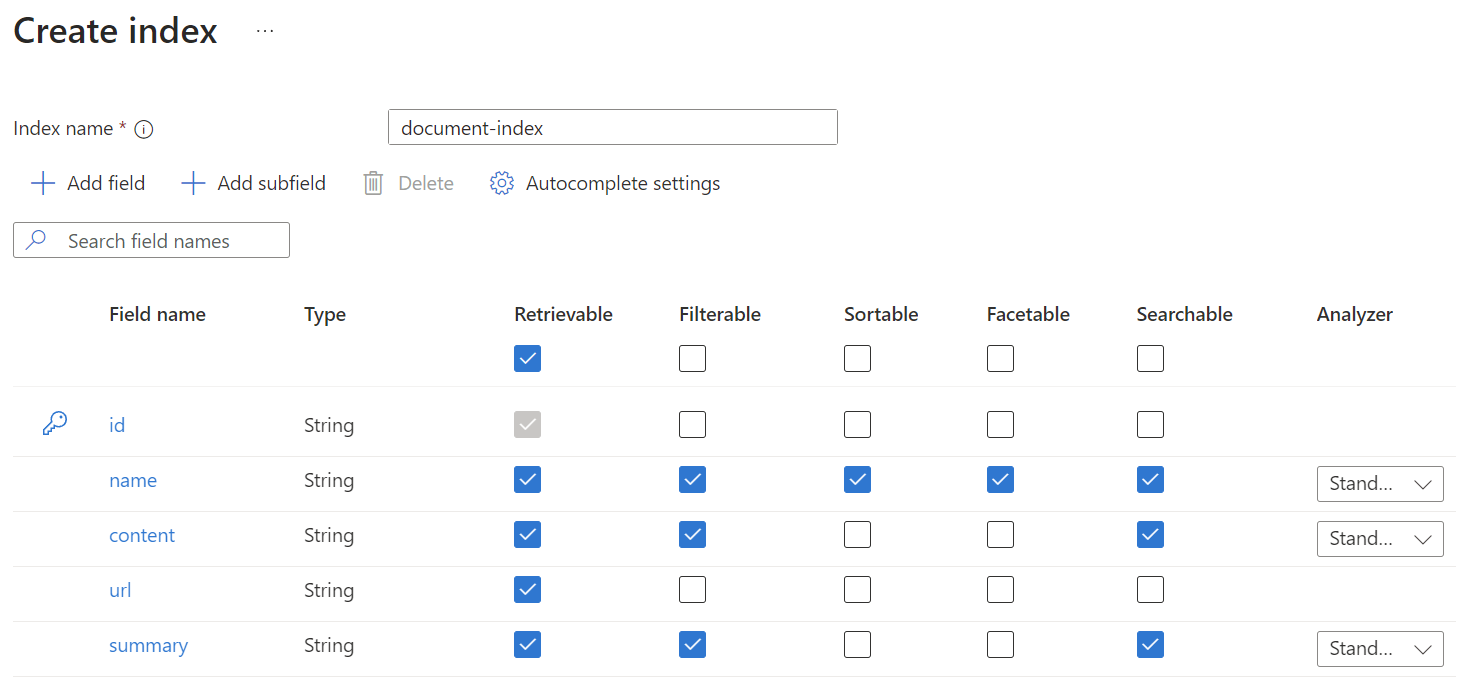
As you see, I have 5 fields. Field id is the key for the indexed file. In addition, fields name, content, and url contains later the information of my indexed files. Finally, I added a field summary, that I fill in my next blog post with a summary of the indexed file.
Indexer
Now I’m ready to create my Indexer in Azure Cognitive Search. An indexer is like a helper in a search service. Its job is to make indexing easier by doing a bunch of tasks automatically. It connects to an outside data source, gets the data, processes it, and sends it to the search engine to be indexed. By using indexers, you don’t have to write as much code, which makes things simpler and easier for you.
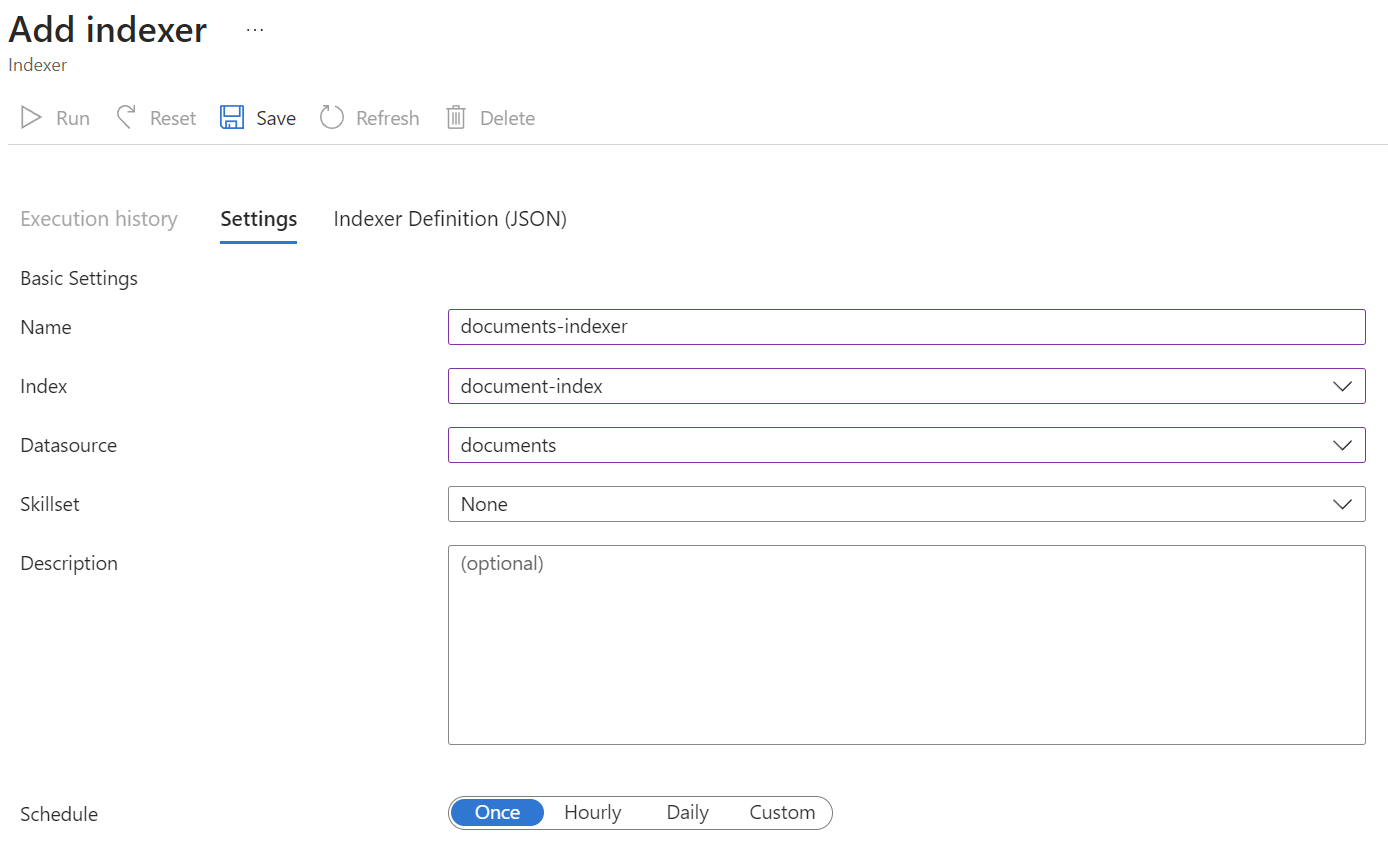
First, I’m adding a new Indexer documents-indexer. Furthermore, I’m selecting my Index document-index as the destination of the indexed data and my Datasource documents. I also selected Once as Schedule option. This is Ok for my demo. Here are my settings:
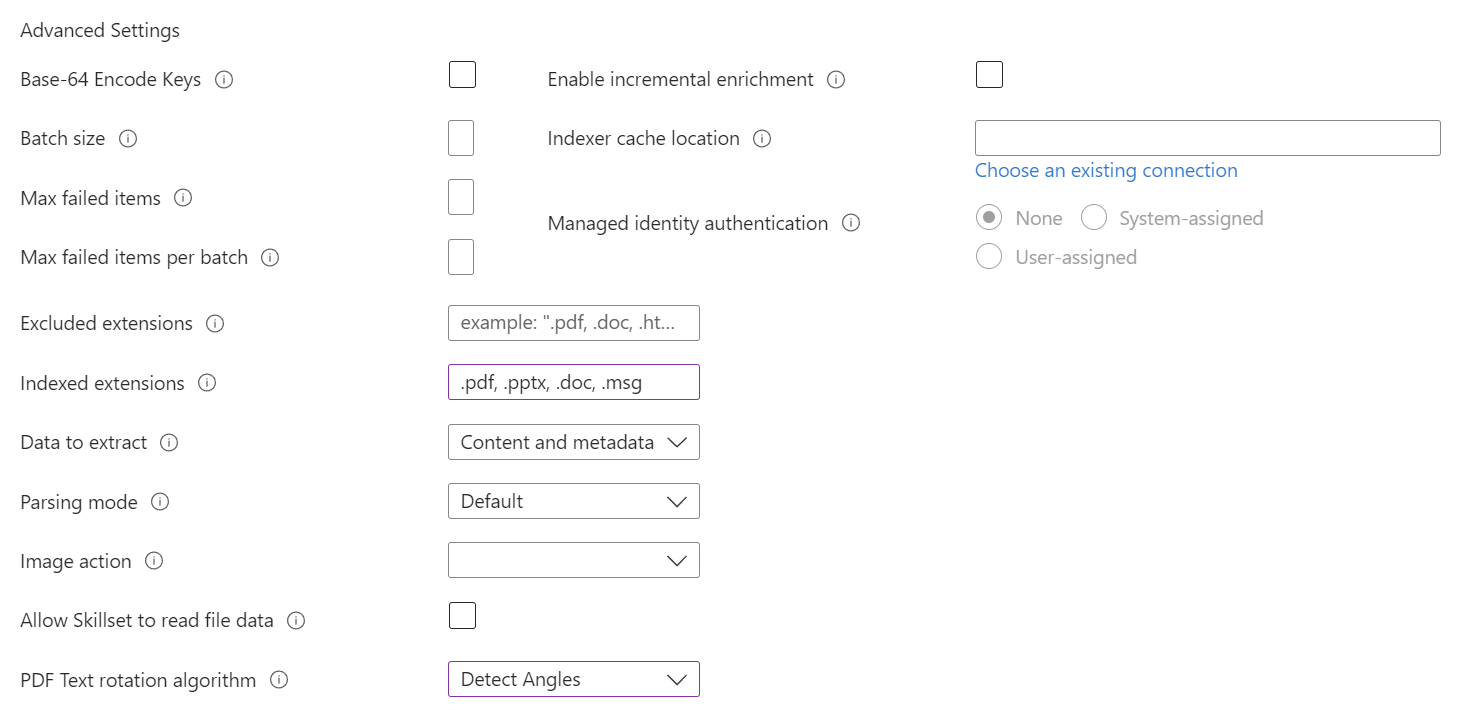
In addition, I’m setting up the Indexed extensions to my preferred document endings (e.g., “pdf”, pptx”, …) in my Advanced settings. I’m also selecting the PDF Text rotation algorithm Detect Angles:
Afterwards, I navigate to Indexer Definition (JSON) to set up my field mapping. This means, I tell the indexer, which source fields the indexer used to fill my index fields:
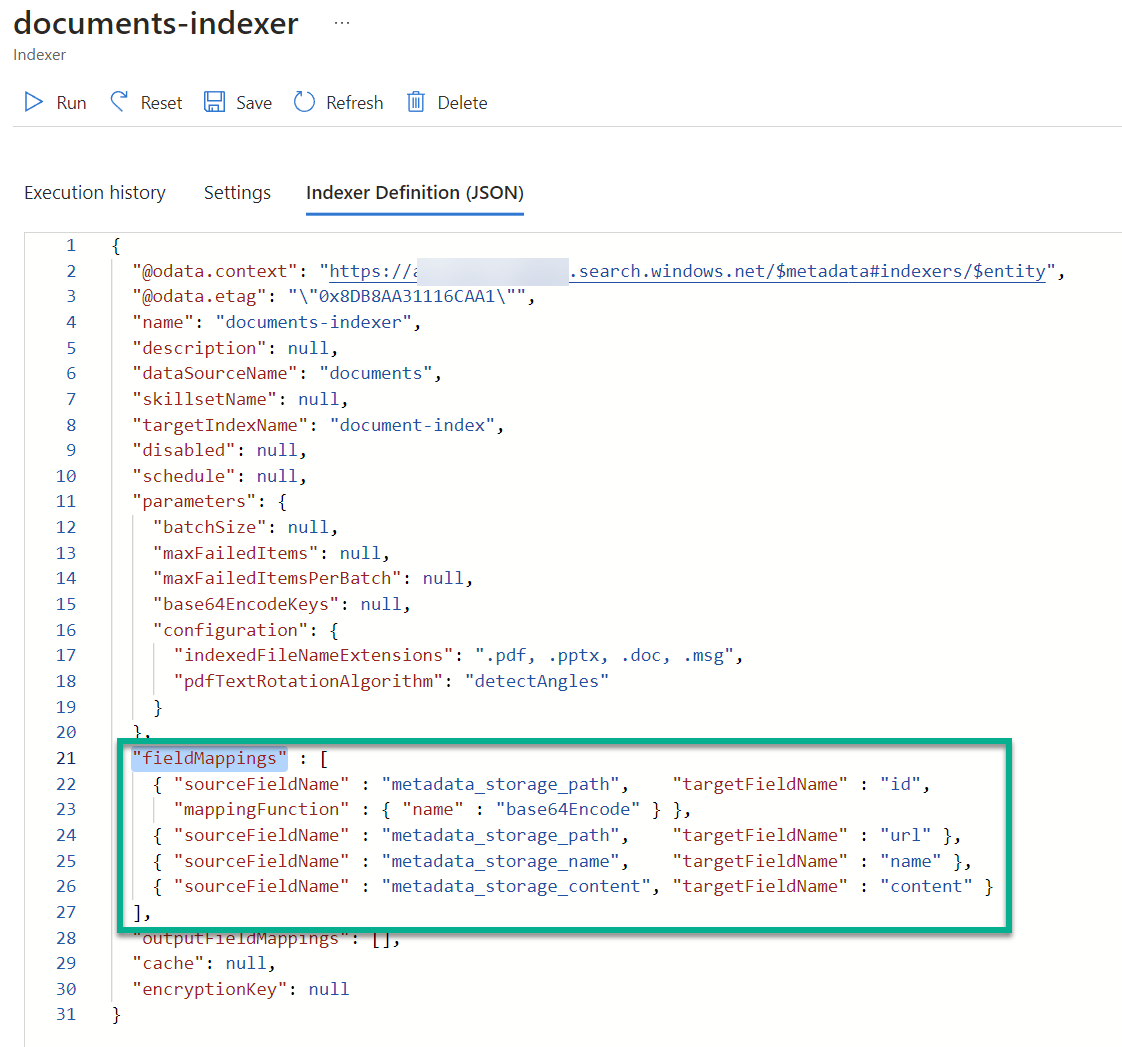
Note: Please read the documentation to find out which source fields are provided by your data source.
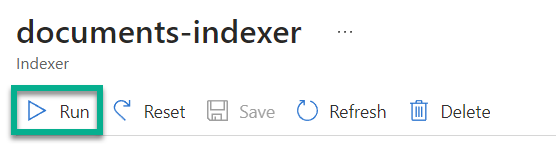
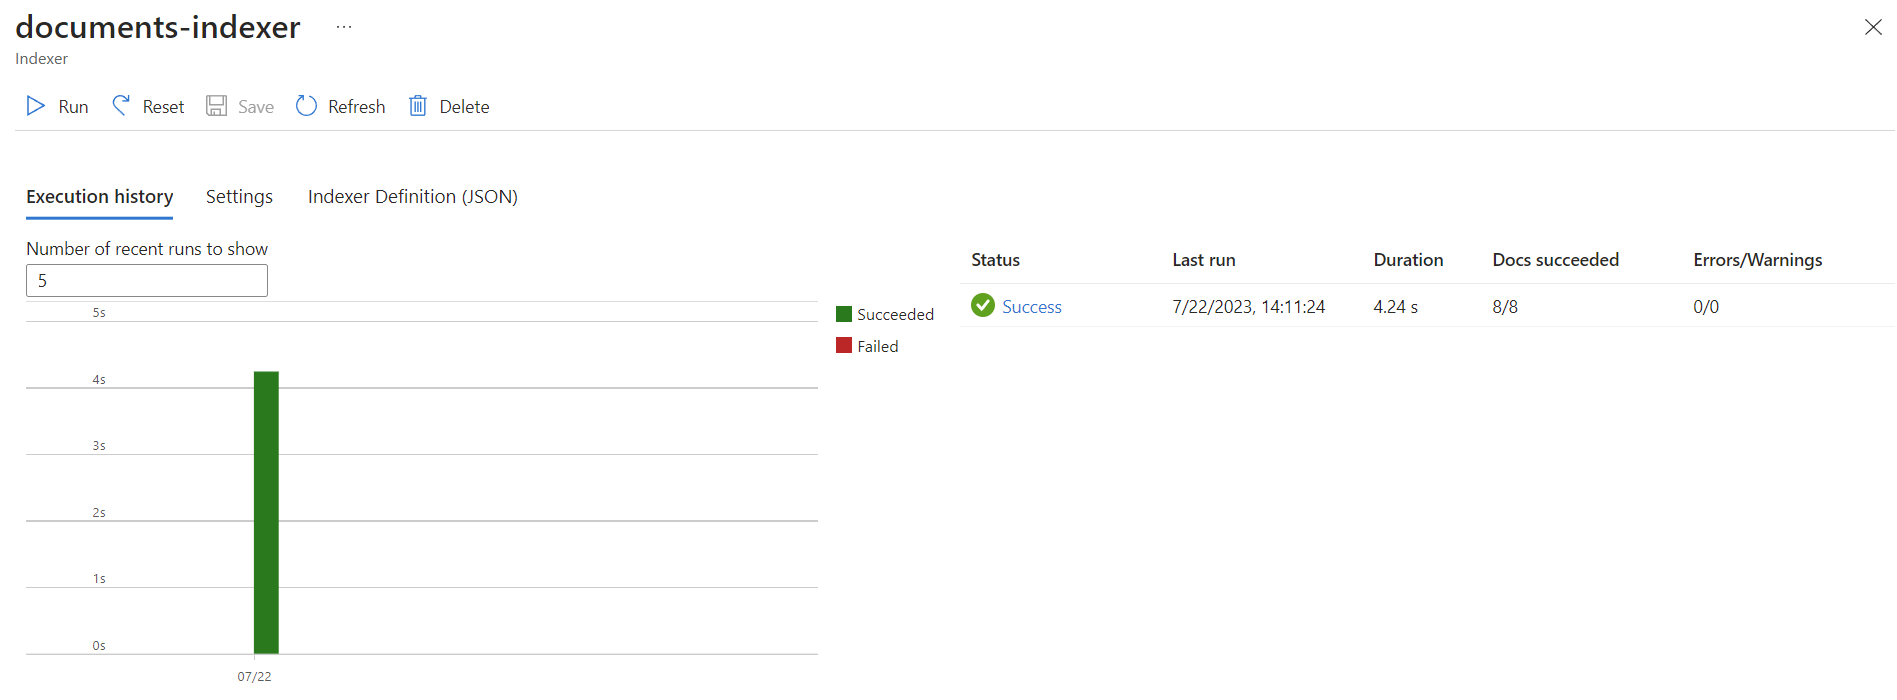
Finally, I’m saving my indexer and start the indexing process:
Now I see from indexer Execution history that 8 of my documents where indexed:
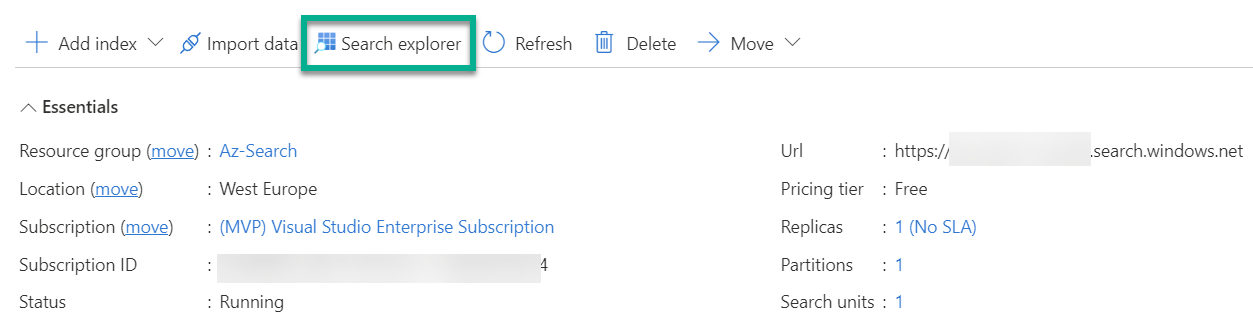
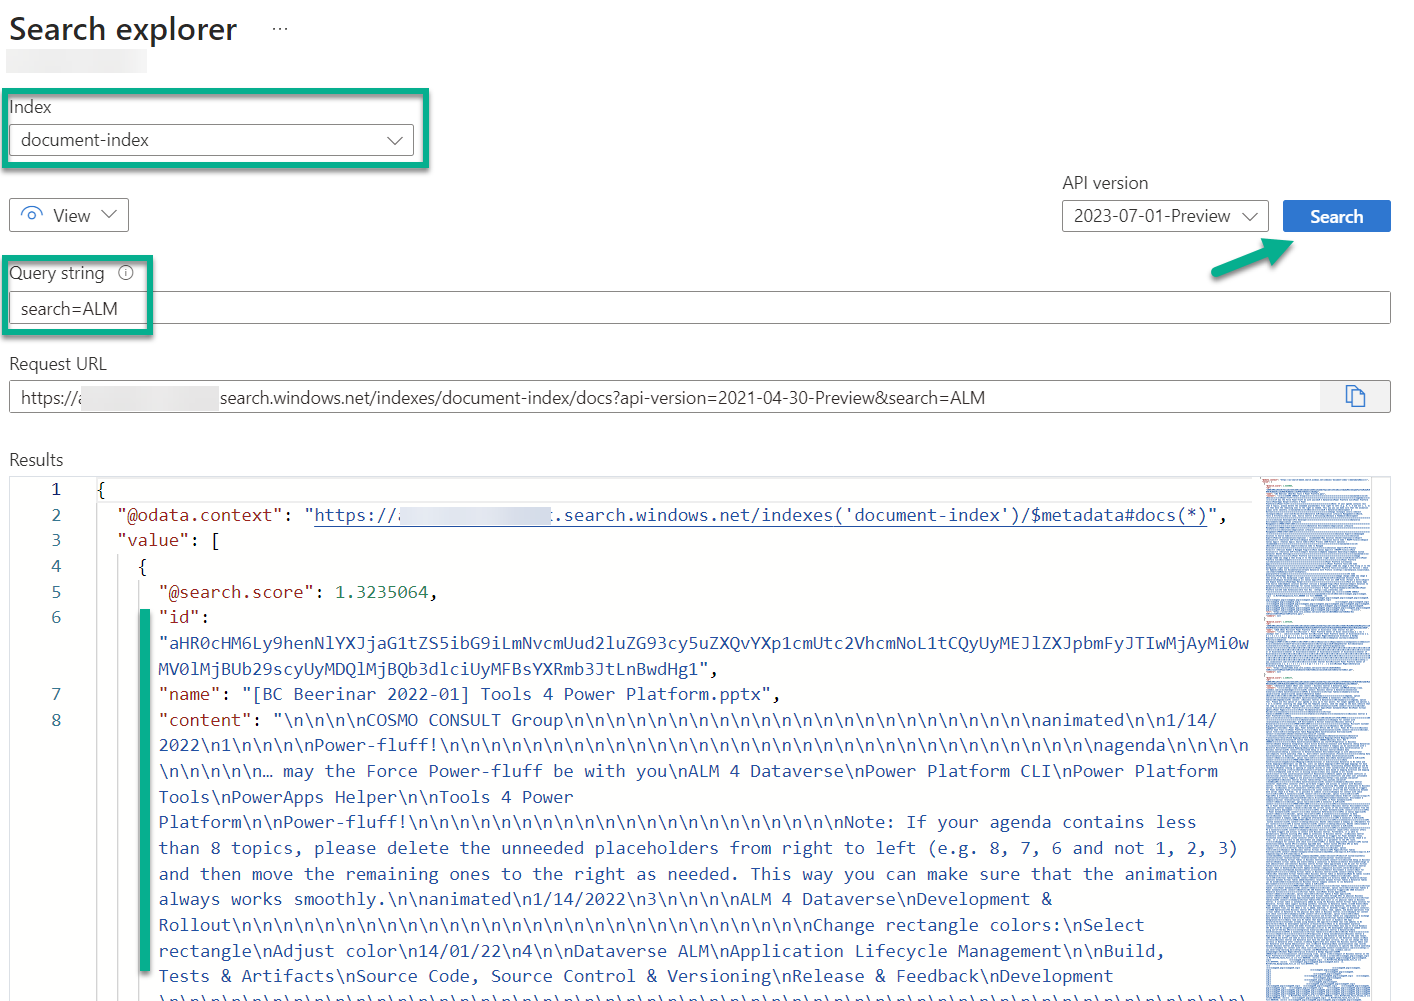
I can also check my filled index by using the Search explorer:
The result of a simple query about my favorite topic ALM is that:
Now it is time to add my Azure Search index as data source to my Azure OpenAI.
Data Source integration in Azure OpenAI
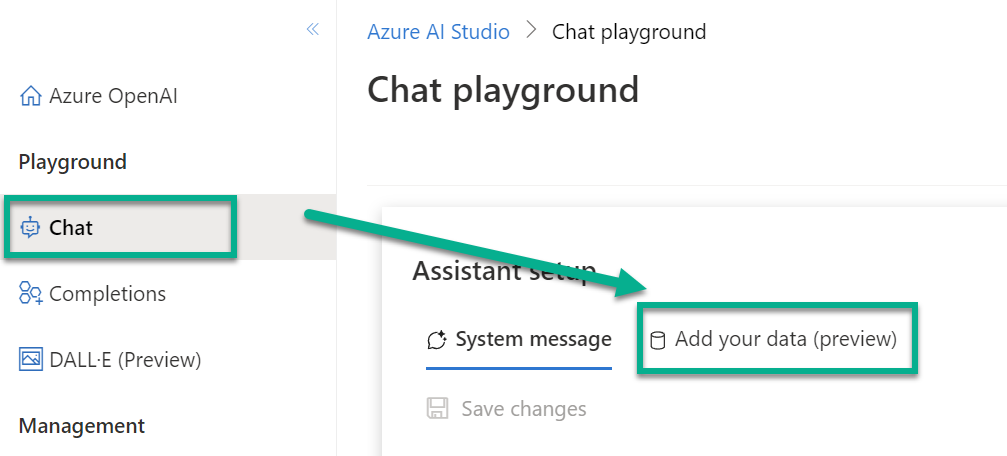
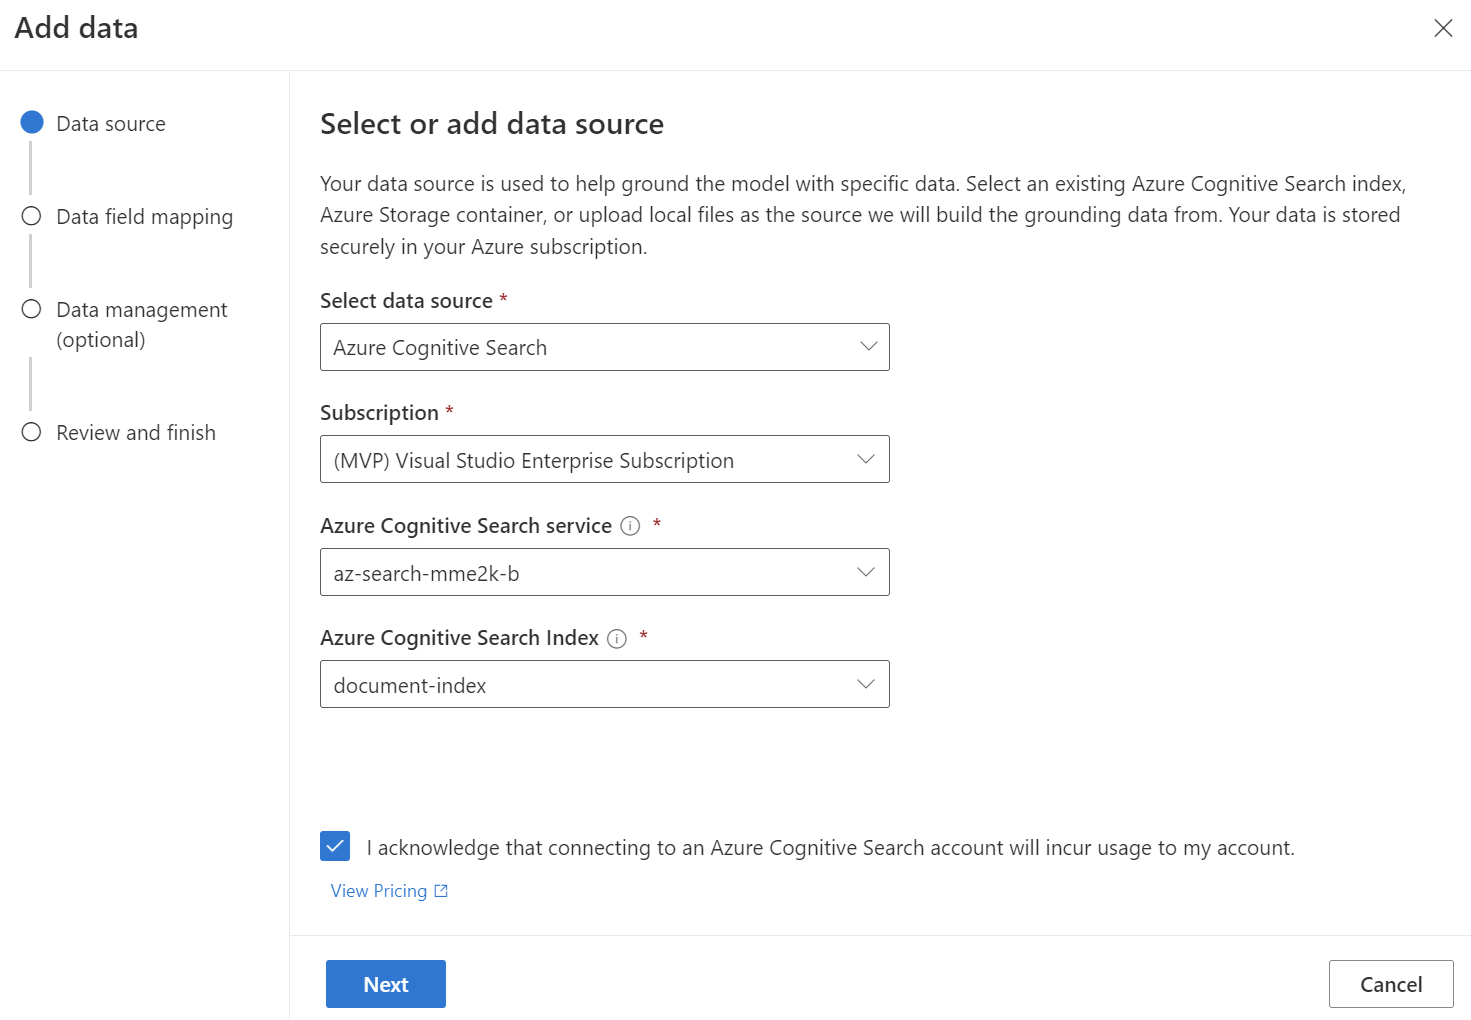
You know, I have already setup an Azure OpenAI resource in my previous blog post “Using Azure OpenAI Chat Completion in Business“. This means, I can navigate directly to my Azure AI Studio and the Playground Chat. Here you see a wonderful new option Add your data (preview):
Note: When you setup Azure Cognitive Search service as Free tier you will see this:
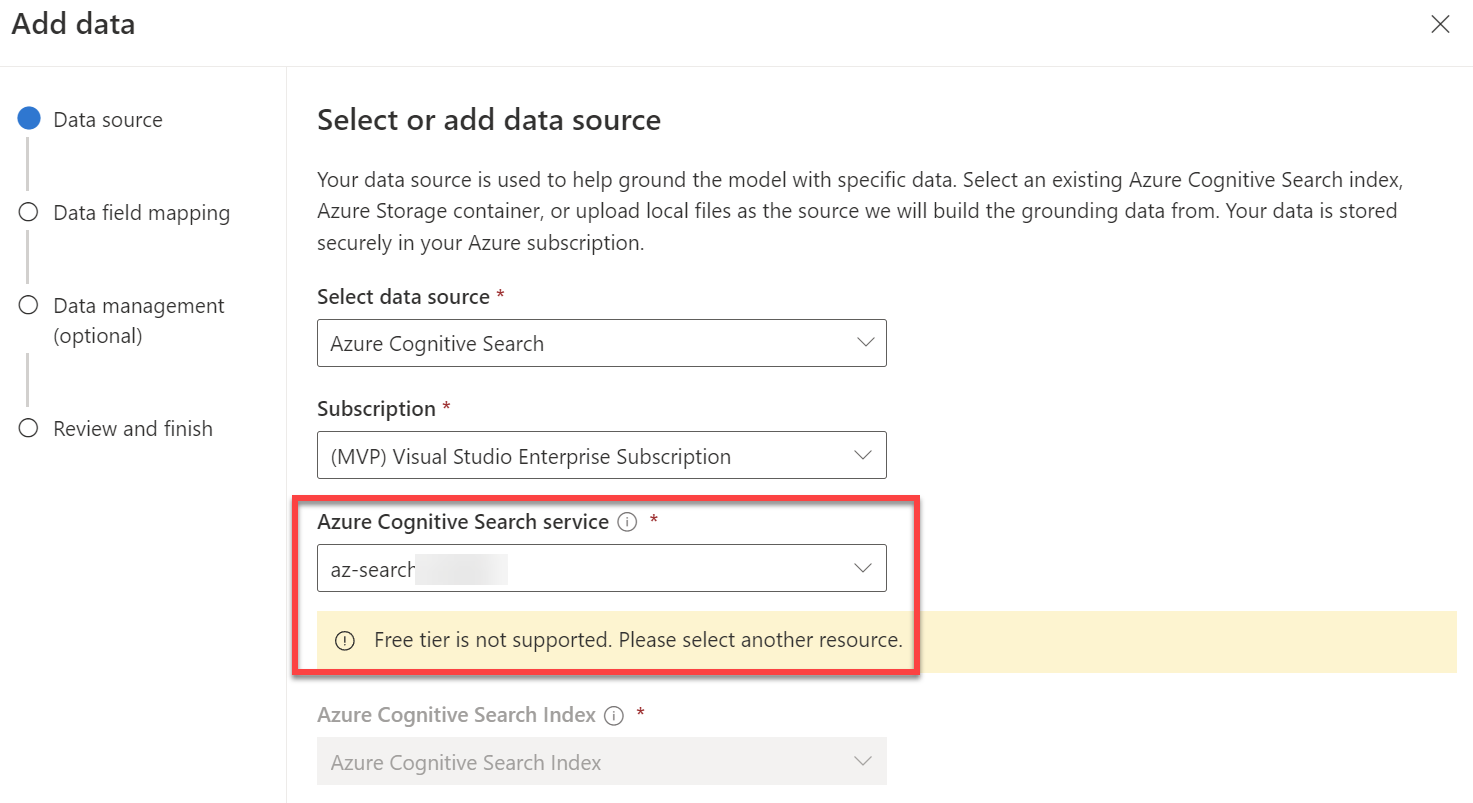
Well, I trapped into that pitfall and recreated my Azure Cognitive Search in Tier Basic. Now the dialog accept my search index and I can continue:
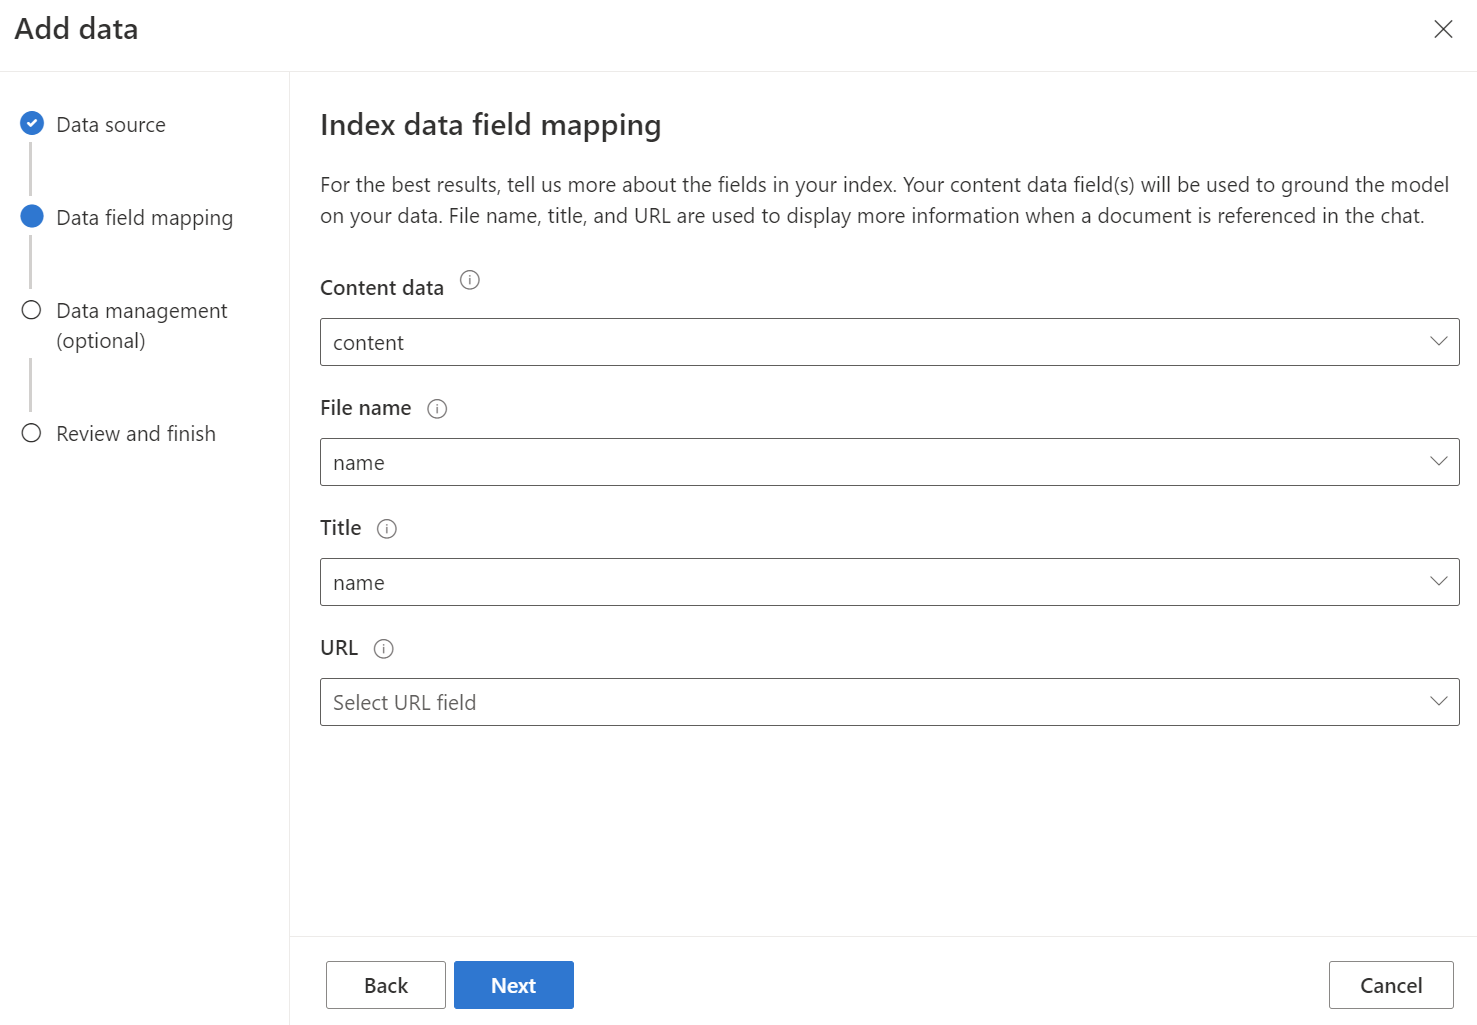
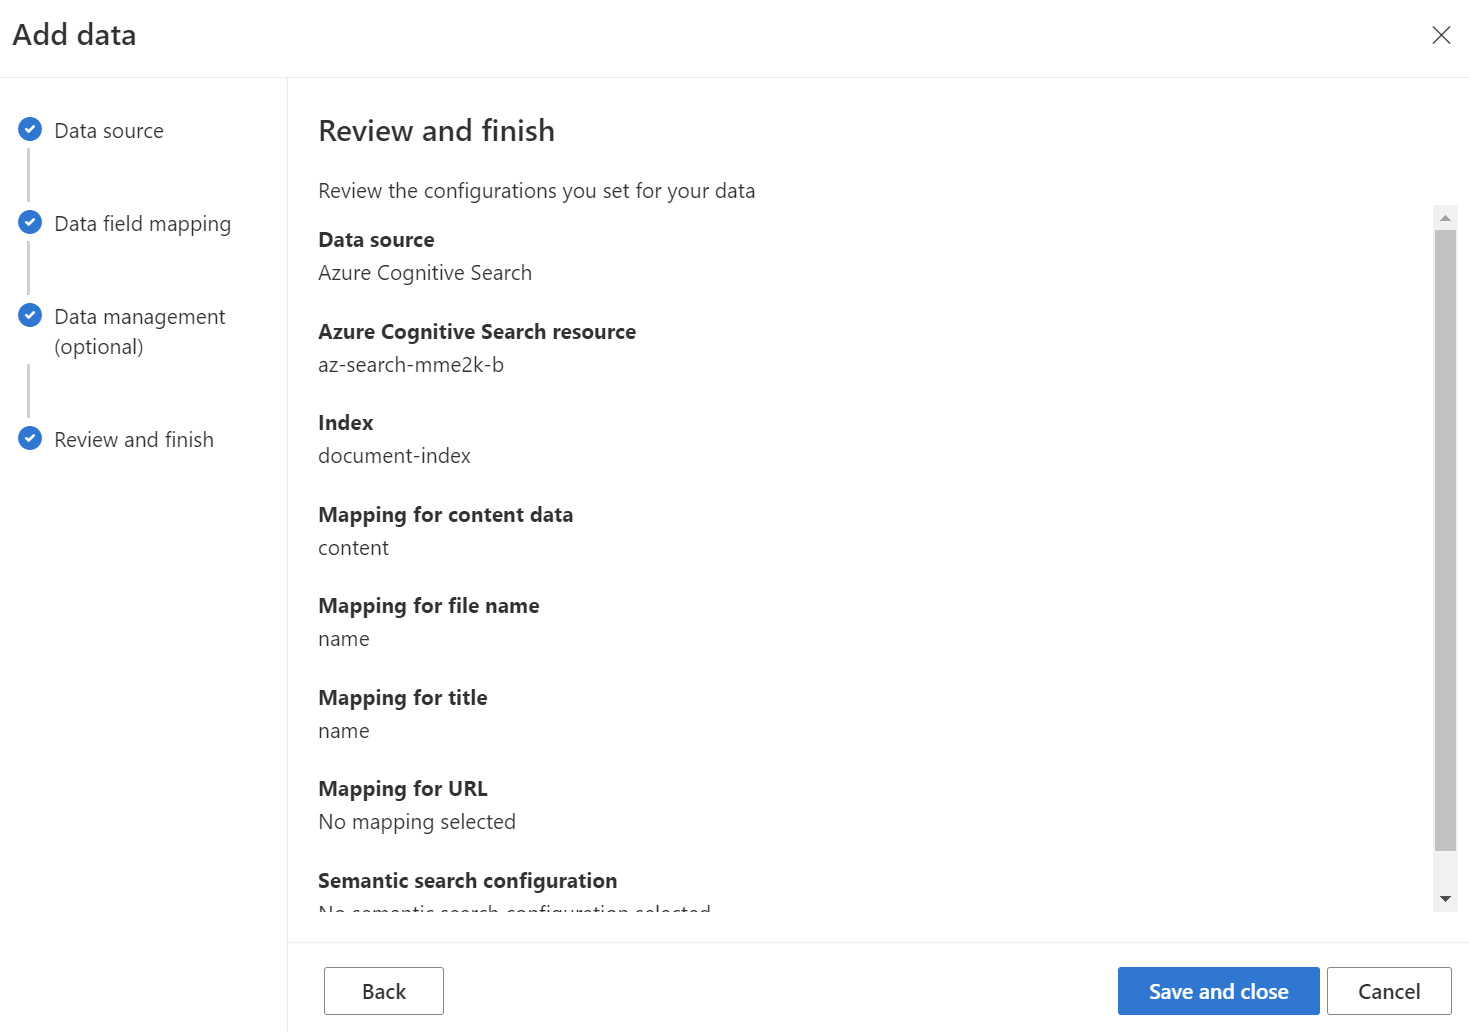
Afterwards, I’m configuring the Data field mappings for Azure OpenAI. I select the field content as Content data, name as File name, and name as Title. I keep the field URL blank because my index field url is not available. This might be caused by the index configuration.
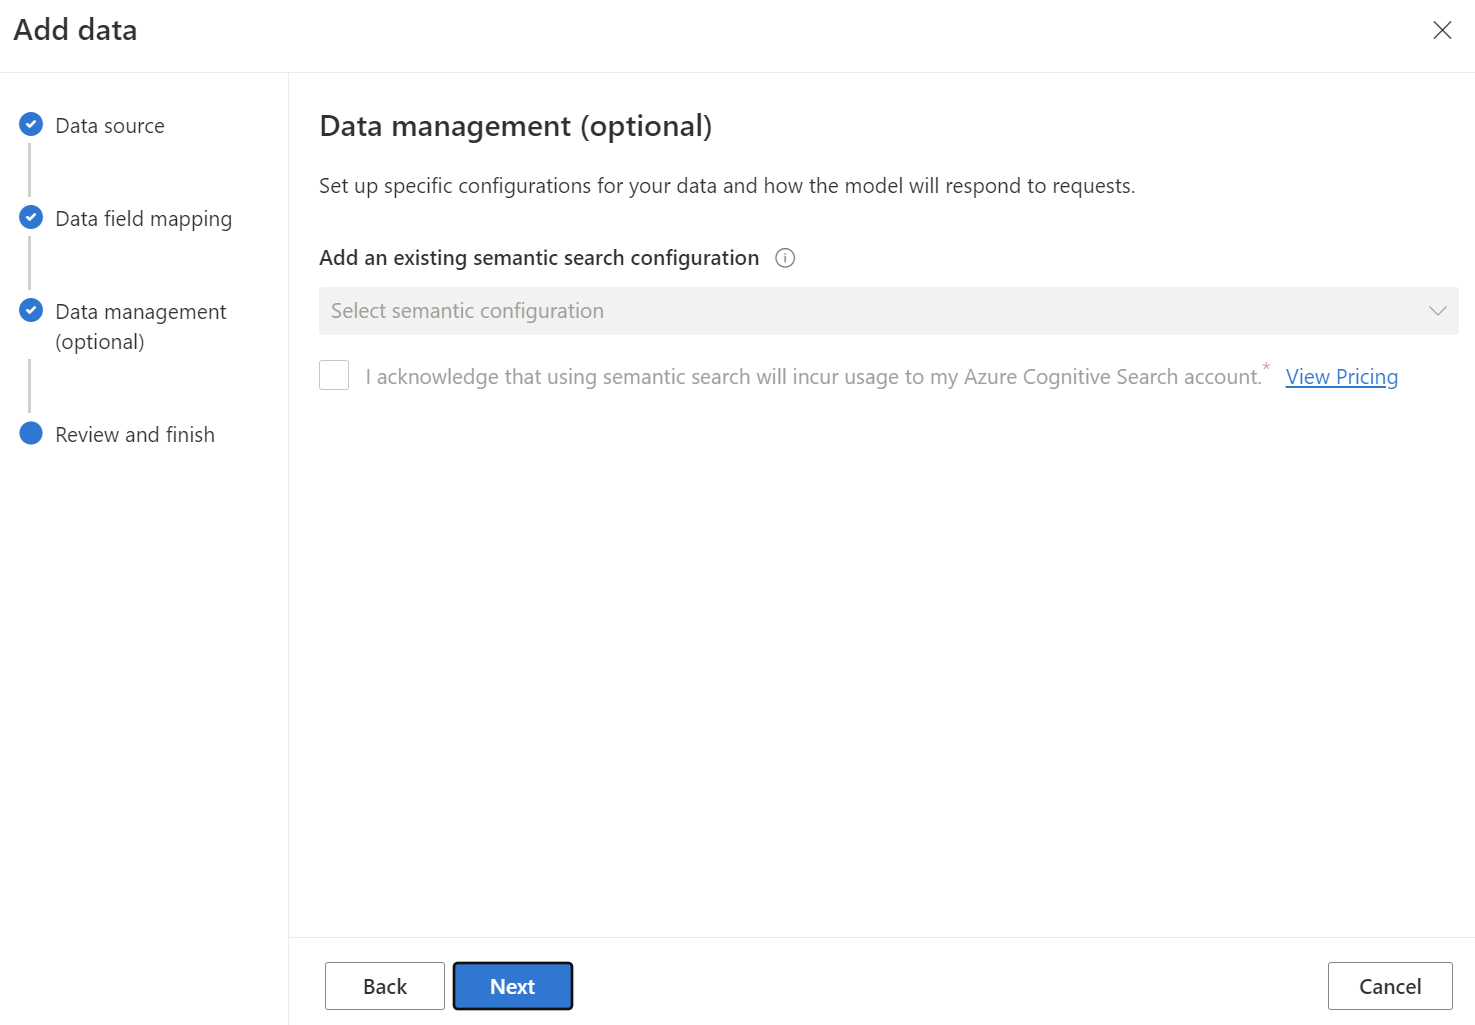
In addition, I could use a semantic search configuration from my Azure Cognitive Search. I’ll skip this because I haven’t set up semantic search for my index.
Finally, I can review all options of my data source configuration:
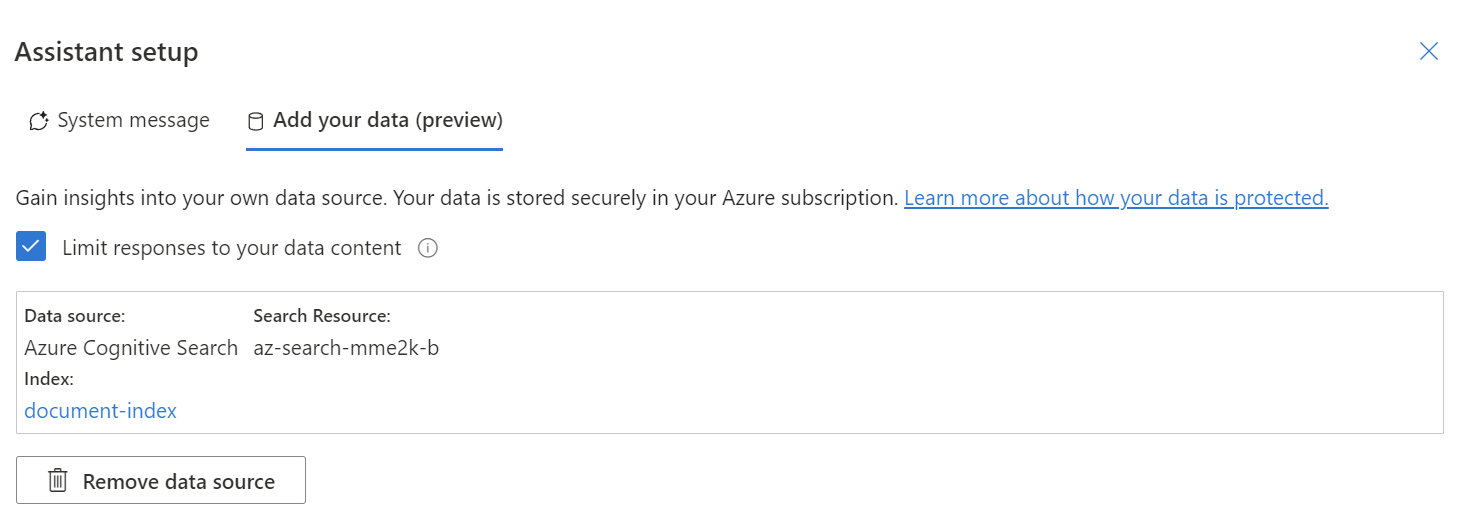
After saving, my document-index from Azure Cognitive Search is used. Furthermore, the AI limit the search results to my data content. In other words, my chatbot will now only answer search questions based on my indexed data:
Unfortunately, I can’t change the current data source configuration here. For this I must re-add my data source. I guess this will be improved soon.
Chat Completion with my Data Source
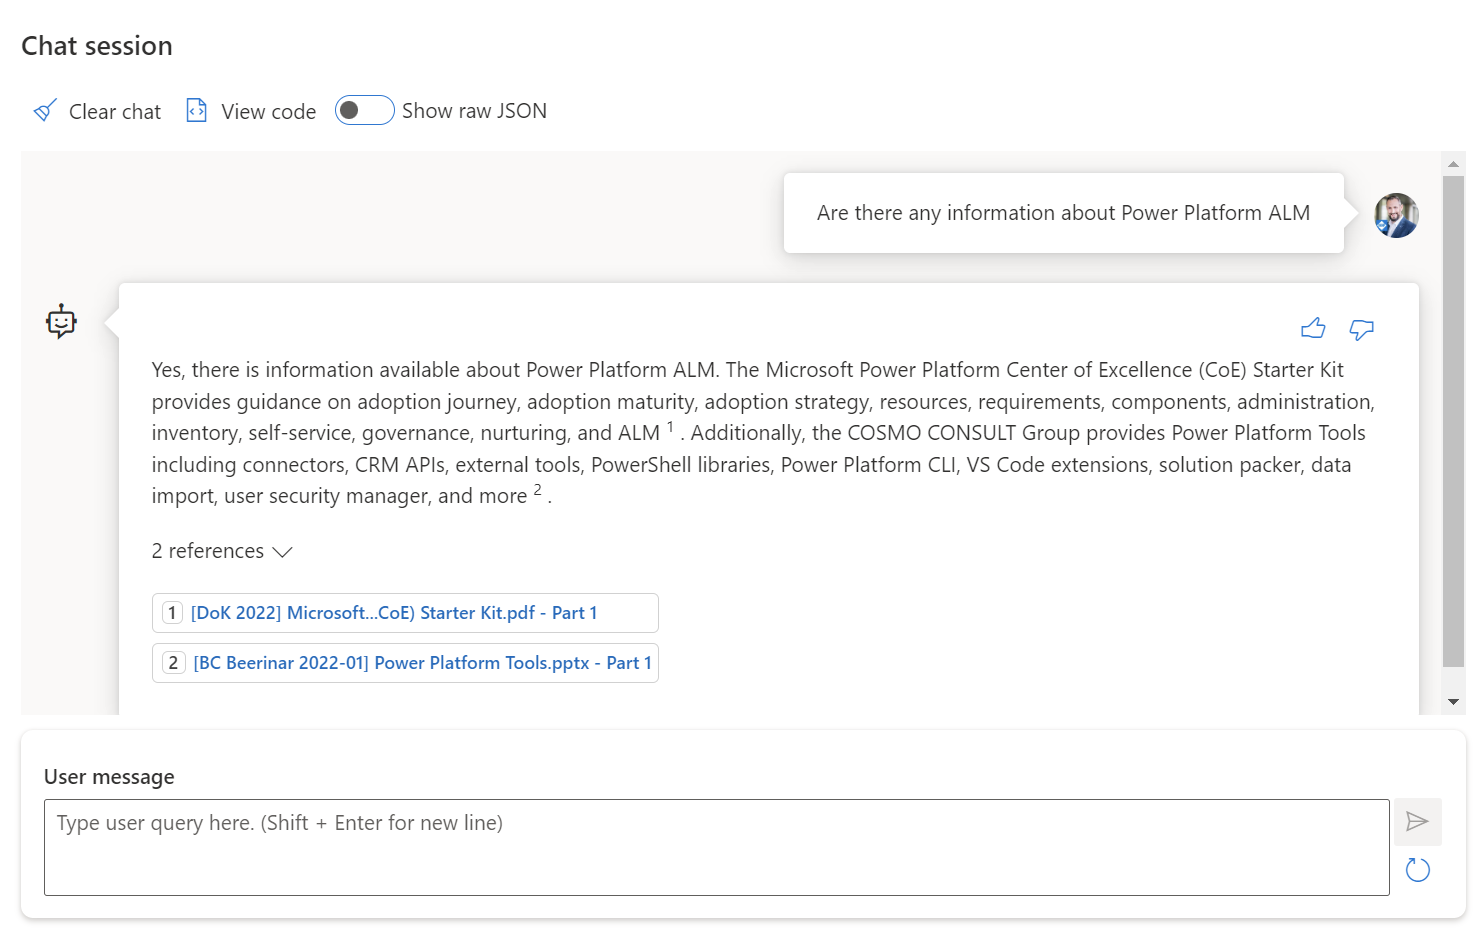
Let’s start a small test and ask about: “Are there any information about Power Platform ALM”. The result looks promising. Two documents were found and the chatbot provide an answer:
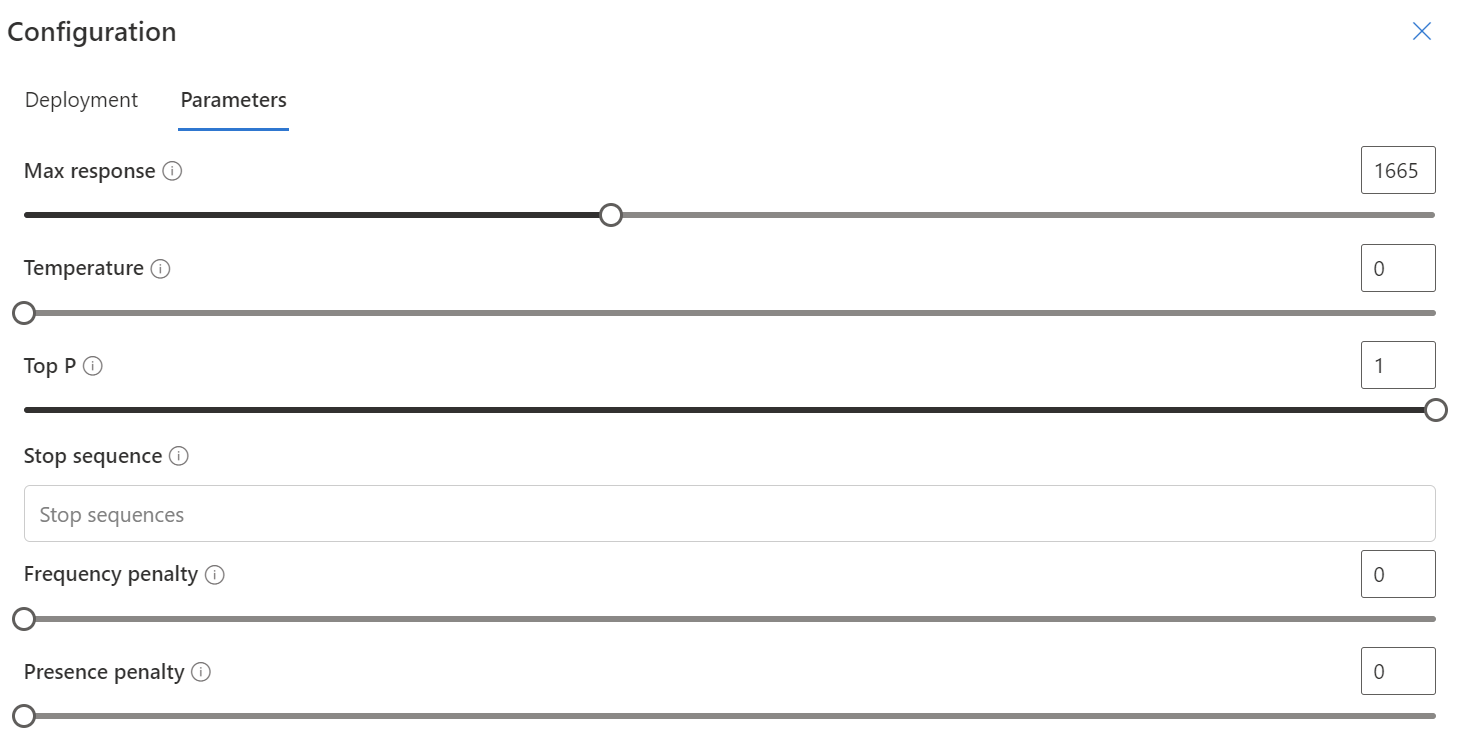
In addition, I can start fine tuning the parameters such as temperature (creativity of your AI):
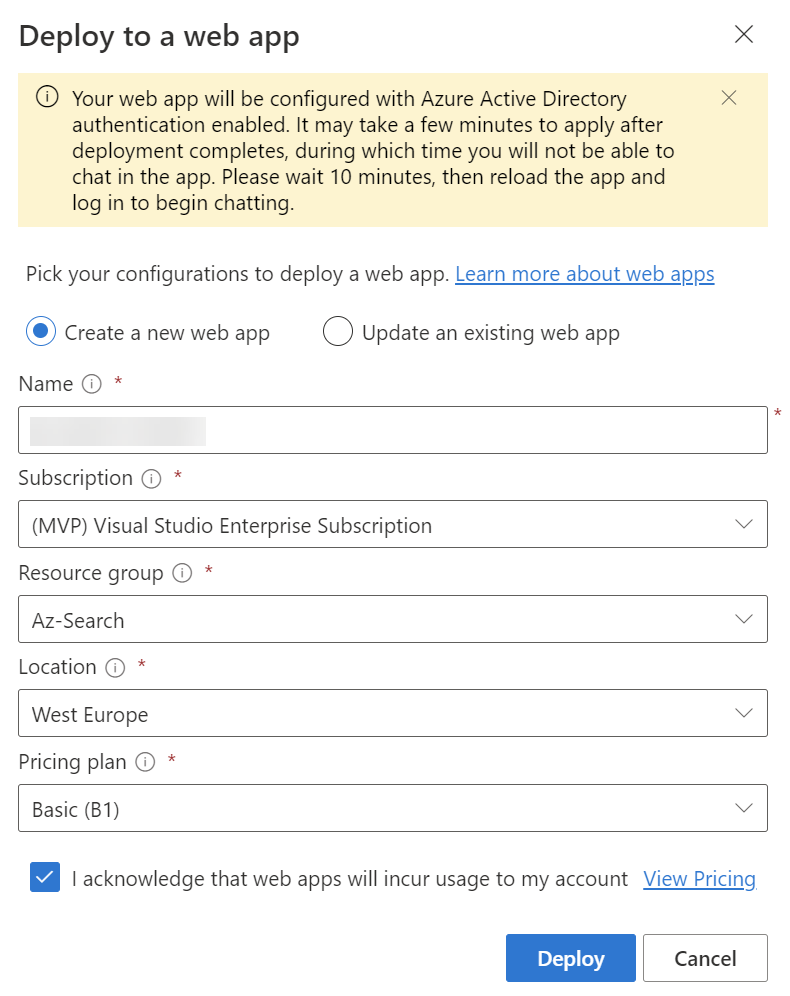
Perfect, after fine tuning and testing I’m deploying my chat application based on my data source and Azure OpenAI as web application:
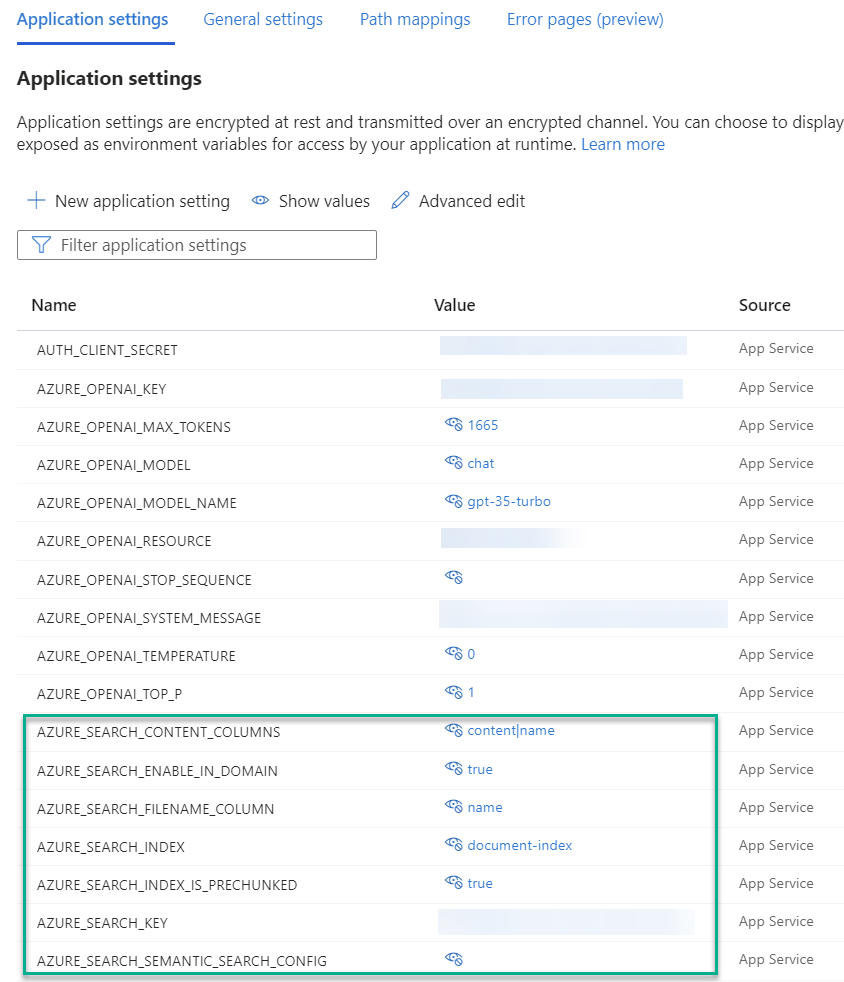
Finally, I can also change the parameters after my web application is deployed. For this I navigate to the Application Settings and change the values of my configuration:
Last, I check my web application. Here you see the chatbot is answering my question and provide also references to the found documents. Moreover, when I click on one of the provided documents references a pane opens and show me the Citations on the right side of my web application:
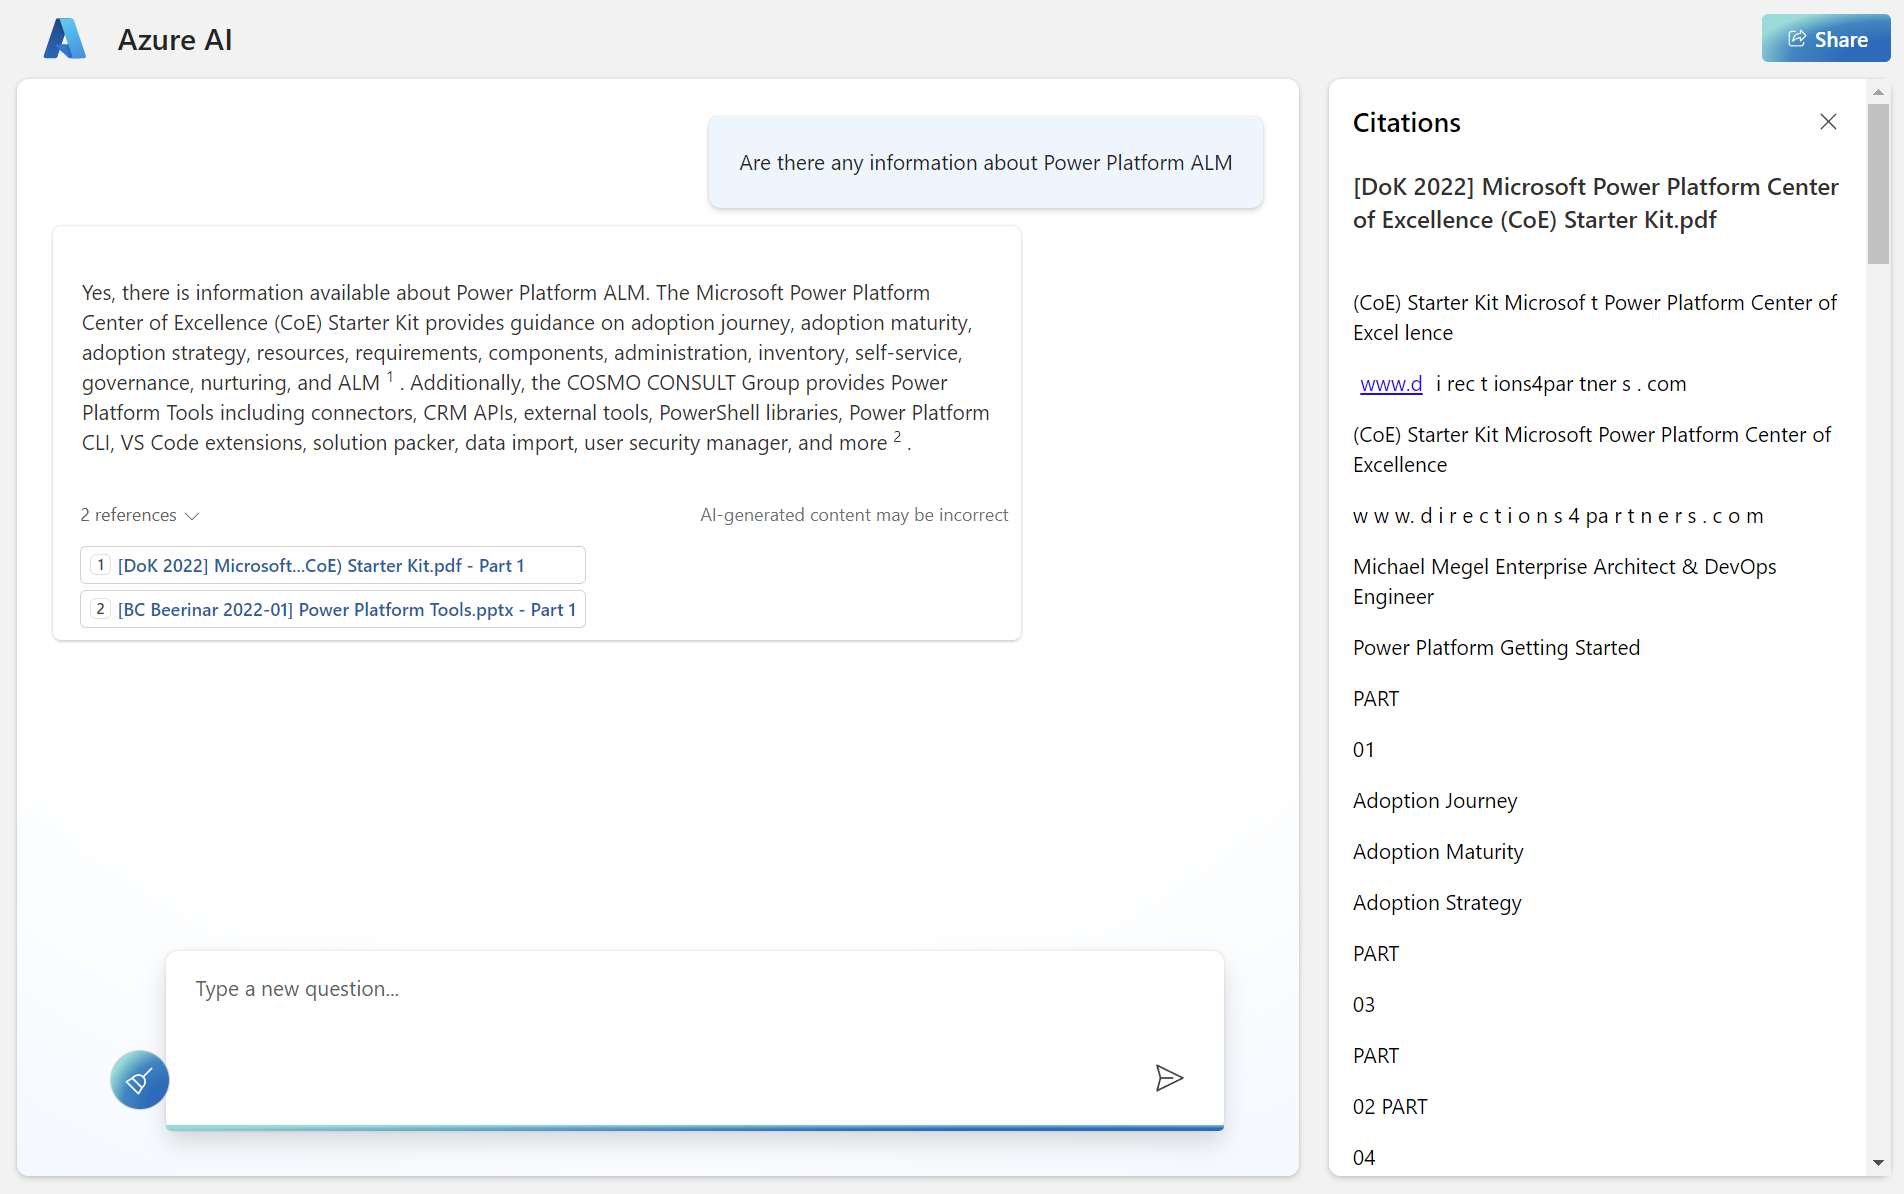
Well, this information is extracted from a pdf file, which was exported from PowerPoint. In other words, the quality of my example data is not so good. On the other hand, documents in business are similar.
Summary
In my opinion, adding Data Sources to Azure OpenAI is amazing. This is because my AI in now able to answer questions based on information stored in my documents. In other words, my AI can support me with business relevant information in a natural language chat. The only thing I need to do is indexing my business data.
For this, I have set up a new Azure Cognitive Search in my Azure Subscription. First, I created a search index with the needed information for Azure OpenAI. Afterwards, I configured my data source and added some example documents in my used Blob Storage. Finally, I created a new indexer to scan and index my documents.
The next part was out-of-the-box available in Azure OpenAI Studio. I added my data source to my Azure OpenAI and selected my fields from index. Then I deployed my Azure OpenAI chat application. Finally, I tested the result.
I’m extremely impressed by the simplicity. In my opinion, Microsoft opens the door for lots of new business cases with this new feature in OpenAI!