
Amazon Q – Single Sign-On with Microsoft Entra ID
Creating a new Amazon Expert Q for Business application was straight forward. I wrote about this in my last blog post. You have seen, I uploaded documents from my local folder directly in Amazon Q. Afterwards, Amazon Q indexed my documents and automatically created a search index. Finally, I tested Amazon Q in the web experience preview.
Great job so far! Today, I’ll deploy the web application and configure my Microsoft Azure tenant to act as the identity provider. I will set up single sign-on for Amazon Q for Business by using my Microsoft Entra ID as the identity provider. Once this is done, the web application (Amazon Q) will only allow access to users that are configured in my Azure Tenant in Microsoft Entra ID.
Let’s start!
Deploy Amazon Q Web Application
I start in my AWS Console and navigate to my previously created Amazon Q for Business application. As you see from my screenshot, my Amazon Q is ready, but not deployed. Therefore, I select my application and click on Deploy web application:

First, I must set up a service role for my Amazon Q web application service. I can create a new one or I can select an existing service role. This is because my Amazon Q web application needs permission to access my AWS resources such as Amazon CloudWatch and Amazon CloudWatch Logs.
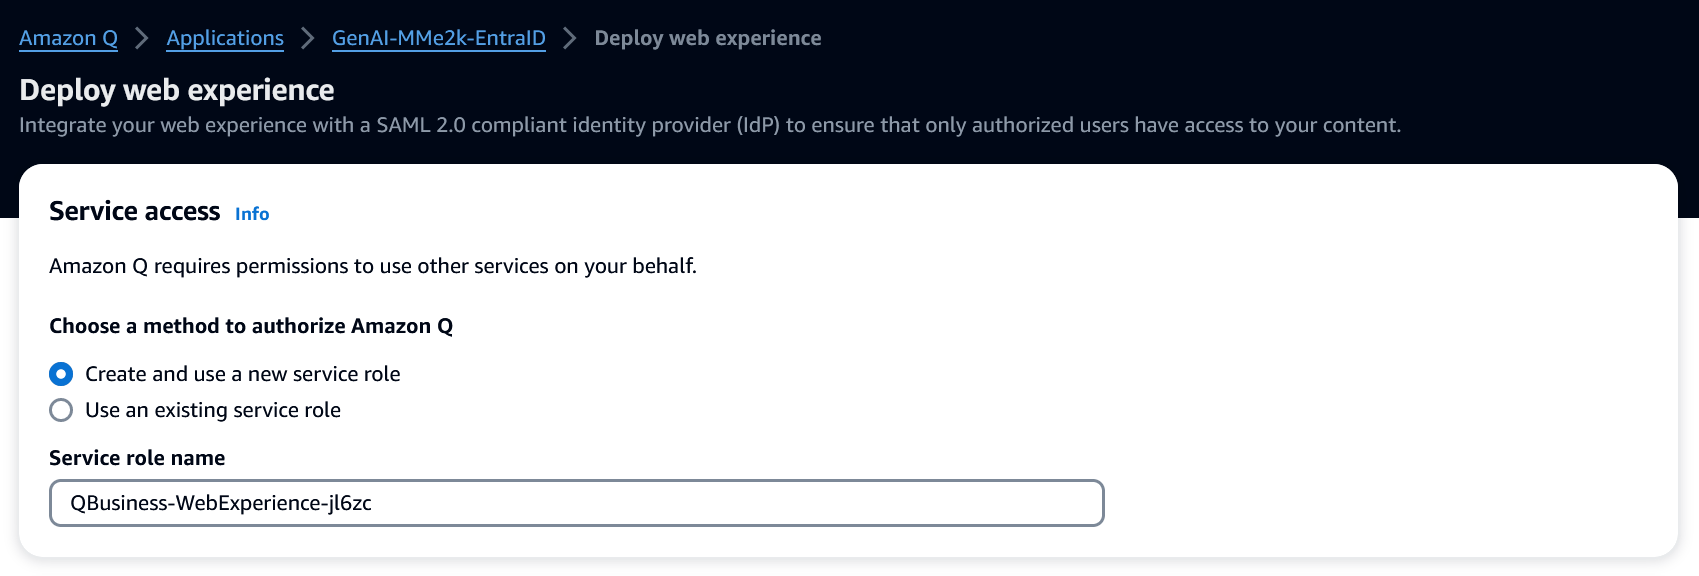
I keep the default and create a new service role. Afterwards, I discover this:
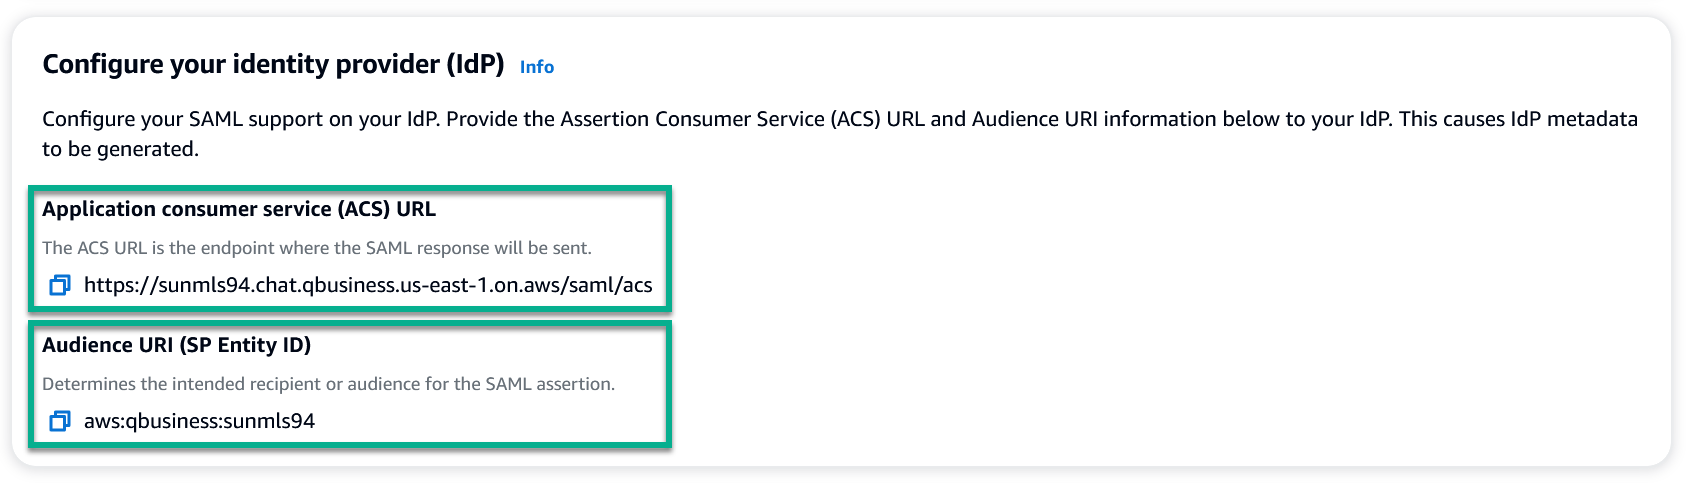
Yes, from here I can start to configure Microsoft Entra ID as my identity provider. You see also, Amazon Q provide information needed to setup and generate the SAML (Secure Assertion Markup Language) metadata in Microsoft Entra ID.
Microsoft Entra ID
I switch to Microsoft Entra ID based on the Amazon Q documentation for Entra ID (AWS Docs) in Microsoft Entra ID:
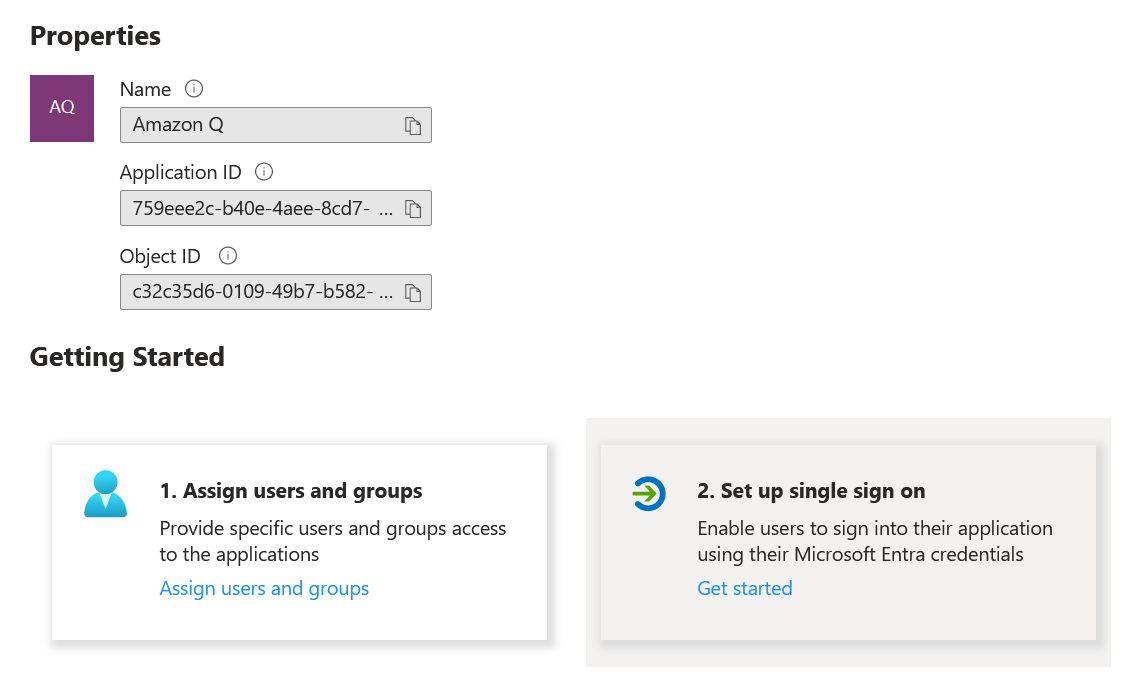
Now, I give my application the name Amazon Q:
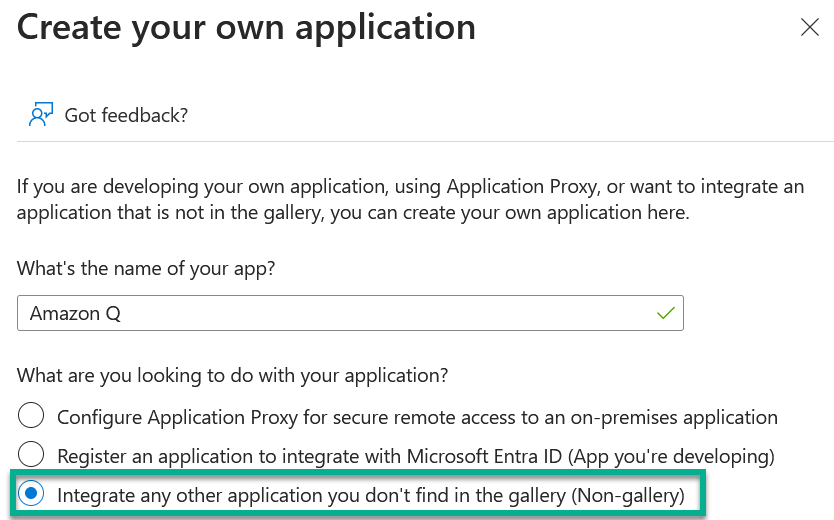
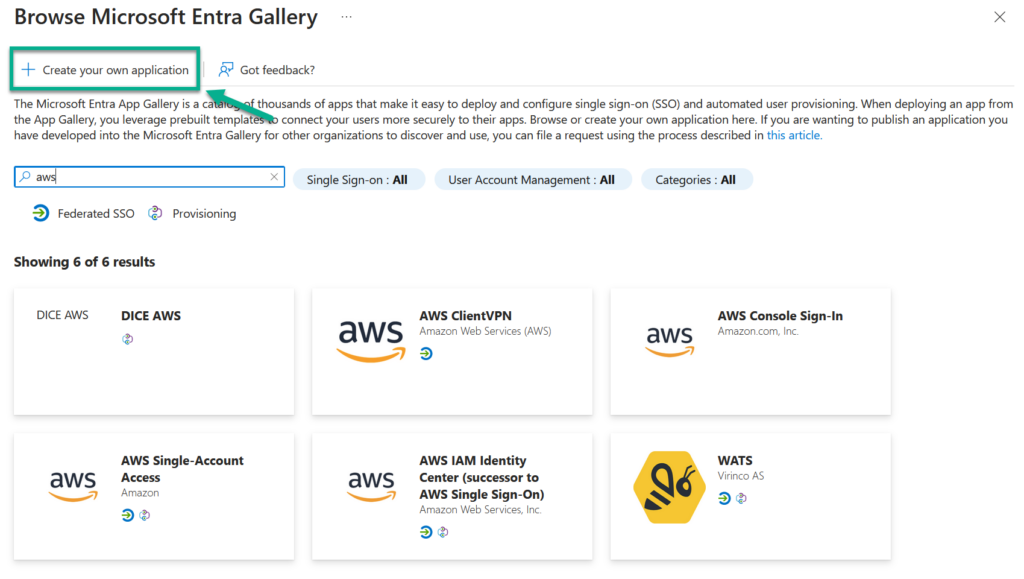
Important, I select Integrate any other application you don't find in the gallery (Non-gallery). This is because Amazon Q has not yet been added to the gallery. I continue by clicking on the create button.
After some seconds, my new enterprise application Amazon Q will be ready. I start with Set up single sign on:
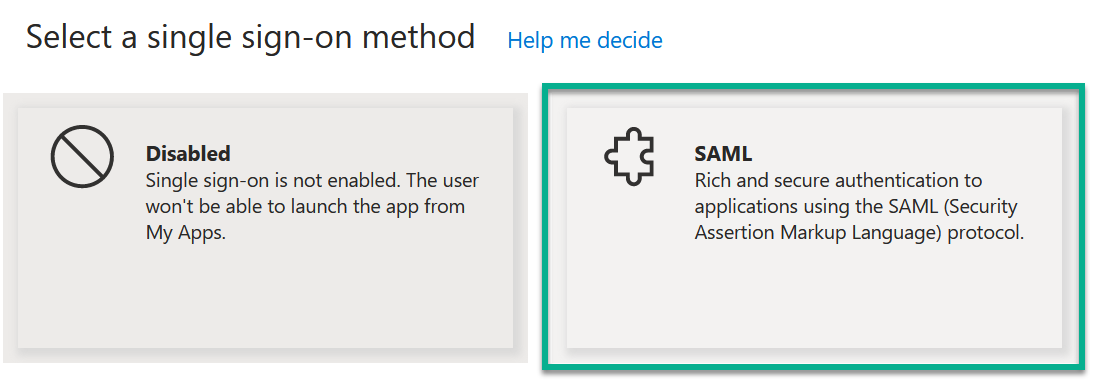
…and here I choose SAML as single sign-on method:
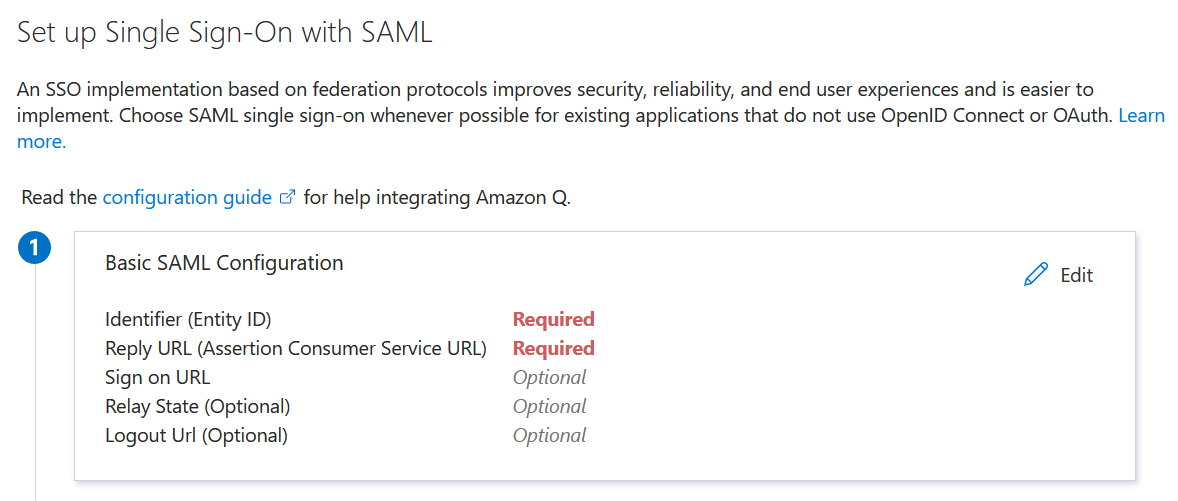
First, I must set up the needed information. You see Identifier (Entity ID) and Reply URL (Assertion Consumer Service URL) are marked as Required:
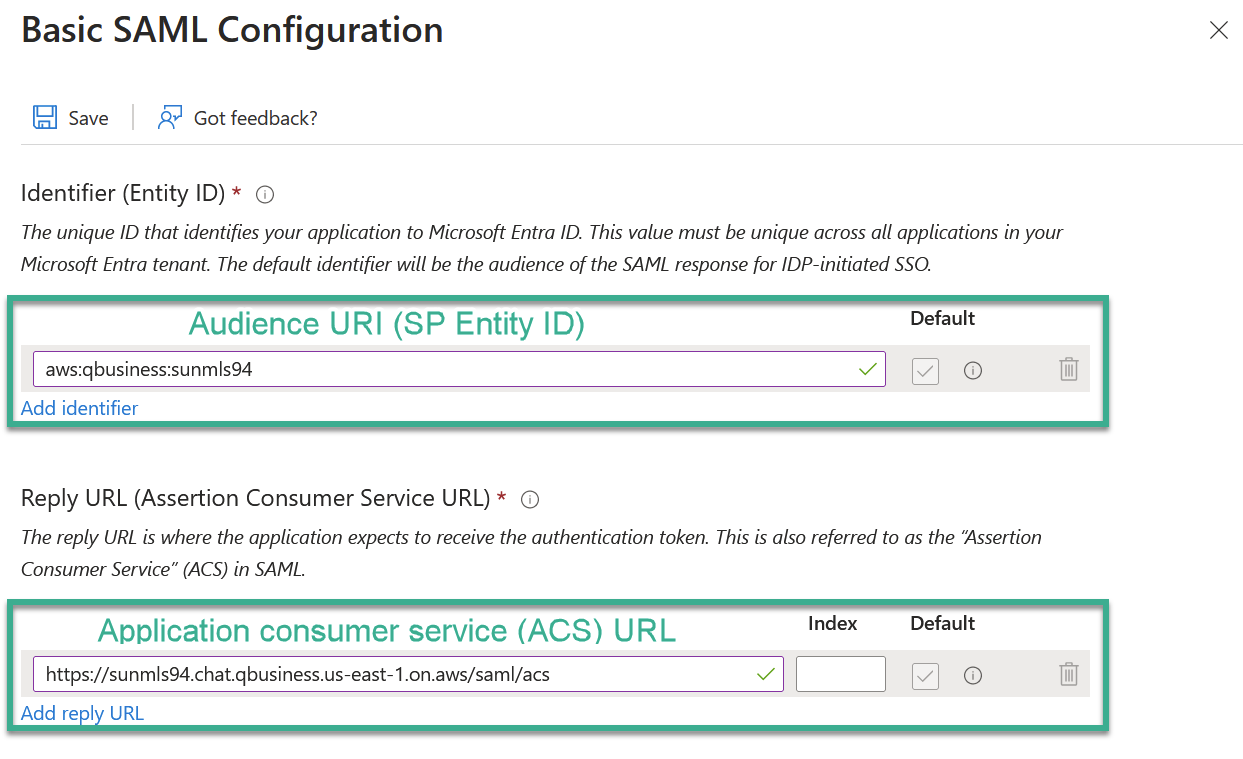
Here I use the provided information from my Amazon Q for Business application:
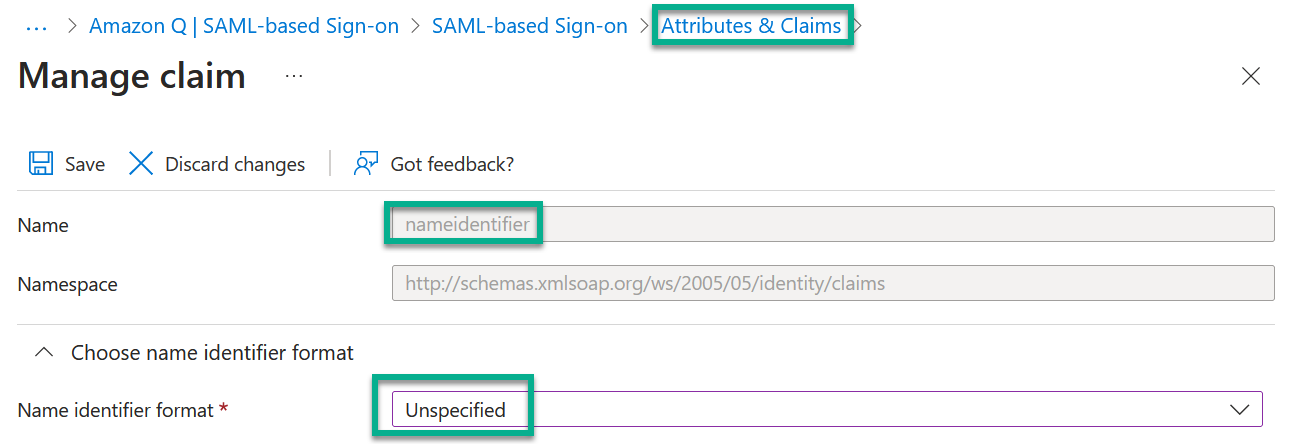
Finally, I update the Attributes and Claims. I change the format of the existing claim nameidentifier to Unspecified:
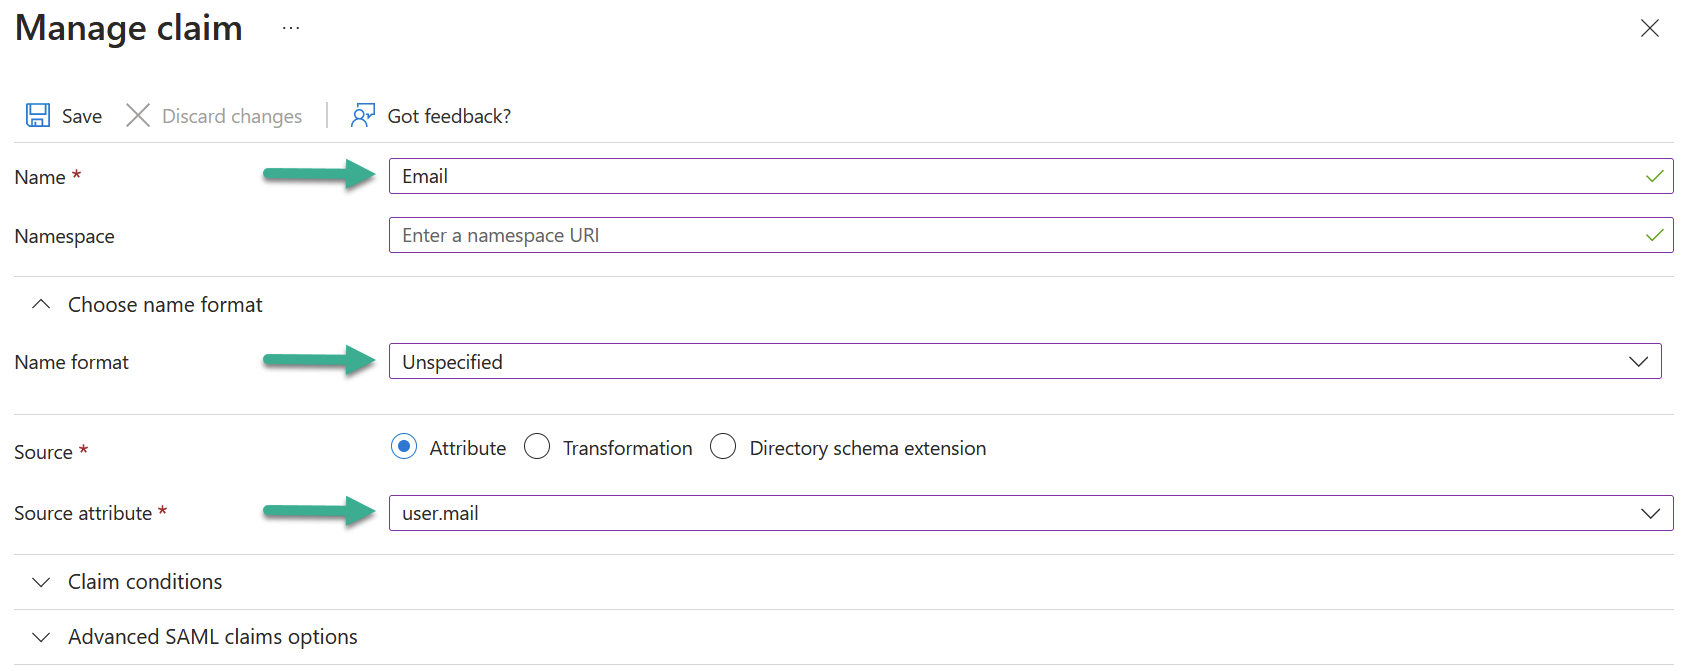
Furthermore, I add a new claim Email also with Unspecified format and adjust the Source attribute to user.mail:
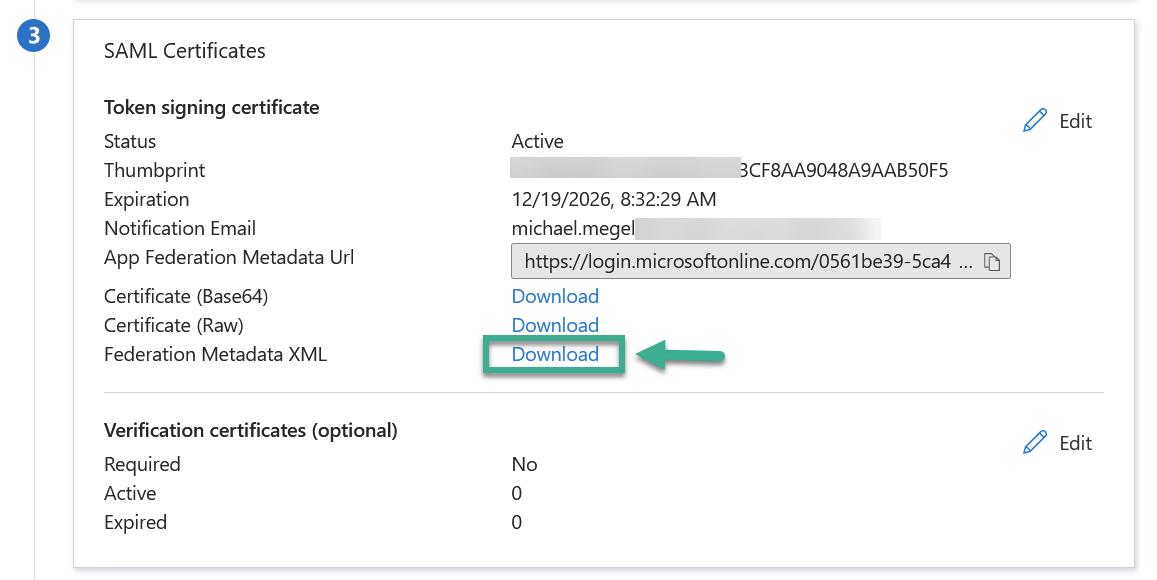
Now, I download my SAML configuration as Federation Metadata XML from Azure Entra ID:
But there is one final step here in Entra ID. Correct, I add some users in Users and groups for my created enterprise application:
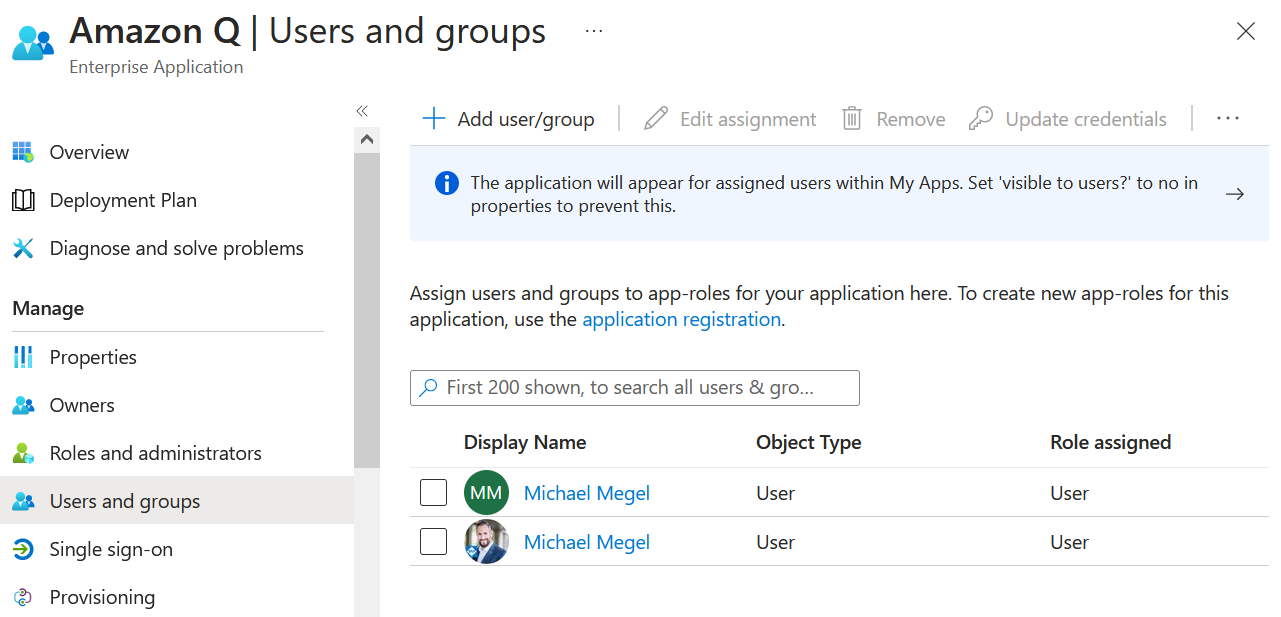
This allows configured users to sign into the Amazon Q provided web application.
Complete Amazon Q Web Application Setup
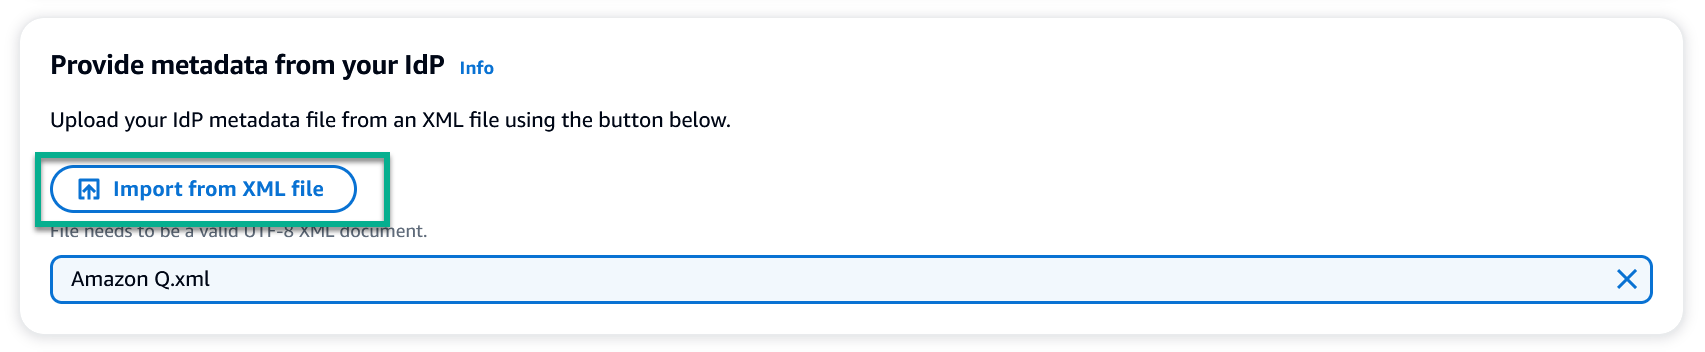
Next, I use the downloaded file and import the Federation Metadata XML from my Microsoft Entra ID Enterprise Application in Amazon Expert Q:
Finally, I configure my user and group mapping in my Amazon Q application. I use as Email attribute of SAML assertion the previously created claim Email from Entra ID:
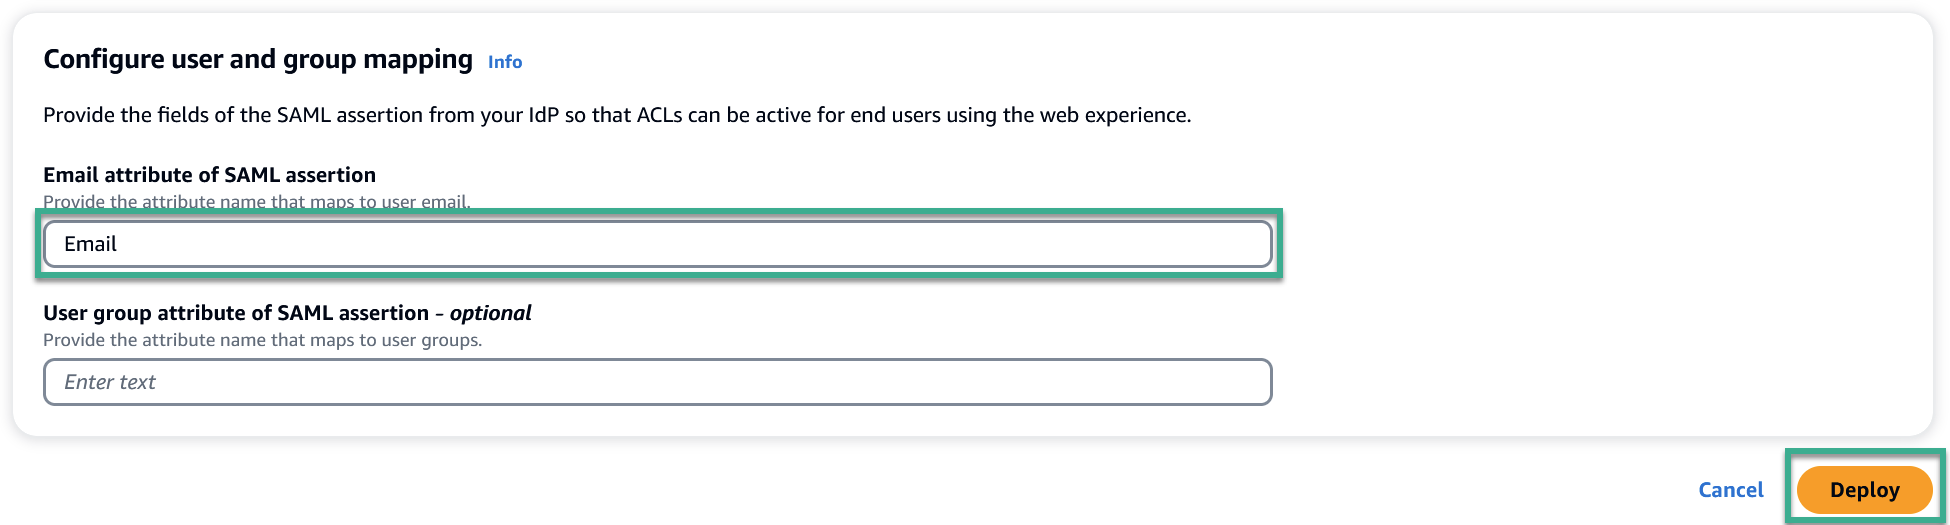
That’s all. Now I click on the Deploy button and my Amazon Q for Business Web Application is ready to use.
Amazon Q Web Application with Single Sign-On
After some seconds until the deployment is ready, I see a link in my Amazon Q application view:

I click on the link in column Deployed URL for my Amazon Q application and Microsoft Entra ID opens:
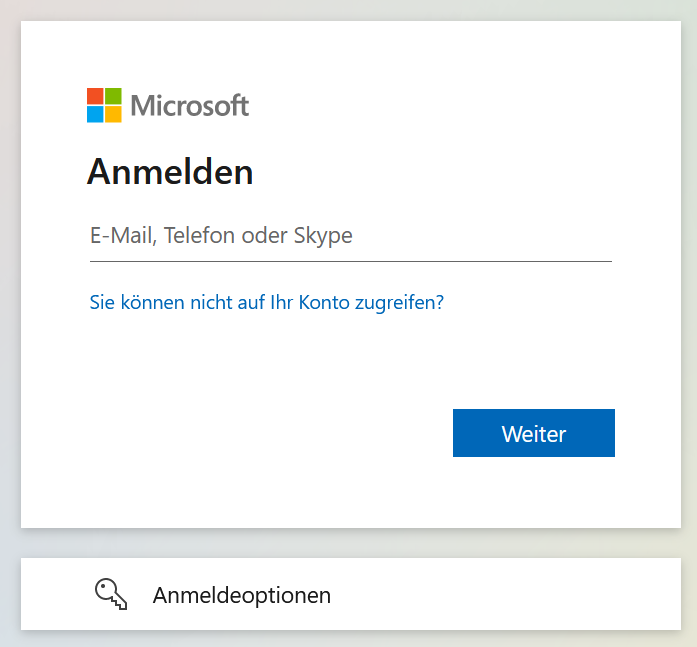
Note: If you see Permission needed after the sign-in, your claims might not be configured correctly.
I provide my login information, and Microsoft Entra ID sends me an MFA authentication request in the background. Once I verify the authentication request, Amazon Q opens up and becomes accessible for me:

I start with a conversation and here you see the result:
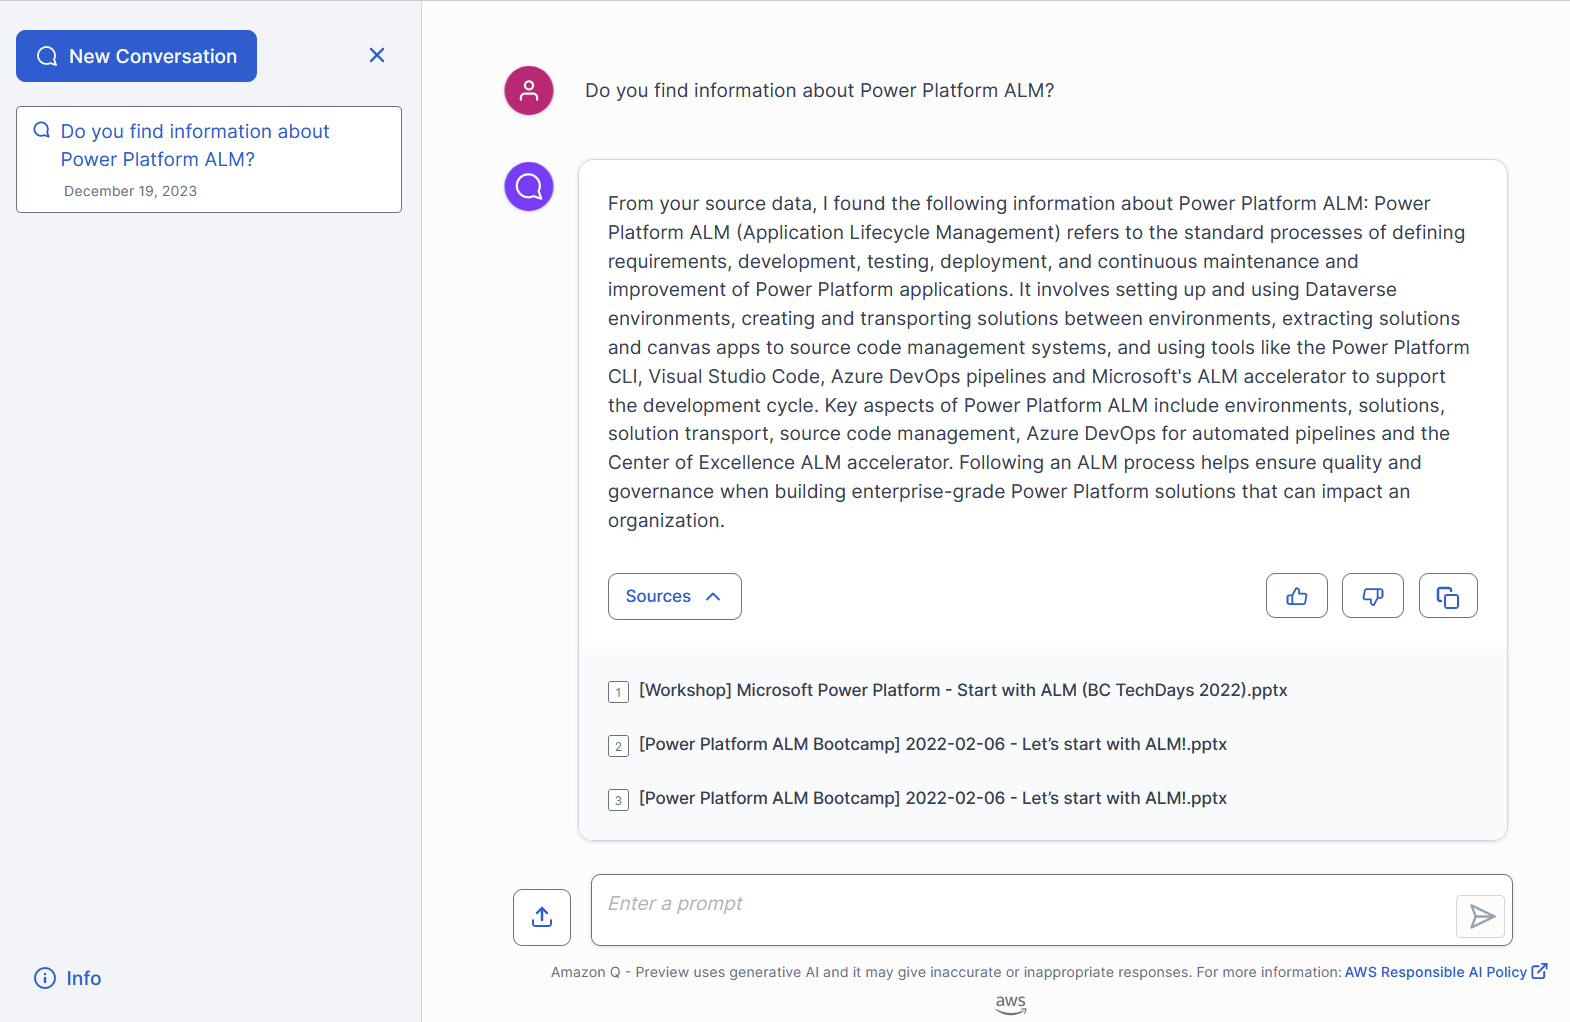
Perfect! My setup is complete.
Summary
Deploying Amazon Q as a Web Application is extremely user friendly. Especially, the configuration of the Single Sign-On with Microsoft Entra ID was straightforward.
In detail, I followed the instructions from AWS documentation and created a new enterprise application in Azure Entra ID. In addition, I used the provided information from my Amazon Q application to complete my single sign-on setup in Entra ID. Additionally, I adjusted the Claims and Attributes in Entra ID and my Amazon Q application. Finally, I exported the SAML metadata provided by Microsoft Entra ID and imported this XML file in Amazon Q to complete my deployment.
Finally, I tested my Amazon Q web application successfully. Now, all my users which are added to my Microsoft Entra ID enterprise application can use Amazon Q with Single Sign-On.