Using Document Intelligence from Power Automate
Usually, when we talk nowadays about AI, we mean ChatGPT or large language models (LLMs). However, there are other Azure AI Services that are extremely important for the business world. One of these services is Azure AI Document Intelligence which I can use to extract information from my digital documents. But can I use Document Intelligence directly from Power Automate?
Yes, I can, and I will explain to you how I use Azure AI Document Intelligence directly from Power Automate Flow. But first, let me introduce this fantastic AI service to you.
Azure AI Document Intelligence
Azure AI Document Intelligence is an AI service that applies advanced machine learning to extract text, key-value pairs, tables, and structures from documents automatically and accurately. In other words, this service works as an OCR (optical character recognition), scans my document and extract the information for me.
Important to me, I can consume this service directly as a managed instance in Microsoft Azure. This means I have no overhead with technical details or the management of this service.
Setup Document Intelligence in Azure
In my Azure portal, I’m searching for Document Intelligence (form recognizer):

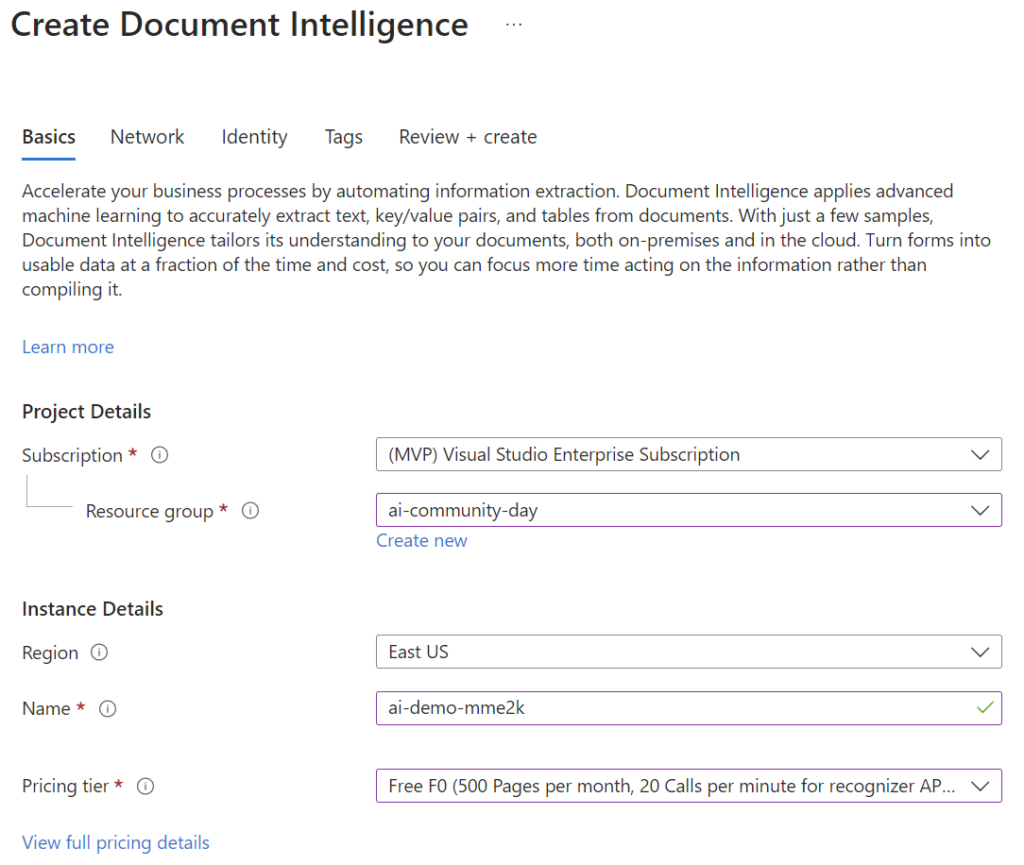
As the next step, I’m configuring my resource group, my preferred instance name, and the region. Furthermore, I’m selecting a proper pricing tier. Free F0 is sufficient for my example and to get a first taste of this service without spending credits from my Azure subscription:
Note: Don’t forget to check that your preferred API version is available in your selected region.
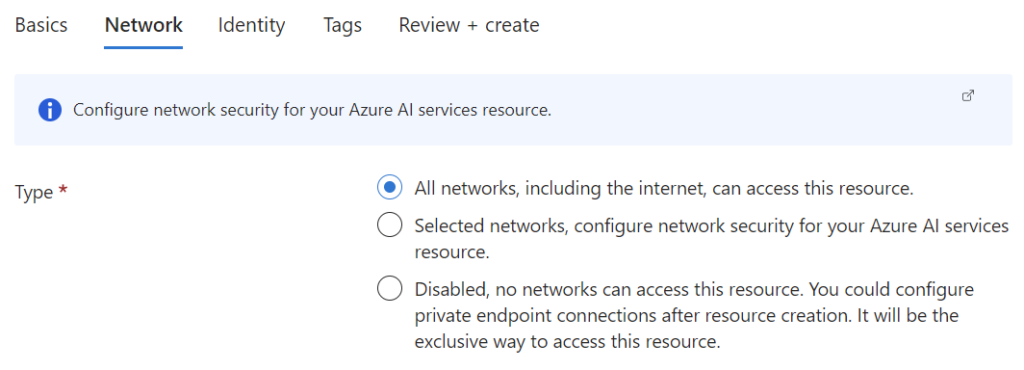
In addition, I keep the Network configuration and allow access from all networks:
Note: Here you can also setup a configuration that fits into your enterprise networking strategy such as using VPCs.
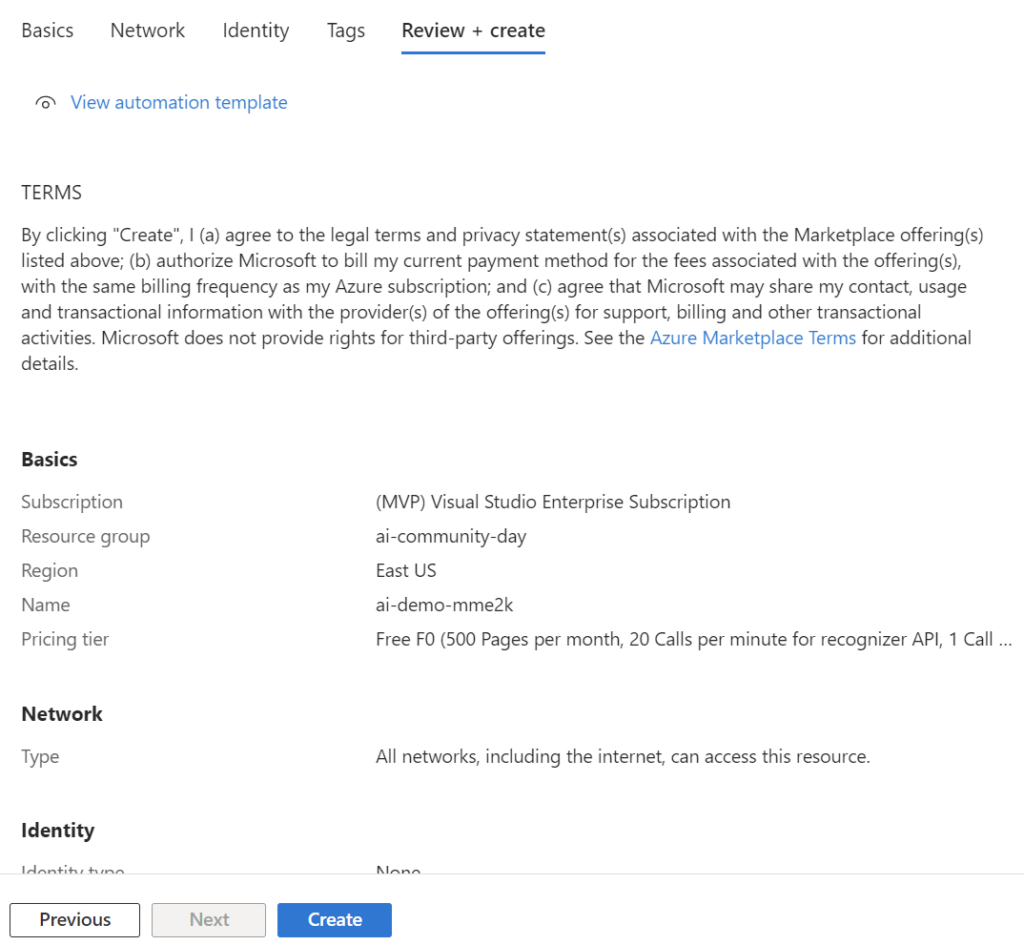
I skip also for now the assignment of a managed identity and move forward. Finally, I’m reviewing my settings and starting the creation process:
Now I must wait a few seconds…
Document Intelligence Studio
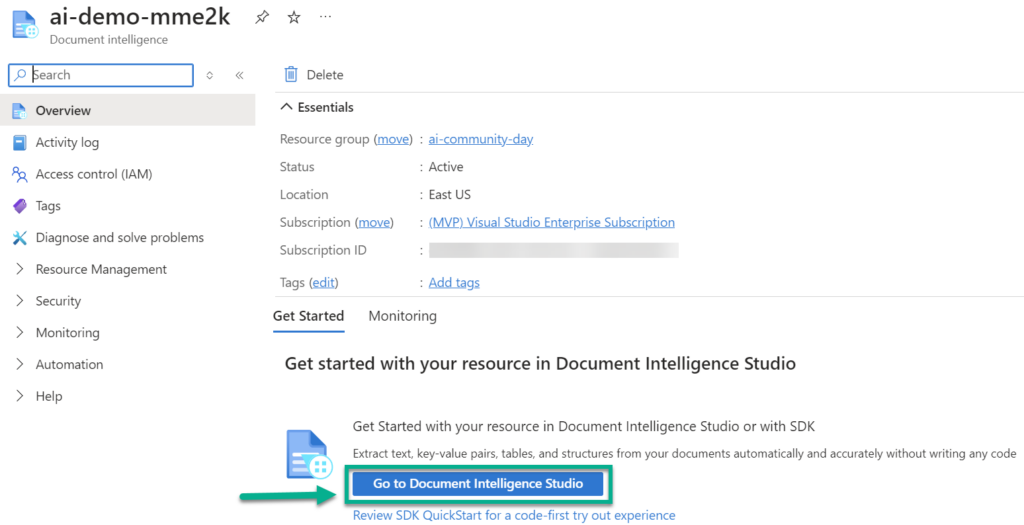
Directly from my created managed instance in Azure I can jump to the Document Intelligence Studio:
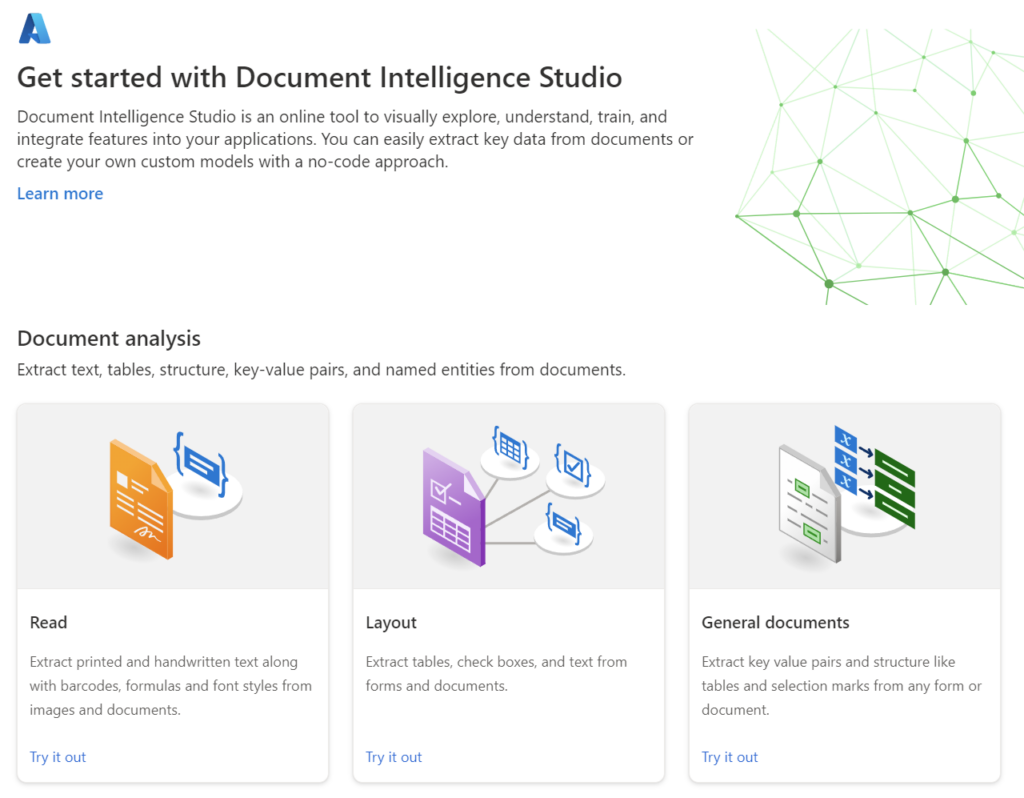
Document Intelligence Studio is my favorite place, where I can try out the provided modals on my documents in a user interface. In other words, here I get a first taste of the Document Intelligence service.
In Document Intelligence Studio, I have the choice: What do I want to analyze? This can be handwritten documents, layout extraction or key value pairs from general forms:
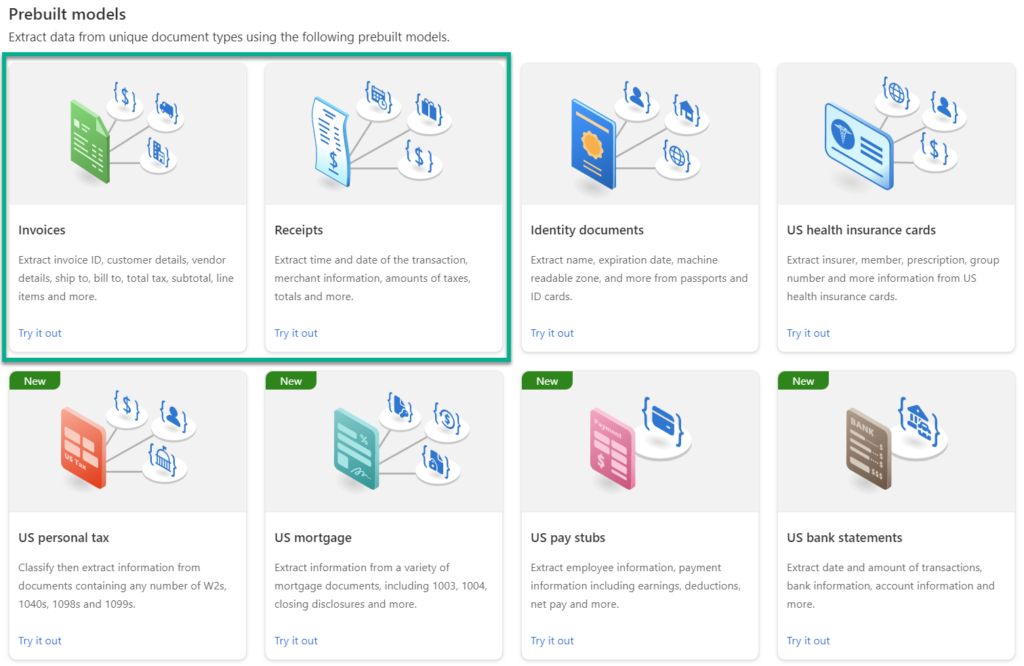
Very interesting for me is the option to use the Prebuild models such as Invoices or Receipts:
These pre build models are prepared to extract standardized information for Invoices and Receipts from the documents. The information can be for example:
| Field | Type | Description | Example |
|---|---|---|---|
MerchantName | string | Name of the merchant issuing the receipt | Contoso |
Total | currency | Full transaction total of receipt | $14.34 |
TransactionDate | date | Date the receipt was issued | June 06, 2019 |
Subtotal | currency | Subtotal of receipt, often before taxes are applied | $12.34 |
TotalTax | currency | Tax on receipt, often sales tax or equivalent | $2.00 |
InvoiceId | string | ID for this specific invoice (often ‘Invoice Number’) | INV-100 |
This is exactly what I need when I want to extract information in an automated way. With these standardized fields, I can set up later a Power Automated flow that uses the document information to add or update records in Dataverse.
Even better, here in Document Intelligence Studio, I can try out the service with prepared samples or on my own documents. I’m selecting a document, click afterwards on Run analysis, and see my Result as JSON:
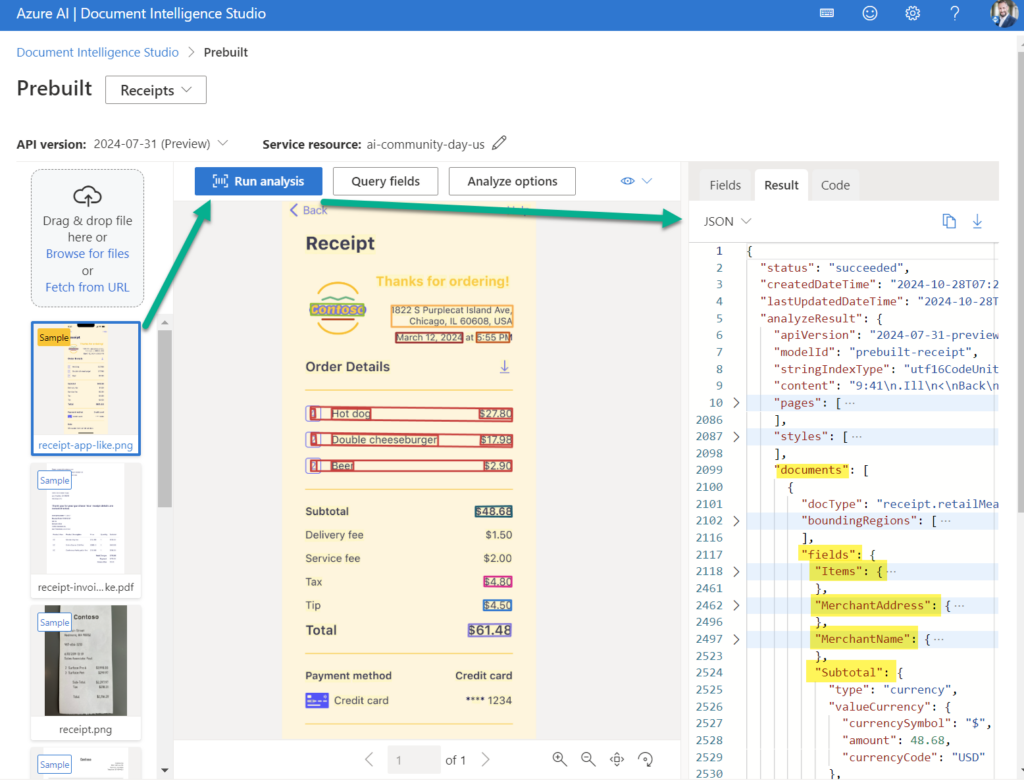
Fantastic, now I want to prepare my process for Power Automate based on the calls in Document Intelligence Studio. For this I usually collect the right REST API calls and test the processing in VS Code.
Document Intelligence REST API
The Document Intelligence REST API is well documented. but before I use this API from Power Automate, I will test my needed API calls in VS Code. For this I’m using the REST Client extension in VS Code.
First, I’m setting up some variables such as my Document Intelligence endpoint, my API key, the model id, and the API version (Don’t forget to check that your API version is supported in your region):
@endpoint    = https://<my-service-name>.cognitiveservices.azure.com
@key         = <my-api-key>
@modelId     = prebuilt-receipt
@apiVersion  = 2024-07-31-preview
Next, I start with the first call to analyze my document. Here I’m using Analyze Document from Stream. In addition, I configure additional query parameters such as queryFields and features. Furthermore, I use my_receipt.pdf as body of my HTTP message:
### Analyze Document
@queryFields = InvoiceId,PurchaseOrder,MerchantName
@features    = queryFields
# ------------------------------
POST {{endpoint}}/documentintelligence/documentModels/{{modelId}}:analyze?features={{features}}&queryFields={{queryFields}}&api-version={{apiVersion}}
Ocp-Apim-Subscription-Key: {{key}}
Content-Type: application/octet-stream

< my_receipt.pdf
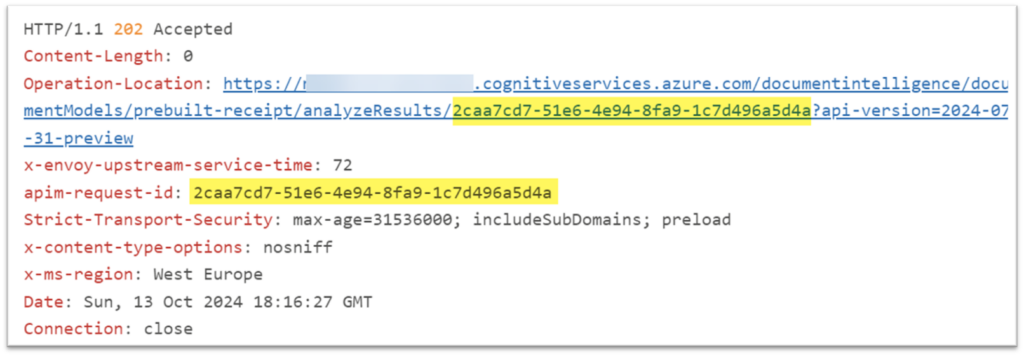
This call returns HTTP 202 Accepted. That means, Document intelligence starts the processing of my uploaded document:
As you see from the response, the service response contains the as apim-request-id and the Operation-Location in the header of the response. I will use this information as input for my next call.
To get my result I must now call Get Analyze Result:
### Get Analyze Results
@resultId = ...           # apim-request-id
# ------------------------------
GET {{endpoint}}/documentintelligence/documentModels/{{modelId}}/analyzeResults/{{resultId}}?api-version={{apiVersion}}
Ocp-Apim-Subscription-Key: {{key}}
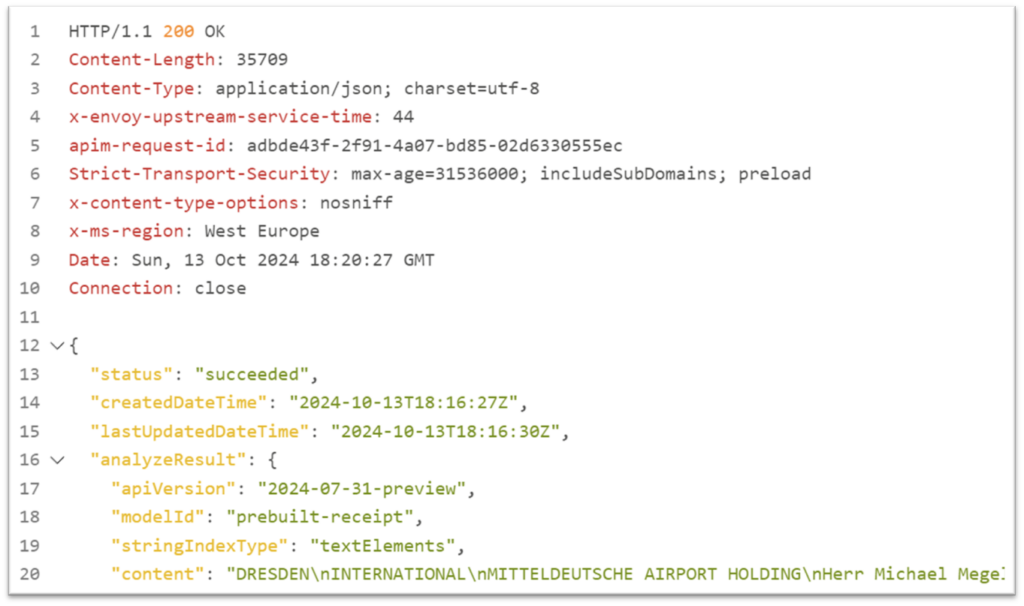
As result, my service returns first the status of my operation at Document Intelligence. When my operation is successfully completed, the status is succeeded, and my response contains the extracted information as shown in my next picture:
Perfect, now I have everything what I need.
Document Intelligence with Power Automate
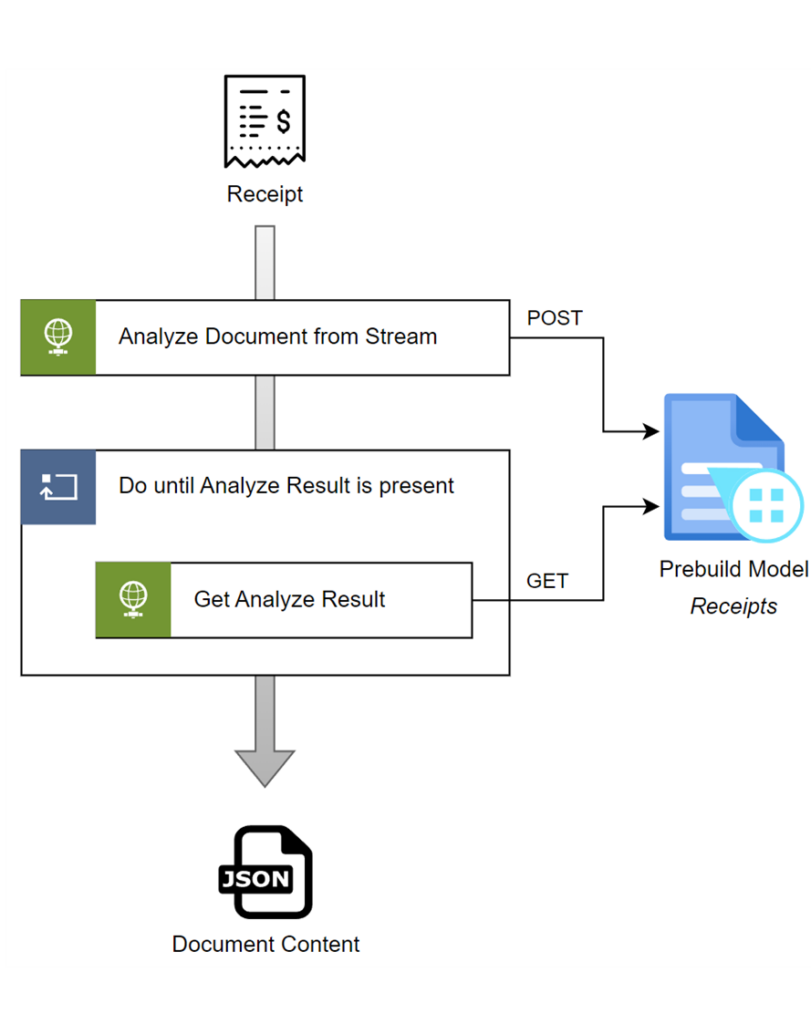
So, let’s start to set up the sequence of API calls in a Power Automate Flow. For this I have drafted here, what I must realize:
As you see from my picture, I will send my receipt data within a HTTP action to Analyze Document from Stream of my Document Intelligence service in Azure as POST request. Furthermore, I will use the returned request id to query Get Analyze Result from another HTTP action as GET request in a loop until the service has processed my document. The result will be my document content.
The prerequisites in my Power Automate Flow are rather simple. I use a trigger with a file parameter. Furthermore, I extract the filename and the content within a Compose action. In addition, I’m also setting up my Model ID within a Compose action:
My first API is now the Analyze Document from Stream. Here I’m using a HTTP action:
From the picture you see, I’m using environment variables that hold my Document Intelligence endpoint URL and it’s API key. In addition, In addition, I’m adding the outputs of my Compose actions to specify the prebuild model and the raw content of my uploaded document.
Next, I’m extraction the URL for my Get Analyze Result call from the returned HTTP response header Operation-Location within another Compose action:
Here is my action code:
outputs('HTTP_Document_AI_Start_Analysis')['headers']?['Operation-Location'] Now I’m setting up a loop to collect the service results. My Do until action is executed until my isRunning variable is no longer true.
Inside of the loop I’m using first a Delay action that prevents my flow from calling the Get Analyze Result too fast and too often. This is because analyzing a document can take some seconds until the status completed is returned.
The details of my HTTP action for the Get Analyze Result call are straight forward. I’m using the Operation-Location as URL and my API key from my environment variable to query my Document Intelligence service:
Finally, I’m parsing the response with a Parse JSON action and extract information such as the operation status. Within this status information I set my variable isRunning to false, when I want to exit my Do until loop. The rest is just business logic to process the document information provided by Document Intelligence.
Summary
You have seen, using Document Intelligence from Power Automate is really simple. In my example I have shown how to set up and configure this AI service in Azure portal. Furthermore, I gave a short excursion to Document Intelligence Studio which provides a user-friendly interface to test Document Intelligence with example documents or with my own document that I can upload.
Next, I have explained which API calls are needed to extract the document information within the Document Intelligence service. In detail, I have used Analyze Document from Stream to start the information extraction process and Get Analyze Result to query the result from the service endpoint.
Finally, after I prepared and tested my HTTP calls in VS Code, I have set up my Power Automate flow to automate this process. In Power Automate I just used HTTP actions to call my Document Intelligence service endpoint in Azure. Now I have a simple reusable workflow that I can use to extract content from PDF documents and process in my Low-Code automation scenarios.
