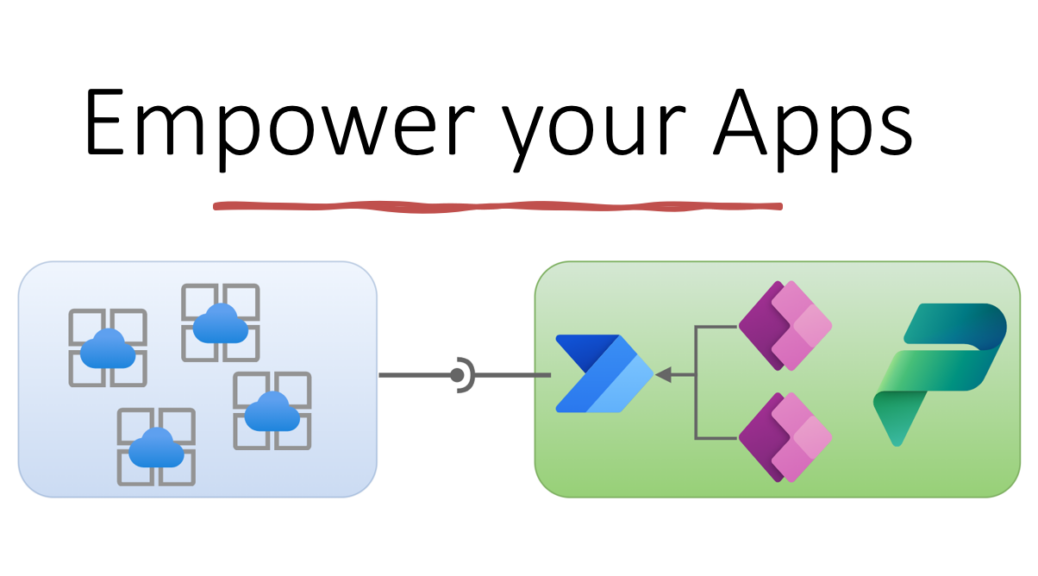
Build a Microservice for Power Platform
Building microservices instead of a monolithic system is state of the art. These also apply to Power Platform, PowerApps, and Power Automated Flows. You don’t have to solve every problem with the same technology! In other words, sometimes it’s better to build a microservice for Power Platform to improve your apps and flows.
This is especially true if your PowerApps or Power Automated Flows require additional power in terms of speed or functionality for a certain data processing. Here, one approach is to build a tiny microservice as an API for Power Platform. I like this pattern for my solutions because it also provides greater scalability, flexibility, and efficiency, and of course increases the maintainability of the overall system.
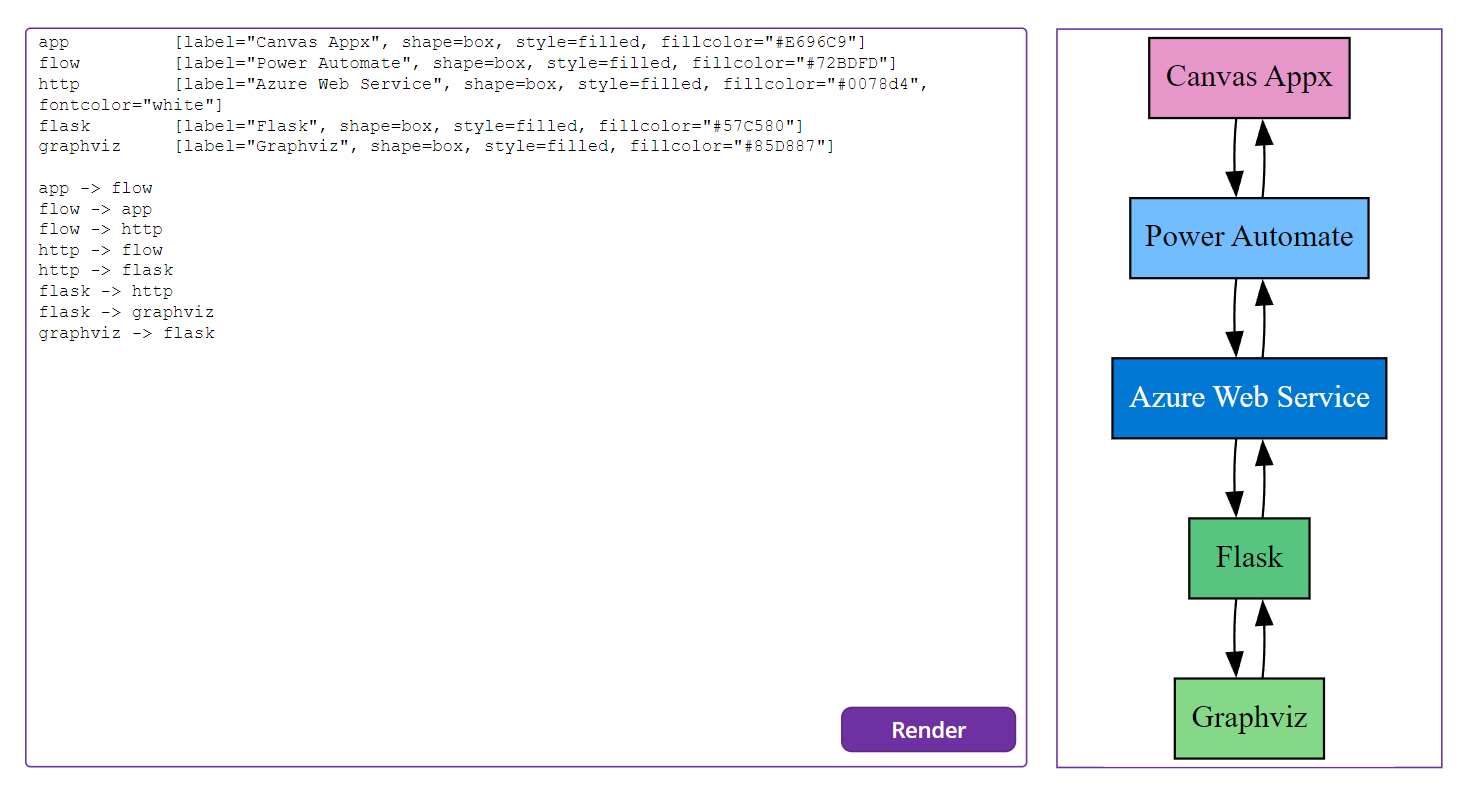
But wait, what does this mean in reality? How can I build such a microservice for Power Platform? Here is an example: I want to render a dependency diagram in my canvas app based on my input.
Let’s start from scratch and build a small microservice together as an API for my canvas app in Power Platform. I will also take you on a pro-developer journey and show you some “pro-code”. In detail, I create an API in Python, containerize my created service in a Docker container and host this container as an API in Azure. Finally, I’ll show you how I use a Power Automate flow to access my microservice in my canvas app.
Graphviz
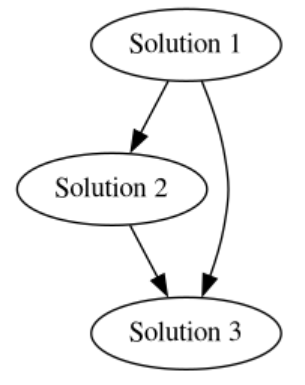
I have previously shown that I use Graphviz in my PowerApps Helper extension. Graphviz is a powerful open-source graph visualization software used for creating diagrams of abstract graphs and networks. In other words, that library turns graph information in DOT language like this:
A [label="Solution 1"]
B [label="Solution 2"]
C [label="Solution 3"]
A -> B
B -> C
A -> C
… into a rendered diagram like that:
Note: It is necessary to download and install Graphviz before utilizing the Graphviz rendering engine through any libraries.
That is not a problem for me. I have installed this on my local machine.
Graphviz with Python
Using Graphviz with Python is a great choice due to its popularity as a programming language. The graphviz library can be easily integrated with Python to create and render graphs in various formats such as PNG, SVG, PDF, or display it in an interactive graph browser.
First of all, I have to install some libraries. This is because I want to use graphviz in my python code. I install “graphviz” and “pydot” by using “pip”:
pip install graphviz
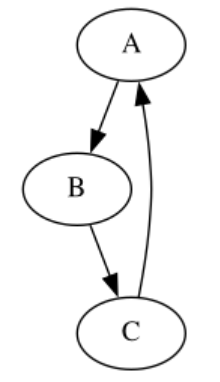
pip install pydotAfter installing that libraries, I’m able to render a simple graph and export this generated diagram into a PNG image. In other words, I can run the following Python code:
from graphviz import Digraph

# Define graph
graph = '''digraph {
    A -> B;
    B -> C;
    C -> A;
}'''

# Render graph
rendered_graph = render(graph, format='png', engine='neato')

# Save graph to file
with open('graph.png', 'wb') as f:
    f.write(rendered_graph)
The resulting image is shown below:
Render a Diagram
Based on my initial example, I have written a function that provided a simple and effective way to create and render graphs using the graphviz library in Python:
# Import the Digraph class from the graphviz library
from graphviz import Digraph

# Set default values for the rendering engine and output format
default_engine = 'dot'
default_format = 'svg'

# Define a function to render a graph with Graphviz
def render(graph, format = default_format, engine = default_engine):

    # Create a Digraph object with the given format and engine
    d : Digraph = Digraph(
        format   = format or 'svg',
        engine   = engine or 'dot'
    )

    # If a graph is provided, add it to the Digraph object
    if graph:
        d.body.append(graph)
    # Otherwise, add a default node with the label "GraphViz"
    else:
        d.body.append("""node [label="GraphViz"]""")

    # Return the rendered graph in the specified output format
    return d.pipe()
In my code snippet, I use the graphviz library to render a graph. The Digraph class is imported from the graphviz library, which is used to create a directed graph. Additionally, default values for the rendering engine and output format are set. My render function is defined to render the graph with the given format and engine. If a graph is provided, it is added to the Digraph object. If not, a default node with the label “GraphViz” is added. The rendered graph is then returned in the specified output format.
Graphviz as Microservice
Well done. I created a small function in Python that returns my chart in the expected format, for example as an image. But this solves not really my initial problem. I know not everyone is able to install the Graphviz library on their local machine.
For that reason, I want to wrap that rendering engine with its functionality and a small API. In other words, I build the graph remotely in my microservice and return the created diagram – the image – to my consumer in Power Platform.
Python Flask
Now, I am happy to introduce Python Flask to you, a popular micro web framework that allows developers to build web applications using Python. Furthermore, Flask is lightweight and flexible, making it easy to get started with and customize to suit your needs. It provides a wide range of features such as routing, handling HTTP requests and responses, template rendering, and more. In other words, Flask helps me create a micro service that hosts my functionality.
For Flask I need another library. I use again pip to install “flask”:
pip install flask
After Flask is installed, I can run that small example:
from flask import Flask

# Create a Flask app
app = Flask(__name__)

# Define a route for the root URL
@app.route('/')
def hello():
    return "Hello, World!"

# Start the Flask app
if __name__ == '__main__':
    app.run(port=80)
In my example, a web service starts on port 80 and returns “Hello World!”.
Graphviz on Flask
Let’s add my render function to this web service and create a micro API. This means, I want to create an API for my functionality “render” with my arguments “graph”, “format”, and “engine”. Furthermore, my web service should return the rendered image.
In detail, I create a new route “render” with a mandatory parameter “graph”. Since a graph can be very large, I want to pass the graph data as whole request body (plain text) into my web service. That means also, I use the POST method. Additionally, my optional arguments are query parameters “format” and “engine”.
To sum up, my expected web request is this:
POST http://127.0.0.1:80/render?format=png&engine=dot
Content-Type: text/plain

A -> B;
B -> C;
C -> A;
Finally, my web service response must return my diagram and also the correct content format. That means, when I expect a png image, my HTTP Content-Type in my response should be: “image/png”
Here is a simplified example of my implementation:
# Define a route to receive the graph and return the rendered graph
@app.route("/render", methods=['POST'])
def render():
    queryParameters = request.args
    # Get the parameters
    format = queryParameters['format'] if 'format' in queryParameters else default_format
    engine = queryParameters['engine'] if 'engine' in queryParameters else default_engine
    graph = request.get_data(as_text=True)

    # TODO ...
    rendered_graph = ...
    content_type = ...

    # Return the rendered graph
    return Response(
        status=200,
        response=rendered_graph,
        headers={"Content-Type": f"{content_type}"}
    )
The whole example can be found in my Github repository:
https://github.com/megel/mme2k-graphviz
Containerize a Microservice
When I containerize a microservice, I package it with all its dependencies and configuration files into a container that can run in any environment. This makes it easier to deploy and run the microservice on different machines without worrying about compatibility issues. It also ensures that the microservice runs in a consistent and isolated environment, making it more secure and reliable.
In detail, I don’t need to install graphviz on my consuming client machine. I install graphviz and all it’s dependencies in my Docker container image.
Graphviz as Docker Container
To run my API with graphviz, I require a suitable Docker image. I use a lightweight image “python:3.8-alpine” as the base and install graphviz. Afterwards, I install also my Python dependencies from “requirements.txt”. Finally, I add my Python Flask application to the container image and set up my container entry point and execute my Flask app.
The resulting Docker image (Dockerfile) is shown here:
FROM python:3.8-alpine as base

# Installs graphviz
RUN apk add --update --no-cache \
            graphviz \
            ttf-freefont


RUN mkdir /app

# copy the requirements file into the image
COPY ./requirements.txt /app/requirements.txt

# switch working directory
WORKDIR /app

# install the dependencies and packages in the requirements file
RUN pip install -r requirements.txt

COPY app.py /app/app.py

WORKDIR /app
# configure the container to run in an executed manner
ENTRYPOINT [ "python" ]

CMD ["app.py"]
In my next step, I build a local docker image based on this Dockerfile. Afterwards, I create a Docker container from the generated image. Here are my commands executed in my “app” folder:
# Build the container locally
docker build -t mme2k-graphviz .\src\.

# Start the container locally
docker run --name mme2k-graphviz -p 80:80 -d mme2k-graphviz:latest
My service is running on Docker Desktop:

That means, I can test my container service with VS Code and RESTClient. I execute this HTTP request:
@host = http://127.0.0.1:80
POST {{host}}/render?format=png&engine=dot
Content-Type: text/plain

"Grapviz on Python Flask rocks!" [shape=box, fontname="sego ui", style=filled, fillcolor="#ccdee0"]
And my container service returns my graph as an image to VS-Code:

Finally, I push my container to a Container Registry in Azure, AWS, or to Docker Hub.
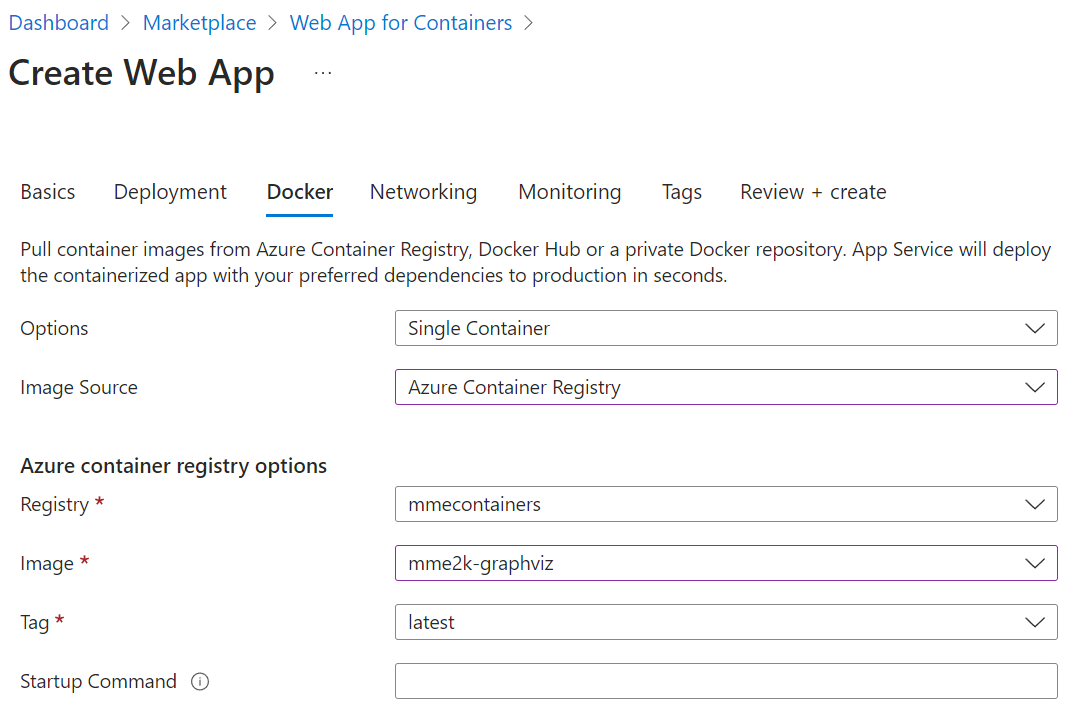
Hosting my Web Service
There are several options to host my web service. I use here for the sake of simplicity an Azure Web App based on my Docker container. Here are some of my used settings:
As result of my deployment, my Web Service is running on Azure:

I can test this also from VS Code:
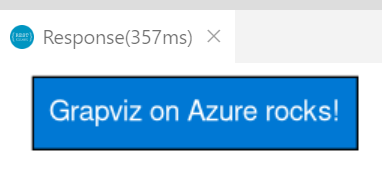
@host = https://mme2k-render-graph.azurewebsites.net
POST {{host}}/render?format=png&engine=dot
Content-Type: text/plain

"Grapviz on Azure rocks!" [shape=box, fontname="sego ui", style=filled, fillcolor="#0078d4", fontcolor="white"]
As expected, my result is presented to me as image:
Microservice for Power Platform
My microservice is now in place. In other words, my service is ready to use. All I need is to call my service with the right parameters. I want to use Power Automate Flow for this job.
First of all, I create a new solution in Dataverse. Afterwards, I add an Environment Variable (Text) for my service URL. I do this, because I want to configure my solution later during rollout without changing my Power Automate Flow. This is in my opinion a good practice.
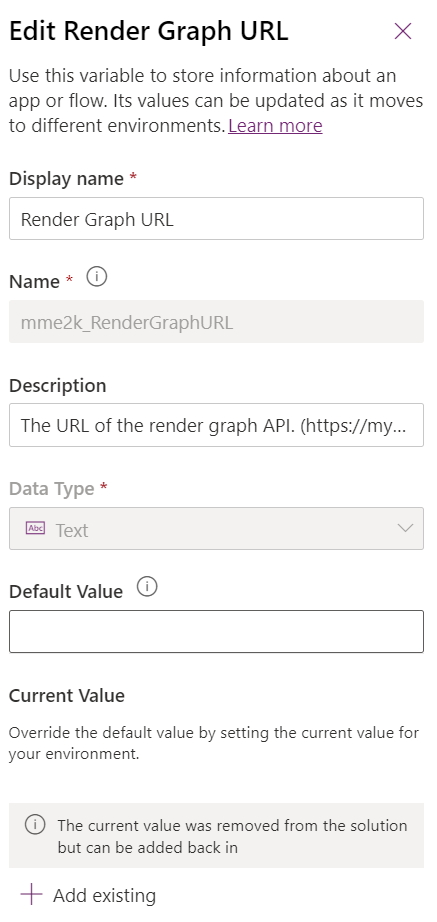
Furthermore, I configure the Current Value with my service URL. Finally, I exclude the current environment variable value from my solution.
Calling my API from Power Automate Flow
Now it is time to create a Power Automate Flow with some one parameter. I use the PowerApps (V2) trigger for this. Additionally, I add an HTTP Request action to my flow, where I use my environment variable together with the correct parameters shown in my screenshot.

Finally, I return the result Body from HTTP Request by using an action Respond to a PowerApp or flow.
Consuming my Microservice in a Canvas App
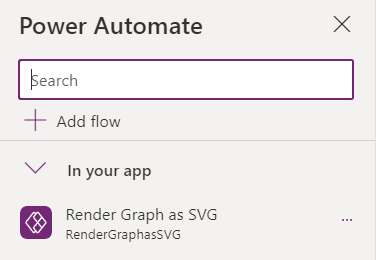
Last but not least I create a new canvas app in my solution. Furthermore, I add my Power Automate Flow as datasource to my canvas app:
My canvas app UI is not so complex. I add a text input, a button, and an image. My trigger “OnSelect” of my button run my Power Automate Flow with the content of my text input. The result is stored in a local variable:
OnSelect := Set(svg, RenderGraphasSVG.Run(edGraph.Text).svg);As result, my variable contains this content:

You see, I need to do some extra work. There is a “<?xml …>” tag and a HTML comment before my svg-content starts. In other words, I can remove everything before “<svg”. Finally, I create a valid image content for my image control. Here is the code:
Image := "data:image/svg+xml;utf8, " & EncodeUrl(Replace(svg, 1, Find("<svg", svg) - 1, ""))Well done! The result is rendered correctly in my canvas app:
Summary
Firstly, I described how I use Graphviz to create diagrams in Python. Furthermore, I explain how to install the necessary libraries and provided you code examples for rendering and exporting a simple graph. Afterwards, I introduced Flask, a popular micro web framework to you and showed how you can build a small web applications using Python.
As next step, I have containerized my microservice with Docker and tested the result locally. In order to access my service online, I have setup an Azure Web App. Finally, I have created a Dataverse solution and used my microservice in a Power Automate Flow. Last but not least, I built a canvas app as user interface and called my Power Automate Flow.
But the best comes at the end. Here is the link to my Github repository with all the shown code. I have added my microservice based on Flask, the Dockerfile, some HTTP examples, and my Dataverse solution. You find the repository here: https://github.com/megel/mme2k-graphviz
Have Fun & Never-Stop-Learning!