
Amazon S3 Bucket (Independent Publisher)
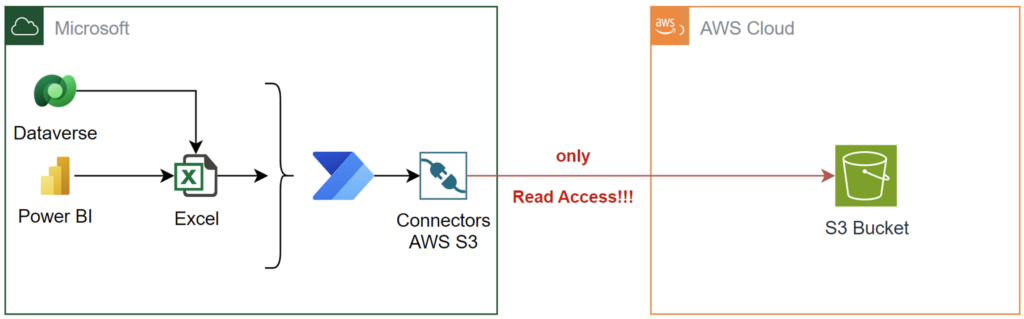
Using AWS S3 buckets from Microsoft Power Platform is limited when you use standard connectors. In other words, you can list buckets and read the content of objects. But you can’t move your data to an AWS S3 bucket with the standard connector. So, what can I do? Right, a custom connector for AWS S3 is the solution.
But my journey to a working connector was not so easy as expected. In other words, I faced challenges and solved a lot of problems. Here is the whole story…
Standard Amazon S3 Connector
In the beginning a short wrap up. This means, yes you find a standard connector for S3 when you start searching in Power Platform. This connector is available for Power Apps, Power Automate, and for Logic Apps. Here is the documentation https://learn.microsoft.com/en-us/connectors/amazons3/.
A closer look on this connector shows, it provides only Get and List operations:
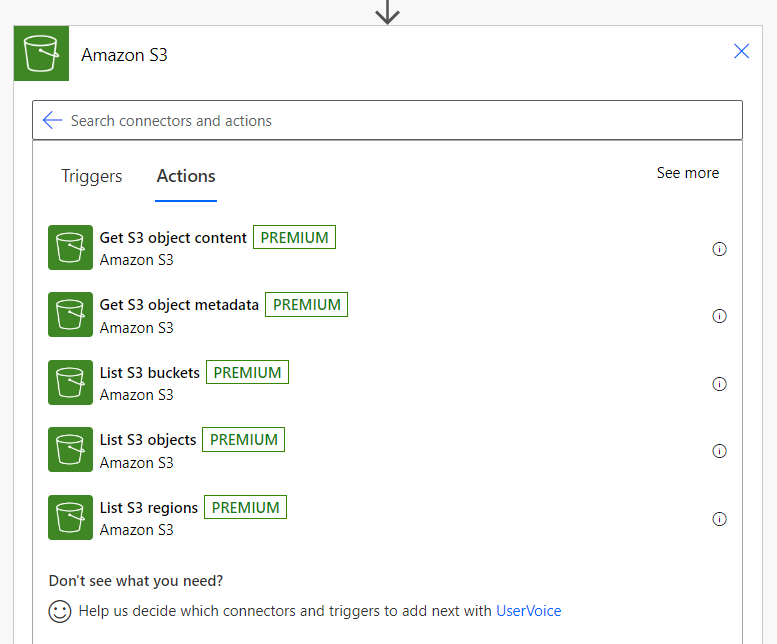
In conclusion, I can use the standard only for reading information from S3!
Well, this is my problem. I also want to write files to my S3 buckets. The question is, what can I do?
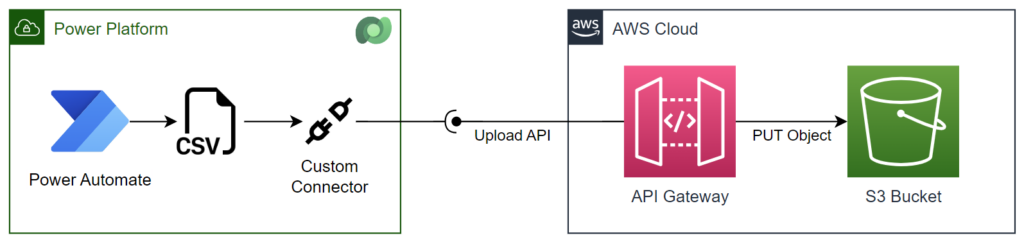
Here is the solution that I have already presented a couple months ago in my blog post. The outcome, I could Upload Files into AWS S3 Bucket with Power Automate. But I must also create an API Gateway in AWS for my solution:
On the other hand, my custom connector provided write access for AWS S3. However, this brought me to a new question. Can I create another custom connector for AWS S3 without a component in AWS?
AWS S3 API
A closer look to the AWS S3 API operations shows me, this is not an issue. The API provides all the needed operations for me. I already recognized; I can create a custom connector with write operations.
This means, in my new connector I will also implement these operations:
- List Bucket to list all objects in my S3 bucket.
- Get Object to read a single object from S3.
- Put Object to store my data in an object in S3. Which means also to create and update an object.
- Delete Object to delete the object from S3.
The URL for all these operations is simple. Here is an example:
https://{bucket_name}.s3.{region}.amazonaws.com/{key-name}As you see, I must modify the hostname in my connector. But there is hidden a challenge. Yes, I also must sign every single request with my AWS credentials.
Mastering AWS Signature v4 for S3 Buckets
The details about creating a signed request can be found in AWS docs. To shorten this let me explain. I have to add for each of my requests a signature similar to this:
Authorization: AWS4-HMAC-SHA256
Credential=AKIAIOSFODNN7EXAMPLE/20130524/us-east-1/s3/aws4_request,
SignedHeaders=host;range;x-amz-date,
Signature=fe5f80f77d5fa3beca038a248ff027d0445342fe2855…30326f1024
The specification of Authenticating Requests (AWS Signature Version 4) explain how I can create this signature. It starts by creating a signable string of which represents my request:
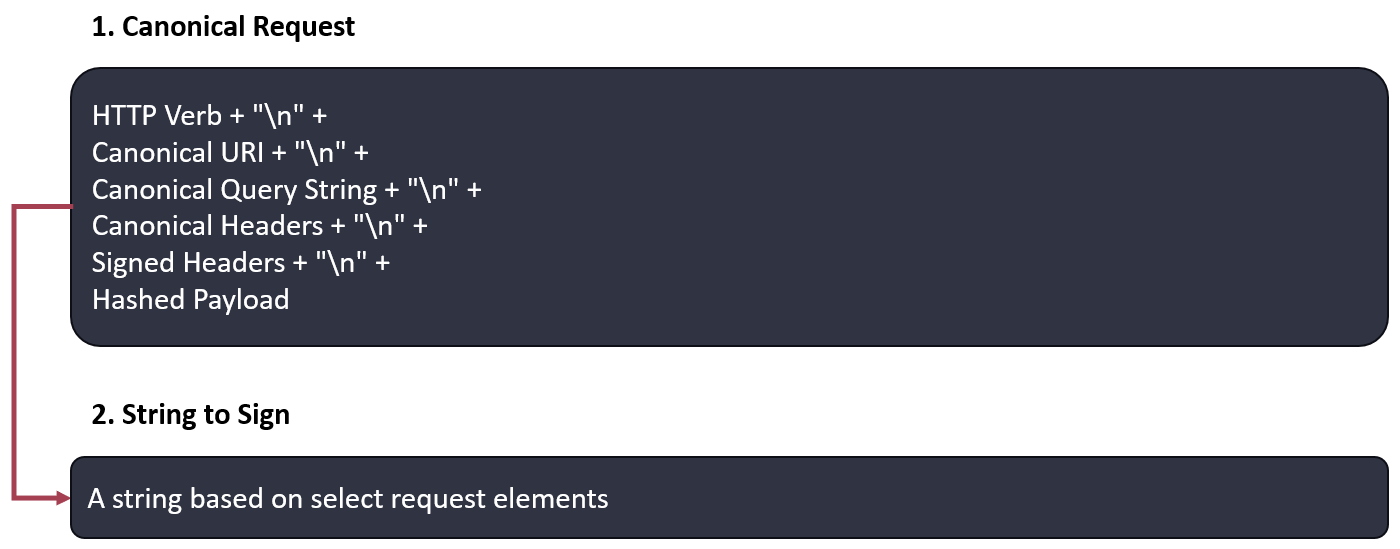
Correctly, this string is built from HTTP verb, my URI, my query strings, my headers, and my hashed payload.
Afterwards, this string is signed with the date, the AWS region, and finally with my AWS Access Key Secret:
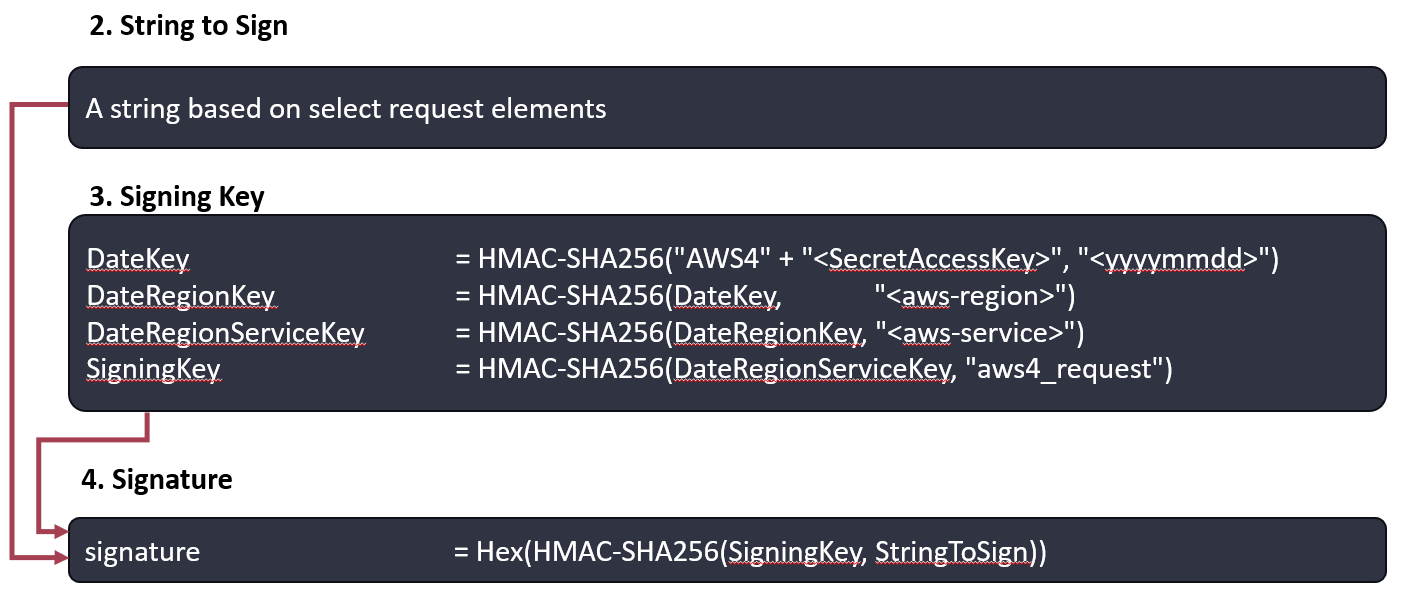
Correctly, the generated key includes the date. This ensures that the signature can only be used for a very short time. That’s why I must sign every single request in my custom connector. For No-Code development this is a real challenge…
But there is also good news. I have found a C# example for Amazon S3 Buckets that includes the source code to generate and test AWS signatures v4:
https://docs.aws.amazon.com/AmazonS3/latest/API/sig-v4-examples-using-sdks.html
Based on this, I created my own source code for my custom connector. Yes, I followed Microsoft Docs to write code in my custom connector:
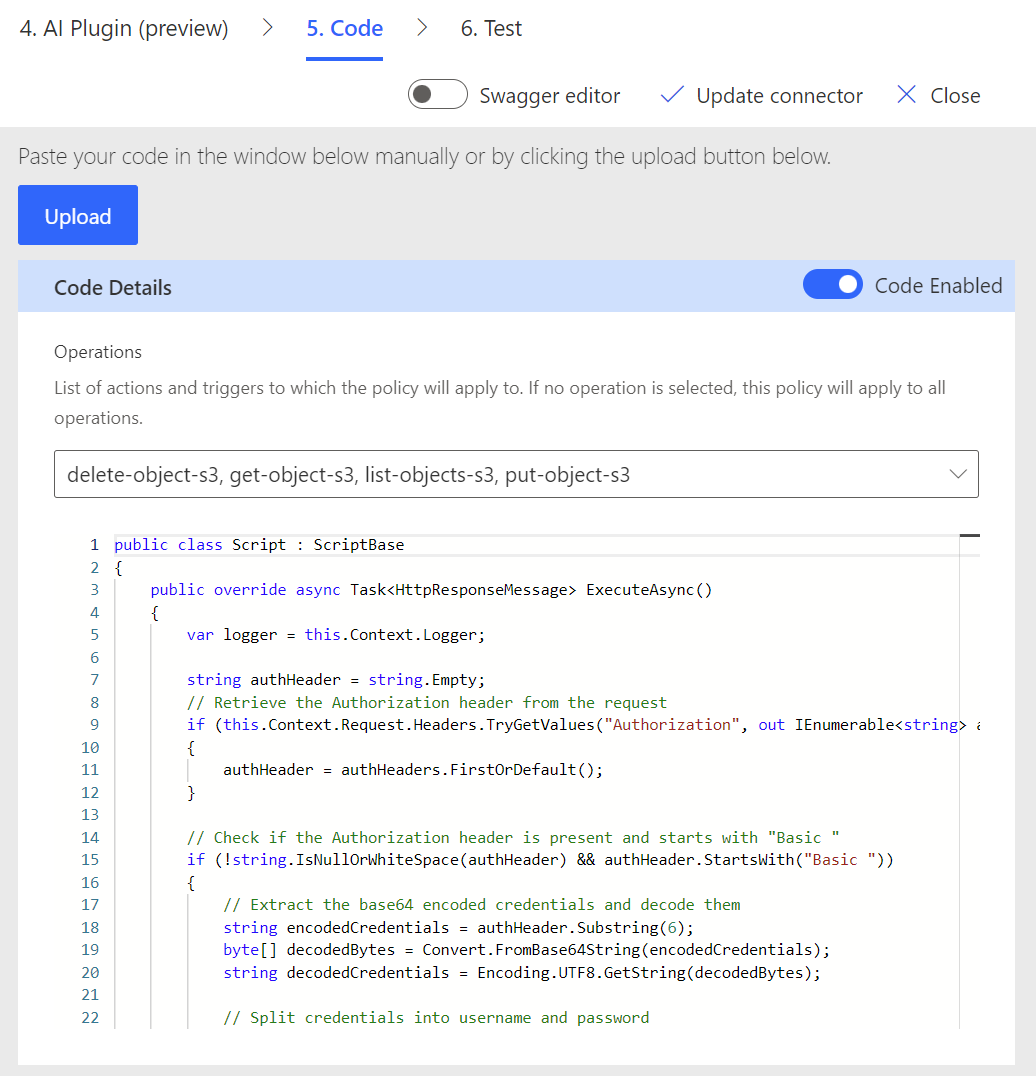
As result, my connector signs now each request to AWS S3 with the correct signing key:
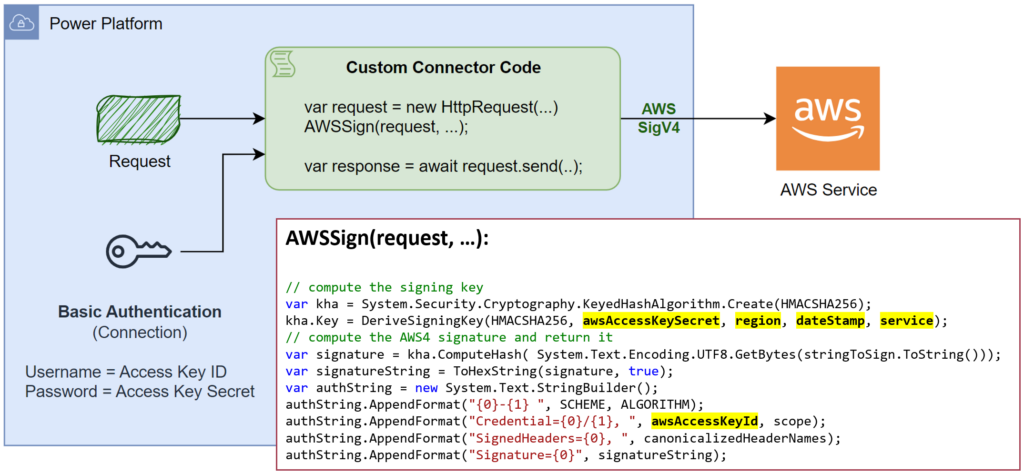
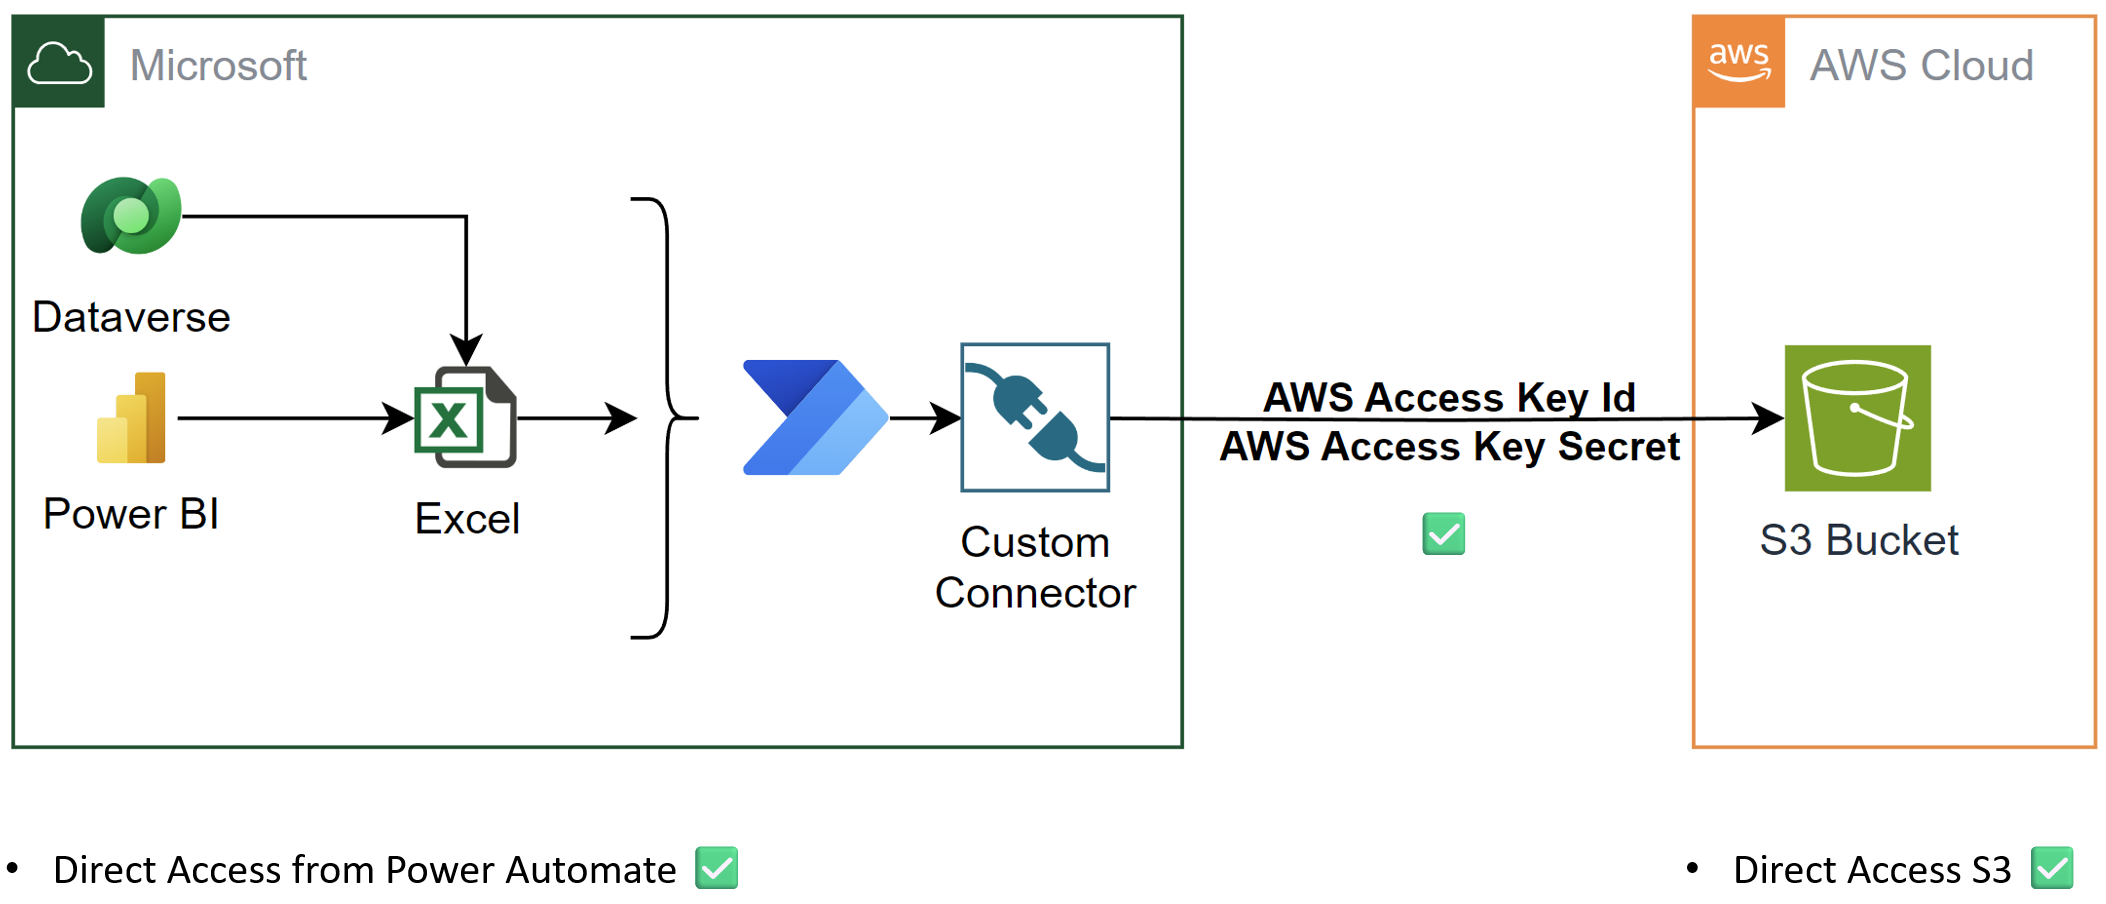
You also see from the picture above; I have used Basic Authentication to store the AWS Access Key ID and Access Key Secret. Furthermore, I’m using this in my code to generate the correct signature.
Independent publisher
This works perfectly for me, but I know you might also face the same problem. For that reason, I have published my custom connector to Microsoft’s Independent Publisher program. This means, you can benefit from my work and enjoy the read and write access to AWS S3 buckets with my custom connector.
Custom connector for AWS S3 Bucket
In detail, I have submitted last year my Amazon S3 Bucket connector in Microsoft’s community GitHub repository https://github.com/microsoft/PowerPlatformConnectors/ as open source contribution.
This procedure is not so difficult. I forked the Microsoft repository into my own account. you can find my connector here: Source Code of Amazon S3 Bucket. Afterwards, I created a pull request and this was merged February into Microsoft’s dev branch.
This means, now it appears also in Microsoft Docs as Amazon S3 Bucket (Independent Publisher) connector:
Yes, my connector is officially accepted, and you can use it.
Import Amazon S3 Bucket Connector from Source Code
Normally, you can import independent connectors directly from Power Platform and GitHub. Today I will show you, my way.
First, I’m cloning the repository in VS Code and checkout the dev branch:
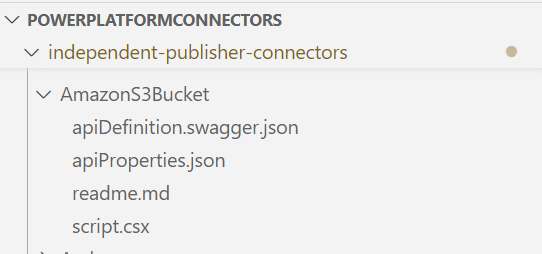
You see, my connector files are there. Perfect!
Now I navigate in my VS Code terminal to the right folder. Here I import my connector with the Power Platform CLI. Yes, this is my favorite tool for this job.
In addition, I import my custom connector into my previously created solution AWSS3. Here is my command to import my connector from source code:
pac connector create -df .\apiDefinition.swagger.json -pf .\apiProperties.json -sf .\script.csx -sol AWSS3Note: Before, you must authenticate within PAC on your target environment.

Some seconds later, my connector appears in my solution:
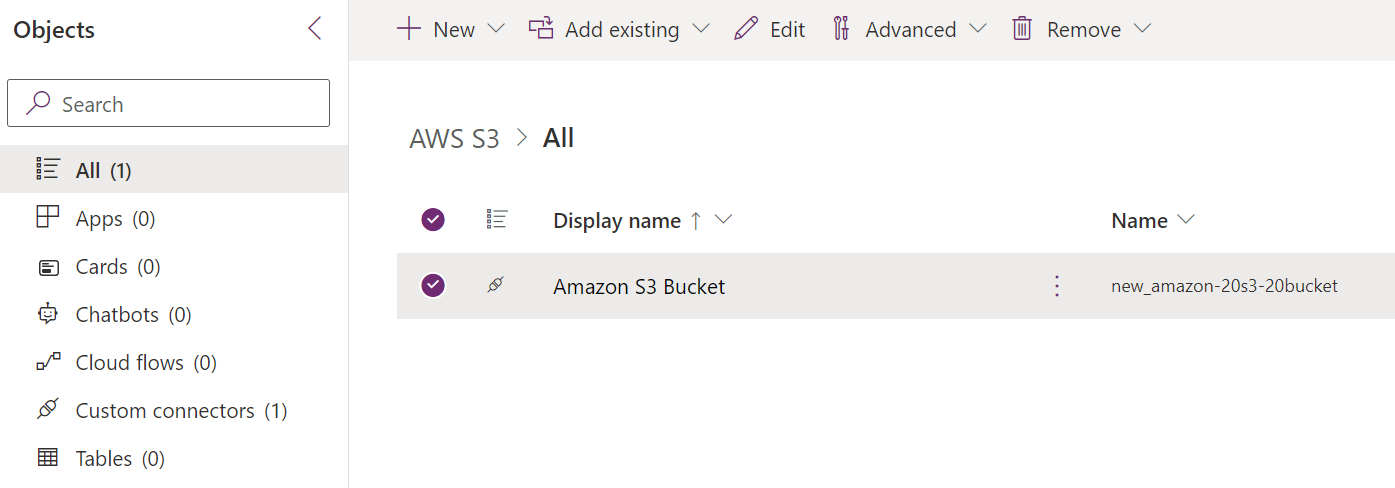
Now I can start and set up a new Power Automate Flow with my connector:
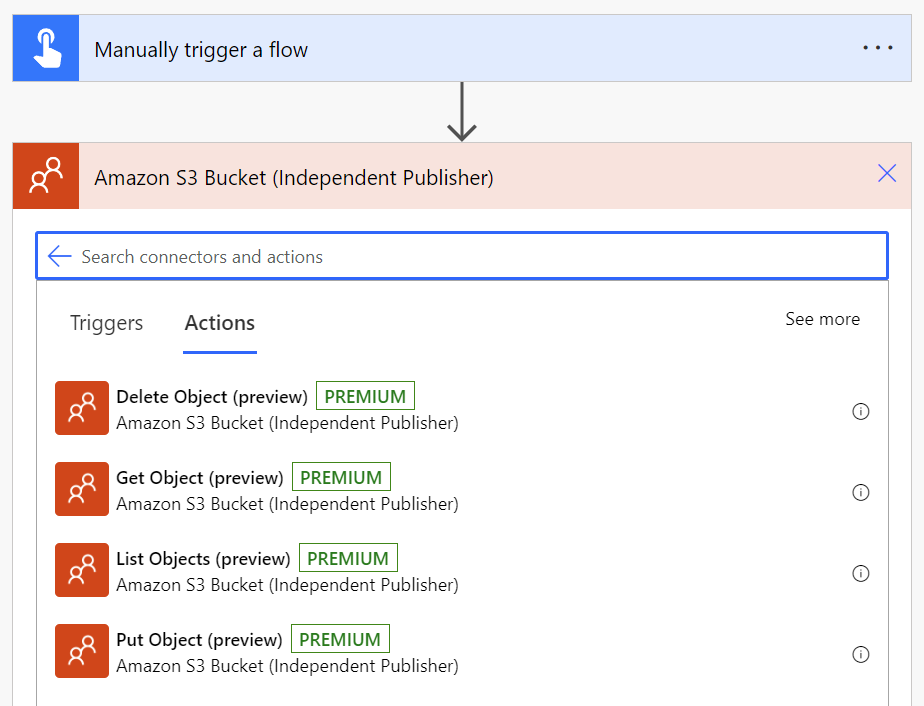
…and as promised, I can read and write data from and to S3.
Summary
Sometimes a standard connector in Power Platform is not enough to automate a process. In my example, Microsoft’s standards Amazon S3 connector provided only read access. But I needed write access and decided to create my own connector.
First, I reviewed the underlying API and checked my options. I discovered that I must sign each individual request to an AWS service with a correct signature based on the Access Key Id and Access Key Secret. I found C# code, which I have refactored and used as custom connector code. This was the moment, as I solved my initial problem. I created a working custom connector for AWS S3 with read and write access:
No, I didn’t stop there. I published my connector as part of Microsoft’s independent publisher open-source project. Now, everybody can benefit from my solution.