Power Automate – Sending Overdue Notifications
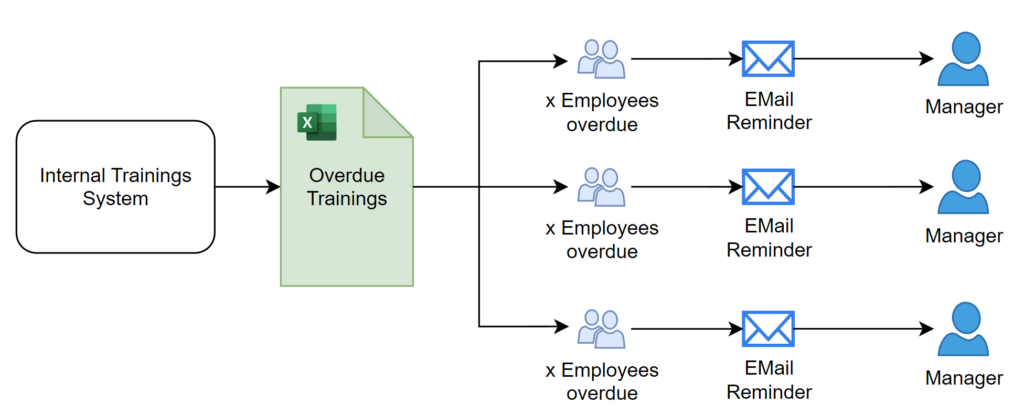
Recently a colleague reached out to me and asked me: “Hey Michael, how can I automate sending of overdue notifications for missed training? ” I answered: “You can achieve this using Power Automate!” Upon further examination of the use case, I discovered that my colleague exports information from an internal training system into excel and stores the file in OneDrive.
A closer look to the workflow showed me this:
My colleague manual task is this:
- Grouping all Employees by respective manager.
- Filtering these groups by employees that are more than 50 days overdue with their training.
- Sending an Email reminder to the respective managers about its employees and the missed training.
Let’s start!
Demo Data
First, I need some demo data. In detail, I need an excel file that contains information about managers, their employees and missed training. Moreover, I already explained in Using GenAI – Create Demo Data how I used my Microsoft Azure OpenAI chatbot to generate this data.
You see the result here:
In addition, I have stored this file in my OneDrive. This is perfect to demonstrate how I utilize Power Automate Flow to read this file, group and aggregate the data, and send emails to the respective managers.
Solution
I always start in Dataverse with a solution. For this I navigate in Power Automate to my solutions and create a new solution:
Next, I give my solution the name Send Overdue Notifications and select my Publisher:
I do this, because my solution is a container for my Power Automate Flow and its connection references. You’ll see this later.
Add Connection References
A connection reference is a part of a solution. In detail, the connection reference includes information about a connection related to a specific connector. This means, when I transport or import my solution, I just have to set up the connections for all of my connection references.
I usually start creating the connection references before I create my Power Automate Flow. This is because here I can specify the names of the connection references. In consequence, I create a new connection reference:
My best practice is, I use the solution letters as a prefix for all my connection references. This helps me to select the right connection reference in my Power Automate Flow actions and triggers:
I have setup connection references for Excel Online (Business) and for Office 365 Outlook:
Perfect, my preparations are complete.
Creating my Flow
Now I start creating my Power Automate Flow from my solution:
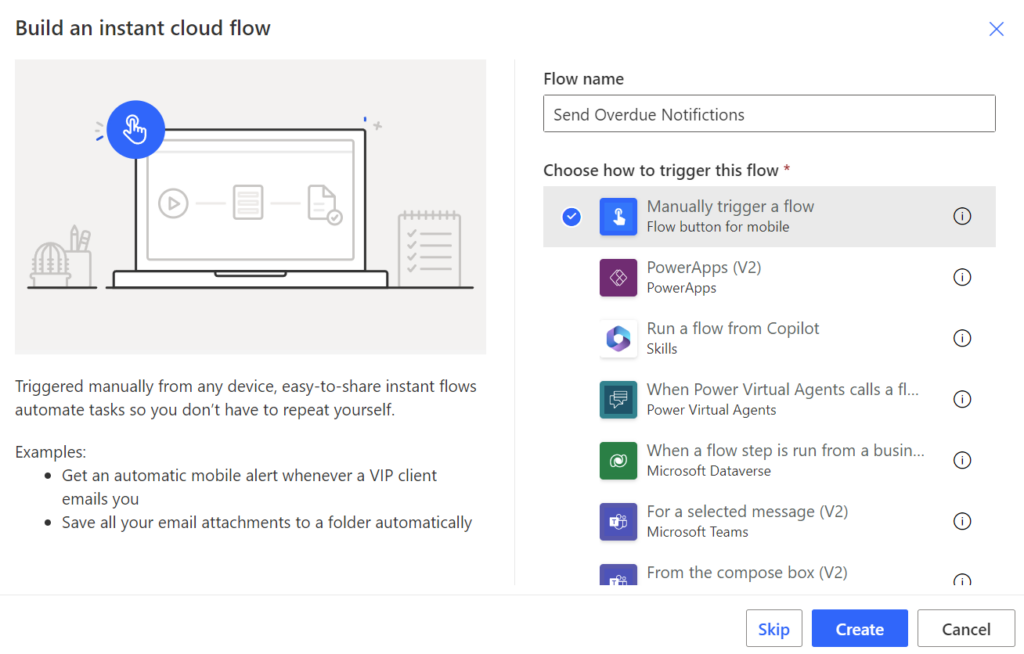
I use an instant flow which is manually triggered:
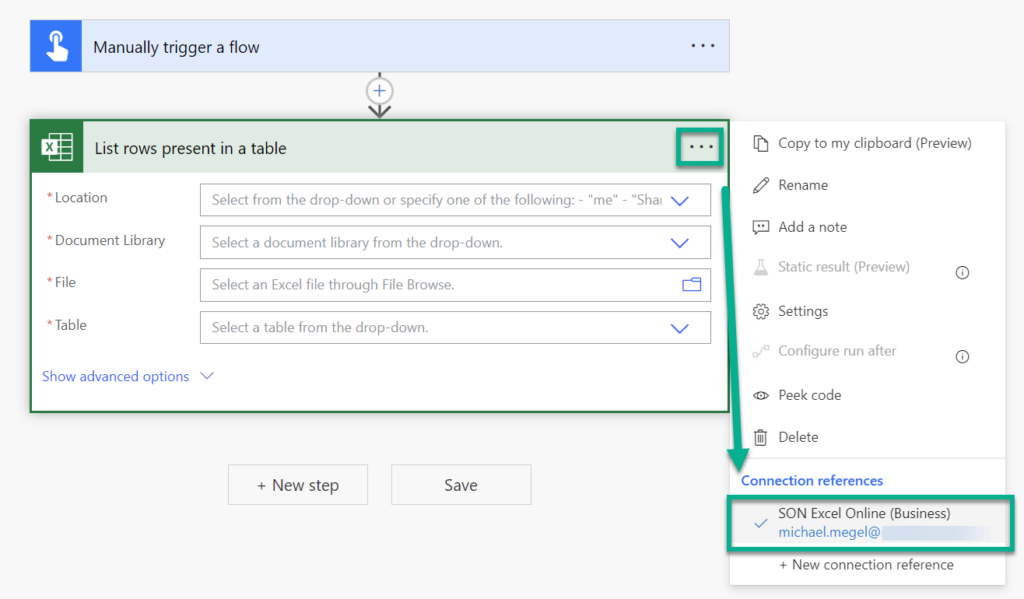
Additionally, I have added my first action List rows present in a table from Excel Online (Business) to my created flow. Now I can also double check that my action uses the correct connection reference:
Finally, I configure my Excel Online (Business) action and select my table stored in my OneDrive for Business.
Transforming my Data in Power Automate
Let’s have a look at my demo data, before I start explaining my example:
| Manager | Manager EMail | Employee | Overdue Days | Training |
|---|---|---|---|---|
| John Smith | john.smith@example.com | Mark Johnson | 45 | Safety Training |
| John Smith | john.smith@example.com | Sarah Davis | 60 | Sales Training |
| Robert Patel | robert.patel@example.com | David Kim | 35 | Customer Service Training |
| Emily Chen | emily.chen@example.com | Lisa Nguyen | 77 | Time Management Training |
| Michael Davis | michael.davis@example.com | James Brown | 50 | Leadership Training |
| John Smith | john.smith@example.com | Lisa Davis | 40 | Sales Training |
| Robert Patel | robert.patel@example.com | Sarah Kim | 70 | Customer Service Training |
You see, my managers are multiple times present in the data. This means each of the 4 managers must be notified with a single email.
Grouping by Managers
First, I must group my data by manager. I start with a Select action and use as fields Manager and Manager EMail:
The result is then this:
[
  {
    "Manager": "John Smith",
    "Manager EMail": "john.smith@example.com"
  },
  {
    "Manager": "John Smith",
    "Manager EMail": "john.smith@example.com"
  },
  {
    "Manager": "Robert Patel",
    "Manager EMail": "robert.patel@example.com"
  },
  {
    "Manager": "Emily Chen",
    "Manager EMail": "emily.chen@example.com"
  },
  {
    "Manager": "Michael Davis",
    "Manager EMail": "michael.davis@example.com"
  },
  {
    "Manager": "John Smith",
    "Manager EMail": "john.smith@example.com"
  },
  {
    "Manager": "Robert Patel",
    "Manager EMail": "robert.patel@example.com"
  }
]
Next, I reduce this data by using a Compose action (Data Operations) and rename the action to Managers:
I use union(…) as formula to reduce my data:
union(body('Select_Managers'), body('Select_Managers'))The execution result is now a unique list of my managers:
[
  {
    "Manager": "John Smith",
    "Manager EMail": "john.smith@example.com"
  },
  {
    "Manager": "Robert Patel",
    "Manager EMail": "robert.patel@example.com"
  },
  {
    "Manager": "Emily Chen",
    "Manager EMail": "emily.chen@example.com"
  },
  {
    "Manager": "Michael Davis",
    "Manager EMail": "michael.davis@example.com"
  }
]
Now I can start to iterate over this collection and filter my managers employees.
Filtering the Employees
Now, I add an Apply to Each action to my flow. Moreover, I use output from my added compose action Managers as the input for my Apply to Each Manager action:
Next, I add another Compose action Current Manager to my flow:
The expression of this action is:
@items('Apply_to_each_Manager')As result, the compose action will contain a value of this structure:
{
  "Manager": "...",
  "Manager EMail": "..."
}
Next, I use the Filter Array action for filtering my employees by the actual manager:
As parameter From I use the value of my initial excel list. Furthermore, I compare the item value Manager with the value of Current Manager Manager. The action code is this:
{
    "inputs": {
        "from": "@outputs('List_rows_present_in_a_table')?['body/value']",
        "where": "@equals(item()?['Manager'], outputs('Current_Manager')?['Manager'])"
    }
}
Perfect, with this I get as result a filtered list of my employees based on the current manager. I also give my Filter array action a better name like Filter Employees by Manager.
Sending Email Reminder as Overdue Notifications
As the final step I first will check if the list is empty. In other words, I don’t send an email to the manager, when no employe have an overdue task.
This means, I’m adding first a condition action with the name When Overdue Employees exist:

Here I check if the length of my filtered list is greater than 0. My expression is this:
length(body('Filter_Employees_by_Manager'))If yes, I will convert my list into more meaningful content. I do this by using a Select action where I generate a well formatted array, followed by a Create HTML table action:
The Create HTML table action ensures that my table is converted into HTML text.
Afterwards, I’m adding a Send an email (V2) action and configure it:
I use for the parameters To this expression:
outputs('Current_Manager')?['Manager Email']The code of my Body parameter is this:
<p>Hi @{outputs('Current_Manager')?['Manager']},<br>\n<br>\nThe following employees are overdue with their training:<br>\n<br>\n@{body('Create_HTML_table')}</p>Finally, here is an example of the sent message:
Perfect, my Power Automate Flow is sending overdue notifications!
Summary
Sending overdue notifications with Power Automate Flows is an easy task. In this guide, I demonstrate how I automate overdue training notifications using Power Automate. I began by creating demo data in my OneDrive, utilizing Azure Open AI.
Next, I shared some best practices with you to enhance your development skills as a Citizen Developer. For example, I created a solution and set up connection references before starting to build my Power Automate Flow.
Finally, I detailed how I group and filter information from the Excel file in OneDrive. Furthermore, I showed all the steps I used to generate and send the overdue notification email to the manager.


