Application Lifecycle Management for PowerApps: Solutions
Once you have started setting up DEV, TEST and PROD environments in Datavers, the next big question arises. How can I transport all my stuff to the next deployment stage? It’s not just my model-driven or canvas apps. I have to take care of their dependencies as well, of course. There are all my used cloud flows, custom connectors, Dataverse tables and much more.
In the beginning, as a citizen developer, I transferred every part manually. This means, I exported my model-driven or canvas apps, cloud flows and custom connectors from my DEV environment. After that, I started importing them manually into TEST. And yes, most of the time something was missing or incompatible. I wasted al lot of time to figure out – what I forgot.
In conclusion I need something to package all my needed components in a consistent state. I need a solution!
Solutions
Microsoft says: “Solutions are used to transport apps and components from one environment to another…”. In other words, I can use a Solution to transport all my stuff from DEV to my other staging environments.
Much better, a solution help me to handle the Application Lifecycle Process for my apps including its components. This is because a solution can be installed, updated, upgraded, patched, and removed from a environment. In other words: “A solution is fantastic”
My first Solution
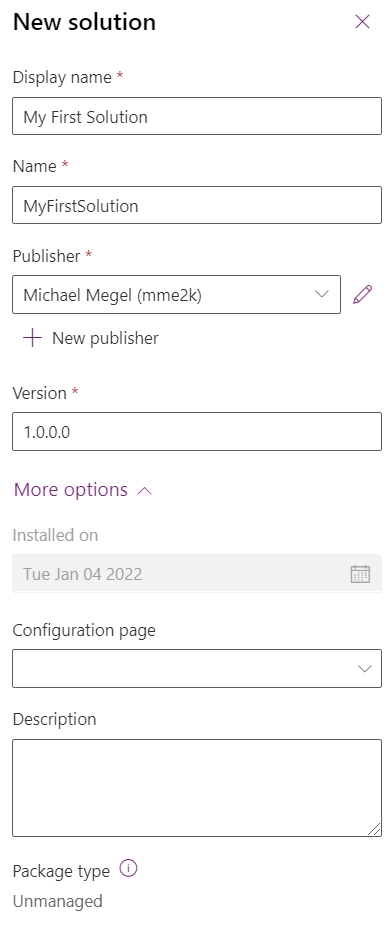
To get started, I have to create a solution for my canvas app. I need to specify a display name, a solution name, a publisher including the solution prefix, and other information like initial version as well as a description.
After that, I can add new or my existing components to my solution. In other words, I can add my canvas app and it’s dependencies like a cloud flow or a custom connector to my created solution.

As result my solution look as follows:
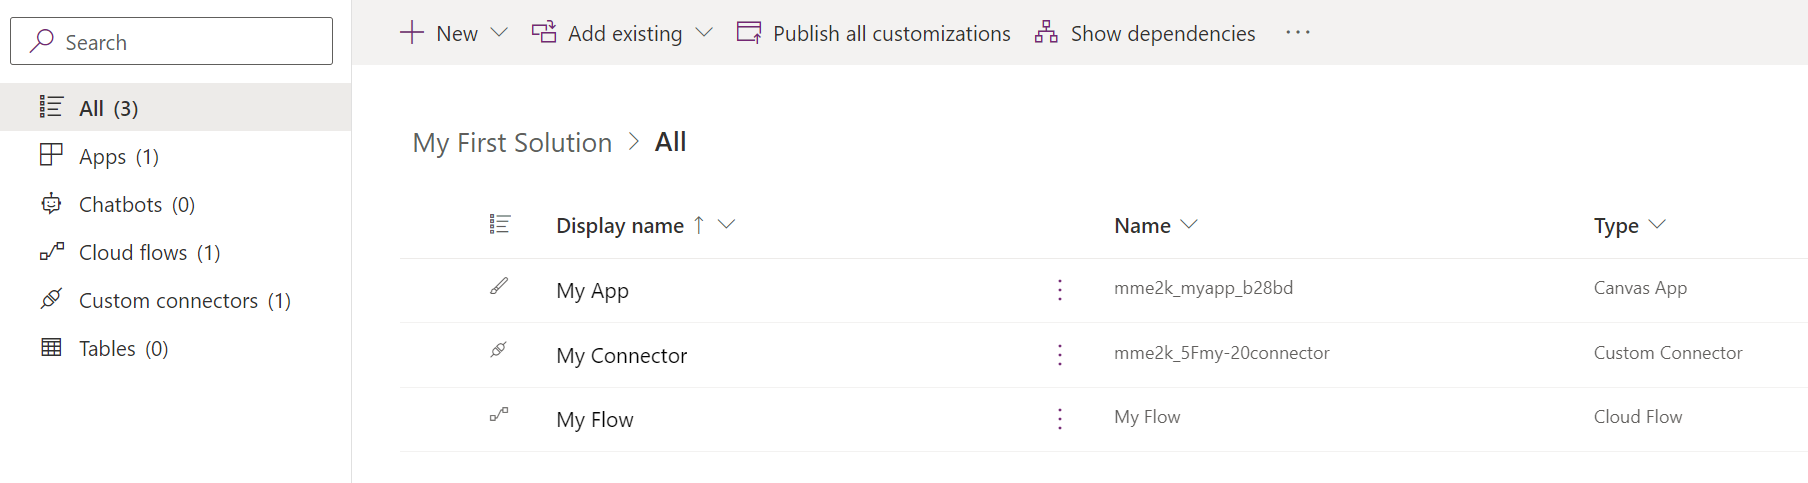
The first benefit, everything is in one package in a compatible state. Furthermore, now I can do a manual transport much easier by using the solution export and import mechanism.
Solution Export
The export is simple. I navigate to the solution overview and start my solution export by using Export:

After that, a dialog arises with to optional actions:

I recommend to use “Publish” before you export your solution. This runs Publish Changes for all components of my solution. In other words, I force to update all my unmanaged changes from my development environment into my current solution. This is important, when I have components like custom connectors, tables, forms, views, model driven apps, and more.
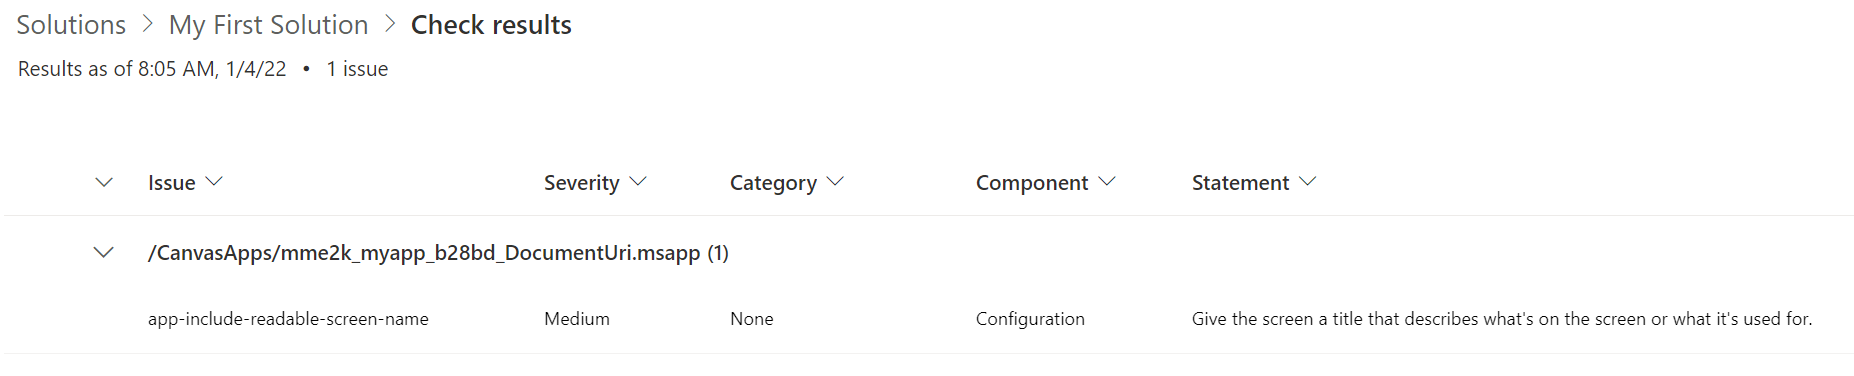
The second action “Check for Issues” run the solution checker tool and evaluate my solution components for any issues.
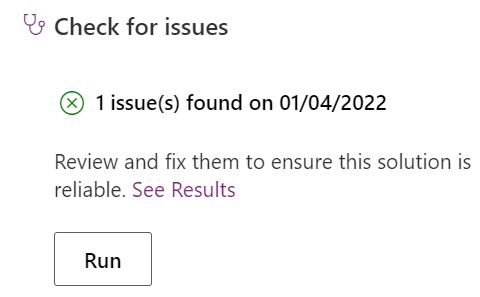
After my solution checker run, I see that my solution have an issue which I might have to fix.
Finally, the wizard asks my about the new solution version number and how I want to export my solution.
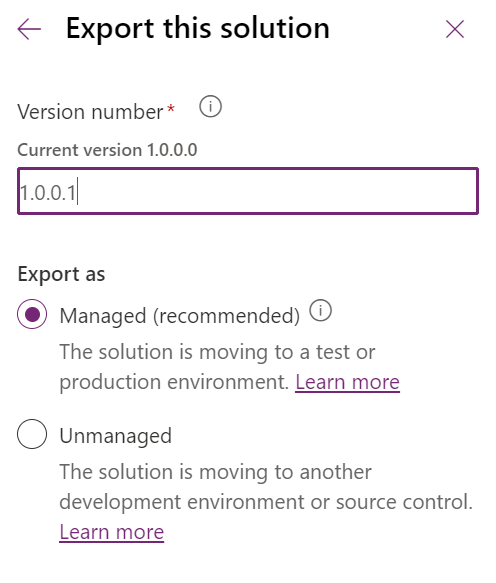
I use managed, because I want to ship my solution to my TEST and PROD environment.

Managed vs. Unmanaged Solution
The description in the wizard was clear, but what is the difference between an managed or unmanaged solution?
Microsofts documentation (Managed and unmanaged solutions) says: “Unmanaged solutions are used in development environments and managed solutions are used to deploy to any other environment that isn’t a development environment”.

Let me explain shortly. One reason of this is, I can only export unmanaged solutions. Once a managed solution is imported in an environment, I can’t export this solution anymore. I can only delete this solution from the environment.
Another fact is, when I uninstall a managed solution, all solution components are completely removed from the environment. This means nothing is left behind and mess up my environment. On the other hand, when I remove an unmanaged solution, its components remain in my environment. What happen is, my components are moved to the default solution in my environment.
However, this is a huge topic and I will focus later on it.
Solution Import
Once I have downloaded my solution, I can now import my solution zip-file into my TEST environment. I do this by using Import in my solution overview:

For this I must specify my solution zip-file in the wizard:

Finally I complete the wizard and import my solution into my TEST environment.

I get more import options listed, when another version of solution still exists in my environment. Then I must specify, how I want to replace my old solution version. But this is another chapter, well described in the Microsoft documentation: Update a Solution

As result, my solution is now imported as managed in my TEST environment.

After testing, I can use the same package and transport my solution to my PROD environment.
Summary
Solutions are in my opinion the perfect mechanism to transport components from one environment to another. Most important for me is, I can include all my components like canvas apps, flows, and custom connectors together in one consistent package.
In detail, this helps me to export and import my canvas apps with all their dependencies. I have a stable package where all sub components work together. I test this package in TEST and finally do an import into my PROD environment.
Finally, I am able to deliver my managed solution as a “sealed” package to my TEST and PROD environments. This also allows me to remove everything together from these environments if needed.
The downside, of course, is that I may have dependencies between multiple solutions and their components.