
Upload Files to Databricks with Power Automate
In the previous post, I signed up for Databricks Free Edition and built a catalog, a schema, and a volume named dropzone. That volume is empty, though. Now it’s time to upload files to Databricks, and that’s where my two hats (Data Platform Architect and Power Apps MVP) actually have to talk to each other.
My plan was simple: trigger a Power Automate flow from Dataverse, and have it upload a document straight into that volume. So I opened a flow, searched for “Databricks” in the action picker, and found two connector groups waiting for me: Databricks and Azure Databricks.
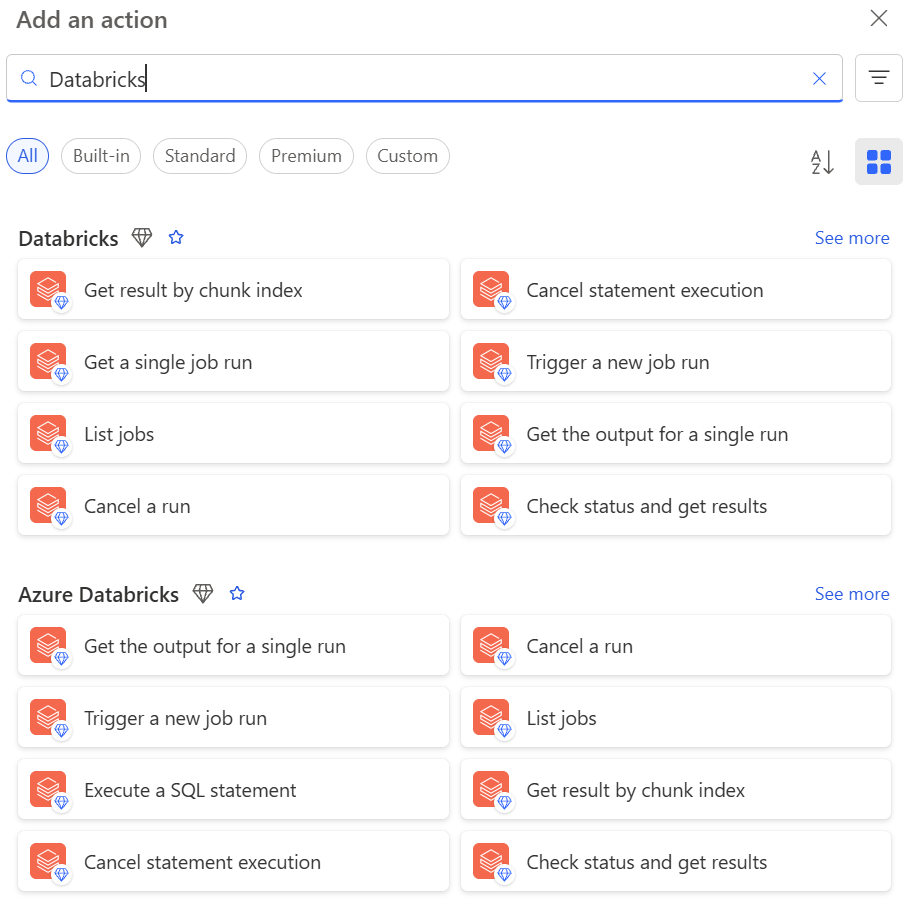
Plenty of actions showed up: triggering a job run, executing a SQL statement, checking run status, listing jobs. Useful stuff, but not what I needed. So I clicked “See more” to check the full list.
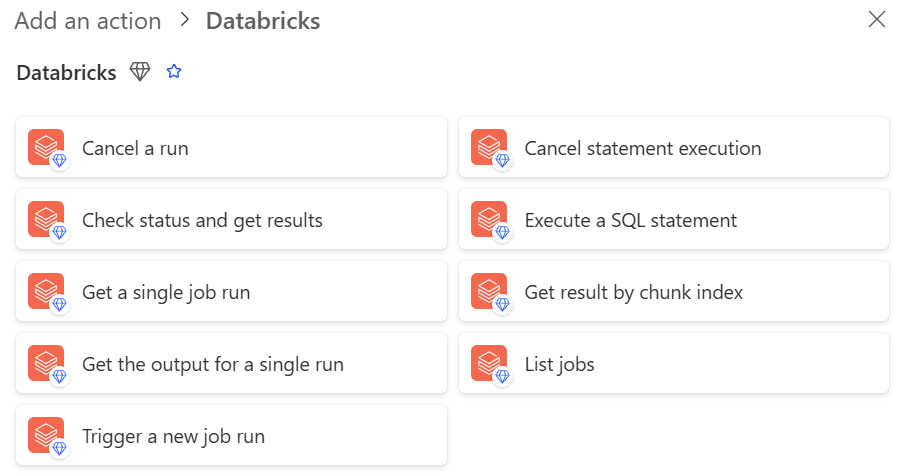
None of those actions uploads a file. The native connector is built for orchestrating Databricks jobs and querying SQL warehouses, not for moving documents into a volume.
That gap is what this post bridges. We’ll look at the architecture, collect the connection details a flow needs, build the upload step by hand, and check that a real document lands where it should.
Designing the Bridge
With the native connector ruled out, I needed a different plan. Nothing fancy, though: just Dataverse, a flow, and the volume I already built.
Here’s the shape of it: an automation task record in Dataverse triggers a Power Automate flow, and that flow uploads the document straight into the dropzone volume on Databricks.
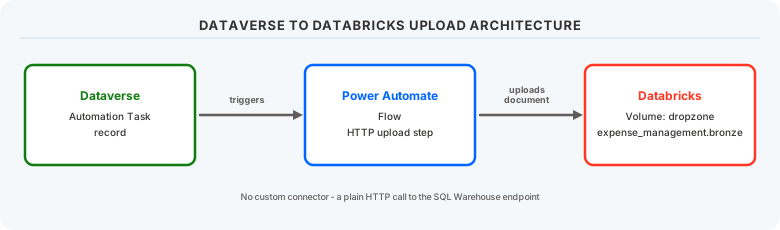
No custom connector, no middleware. Just an HTTP call from Power Automate to the SQL Warehouse that sits in front of the volume. Before that call works, though, I needed a few things from Databricks: connection details and a way to authenticate. Let’s gather those next.
Authenticating with a Personal Access Token
The native Databricks connector authenticates with OAuth sign-in or a Microsoft Entra Service Principal. Neither applies here, though. My flow skips that connector entirely and calls the Databricks REST API directly over plain HTTP. That call still needs a credential, so I used the simplest option available: a personal access token.
In Databricks, I opened Settings, then Developer, then Access tokens.
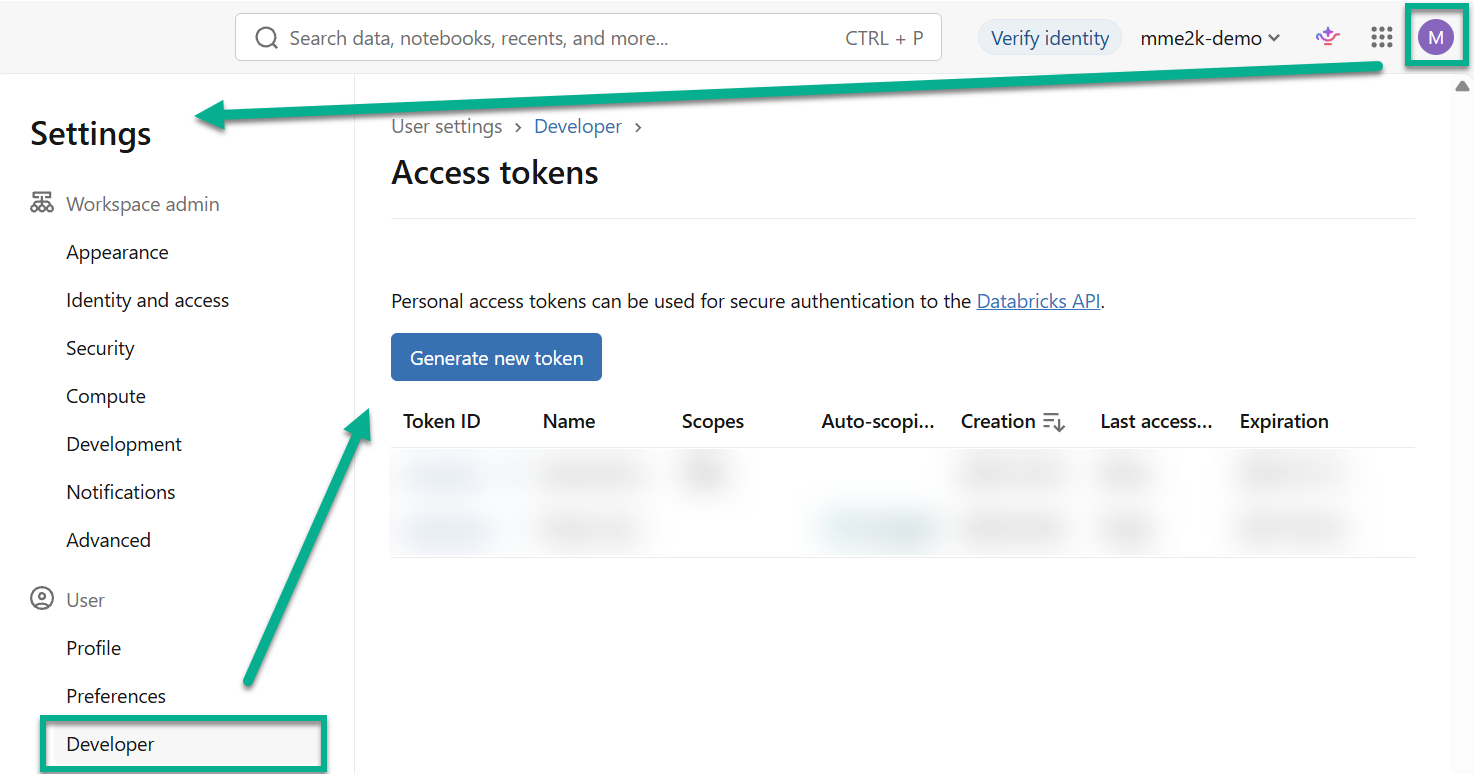
From there, I clicked Generate new token. I named it personal-token-dataverse, set a short 14-day lifetime, and scoped it to just the files API. Nothing more than what this flow actually needs.
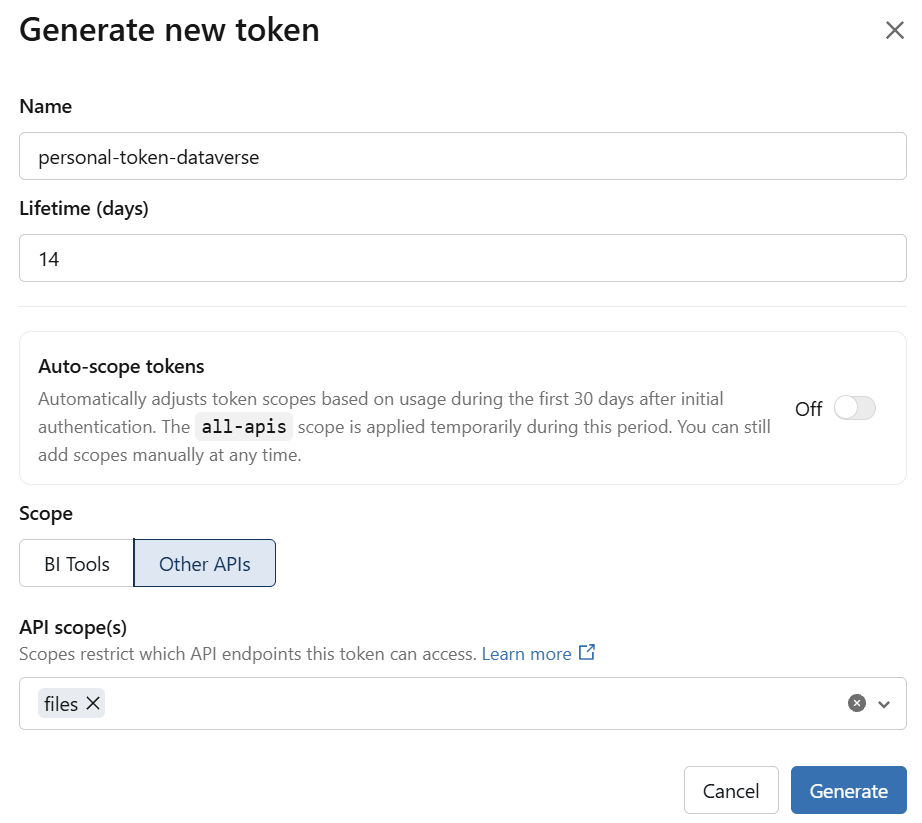
Databricks shows the token value exactly once, so I copied it straight away. The flow’s HTTP action will send it later as a bearer token in the request header.
A quick caveat: a personal token is fine for a walkthrough like this one, but it’s tied to my user account and doesn’t rotate on its own. For a production flow that runs unattended, a Service Principal connection is the better fit. That’s a topic for a future post.
Connecting to Databricks
With a personal access token in hand, the last missing piece is the Databricks endpoint itself: where exactly does the flow send its request?
Databricks keeps these details under your SQL Warehouse, not under the volume itself. In the workspace, I opened SQL Warehouses, selected the Serverless Starter Warehouse, and switched to the Connection details tab.
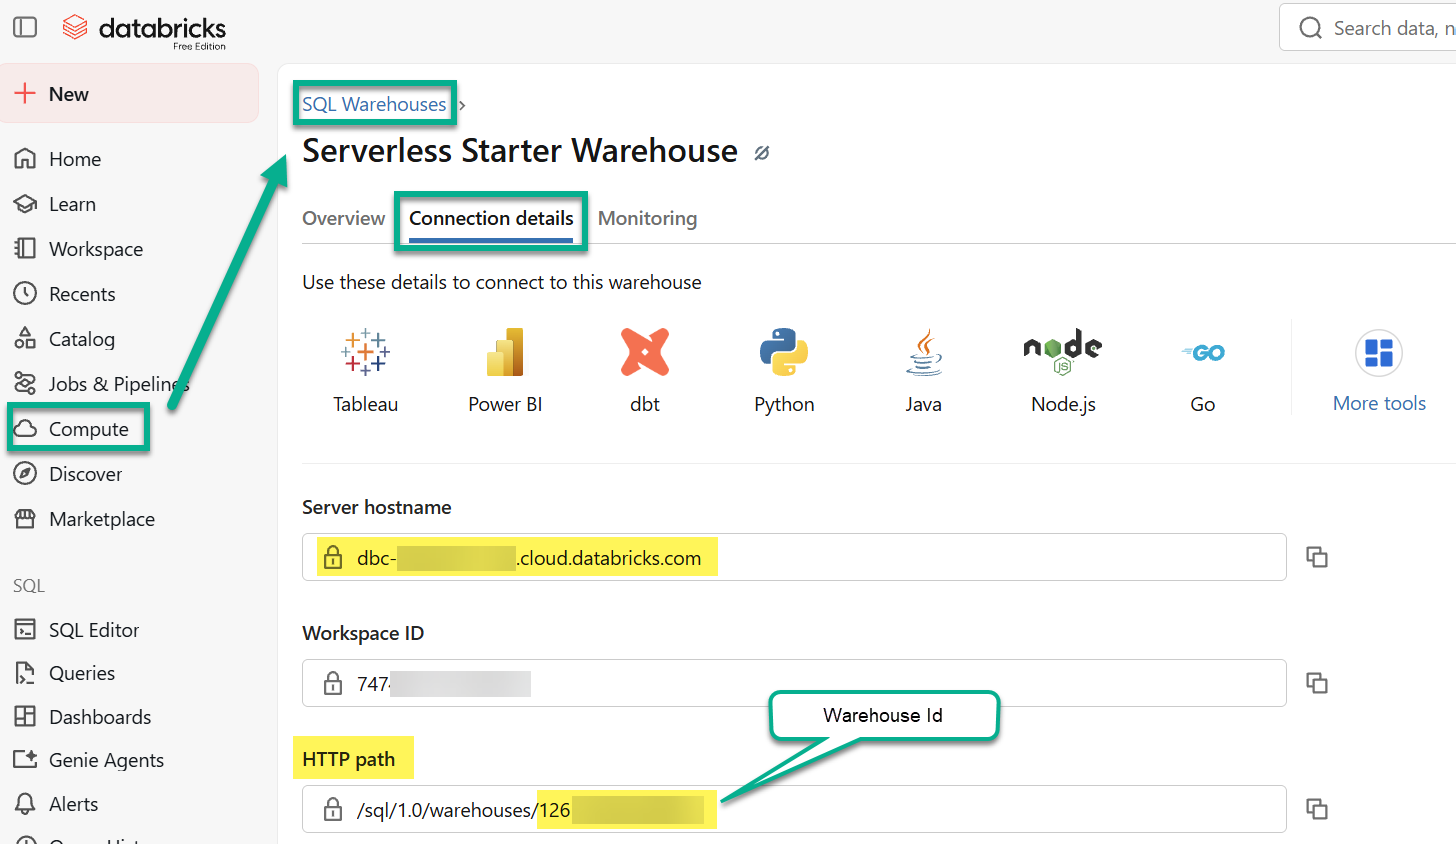
Three values matter here: the server hostname, the HTTP path, and the warehouse ID (the last segment of that same HTTP path). For the simplicity of this demo, I defined all three in a Parse JSON action, so every later step could reference the parsed values by name instead of pasting raw strings everywhere. In a production flow, environment variables are the better home for these, because they survive across environments without editing the flow itself.
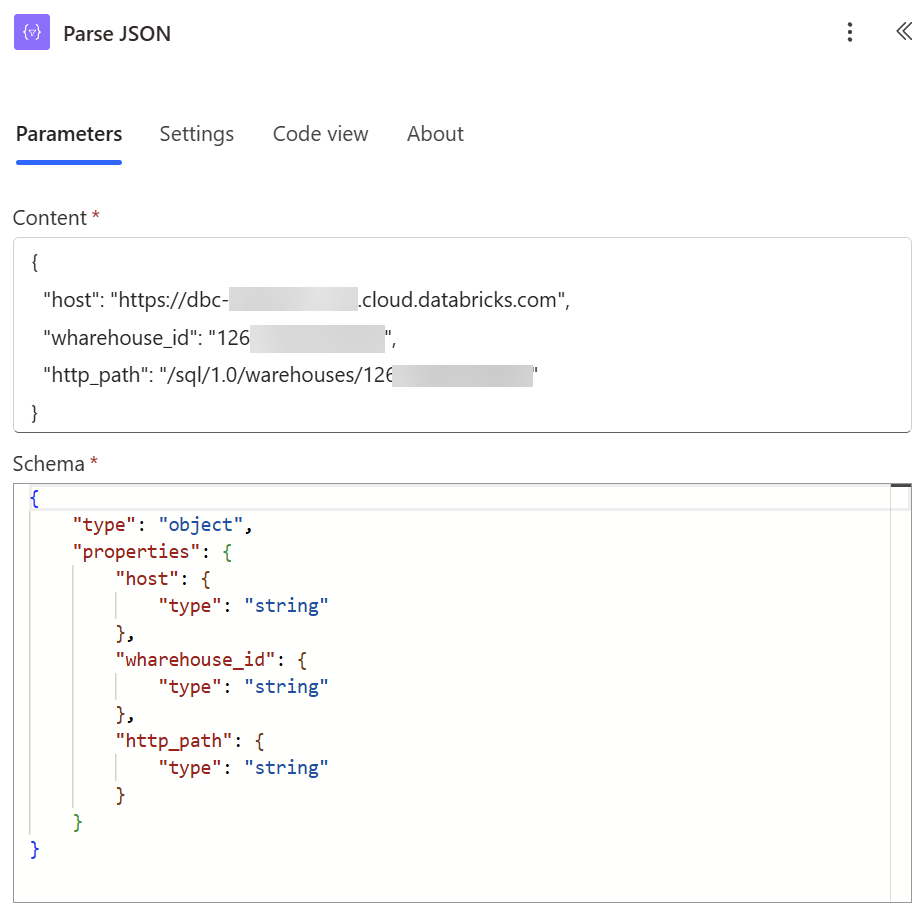
With the token and these three values collected, the flow finally has everything it needs to talk to Databricks. Next, let’s build the step that will upload files to Databricks.
Building the Power Automate Upload Flow
Connection details ready, token ready. Here’s what’s left: build the file path inside the volume, call the Databricks Files API to upload the bytes, and wire it all into one flow I can trigger from anywhere.
Setting the File Path
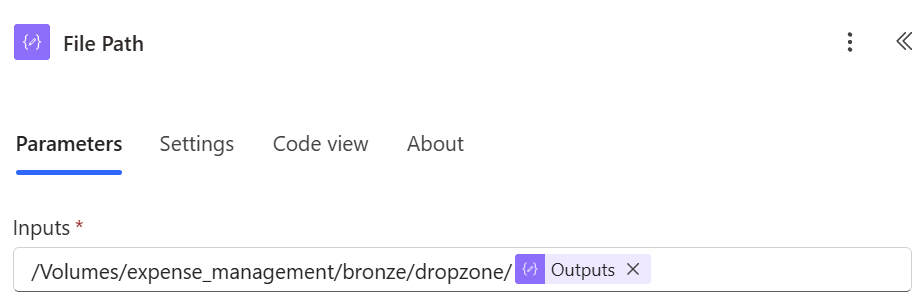
A Databricks Volume path follows a fixed pattern: /Volumes/<catalog>/<schema>/<volume>/<filename>. I used a Compose action to build it, combining the fixed /Volumes/expense_management/bronze/dropzone/ prefix with the filename coming into the flow.
How to Upload Files to Databricks with the Files API
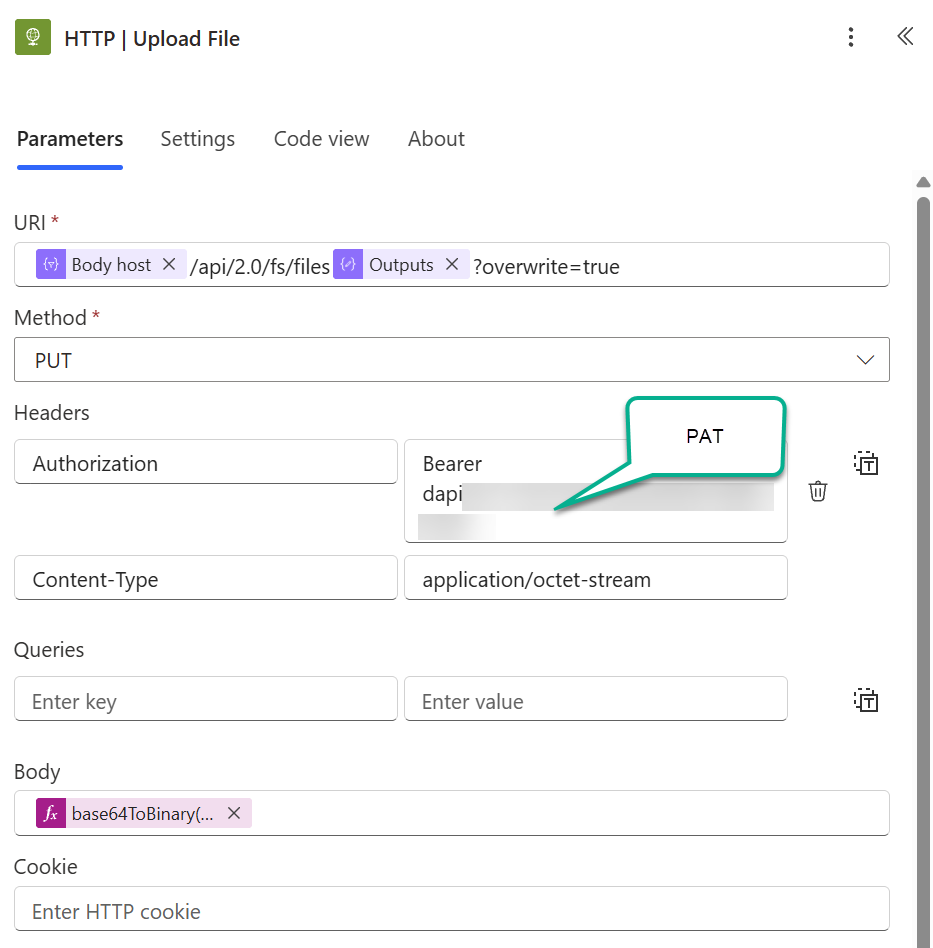
With the path ready, the upload itself is a single HTTP action. The URI combines the host from my Parse JSON step with the Files API path, /api/2.0/fs/files, the file path, and ?overwrite=true so re-running the flow doesn’t fail on a duplicate.
The method is PUT. Two headers matter: Authorization, set to Bearer followed by the personal access token from the authentication step, and Content-Type, set to application/octet-stream since I’m sending raw bytes, not JSON. The body uses base64ToBinary(...) to convert the incoming file content back into binary before it goes over the wire.
The Complete Flow
Here’s the full shape, end to end: the flow receives a filename, parses the connection details, builds the file path, uploads the file over HTTP, and responds back to the caller.
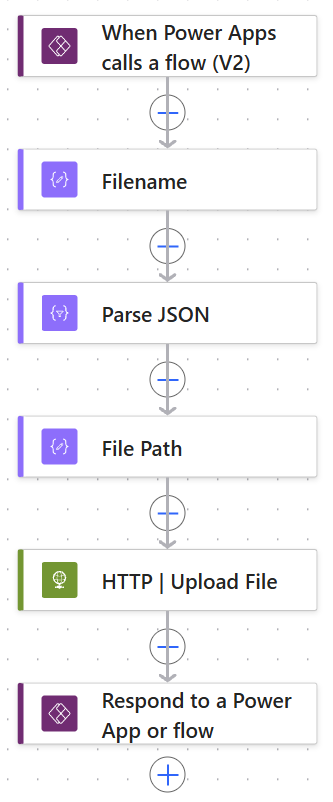
I built this as a reusable child flow, triggered by When Power Apps calls a flow, so the upload logic stays decoupled from whatever calls it: a canvas app during testing today, a Dataverse-triggered parent flow once it’s wired into the automation task in production.
The Moment of Truth: Upload Files to Databricks
Time for the moment that actually matters: does it run?
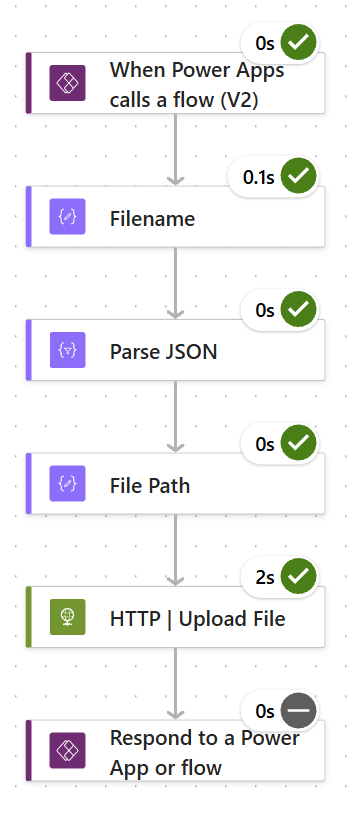
I triggered the flow with a test receipt photo and watched it move through every step: filename, parsed connection details, file path, the HTTP upload, and a response back to the caller. Green checkmarks all the way down, with the upload itself taking about two seconds.
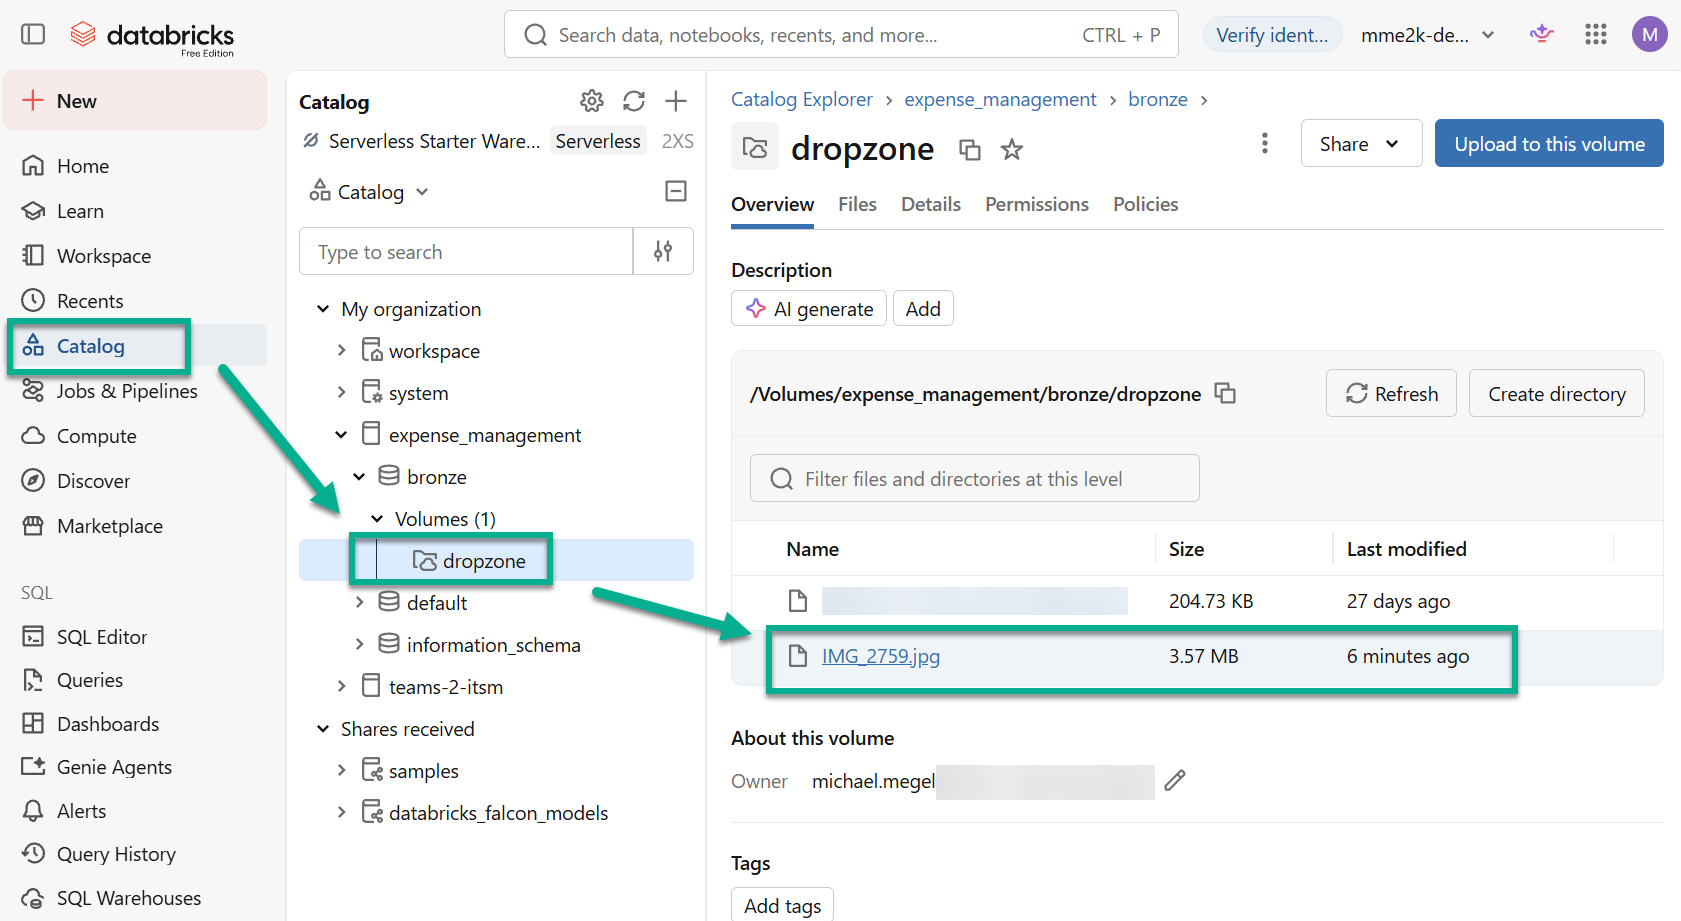
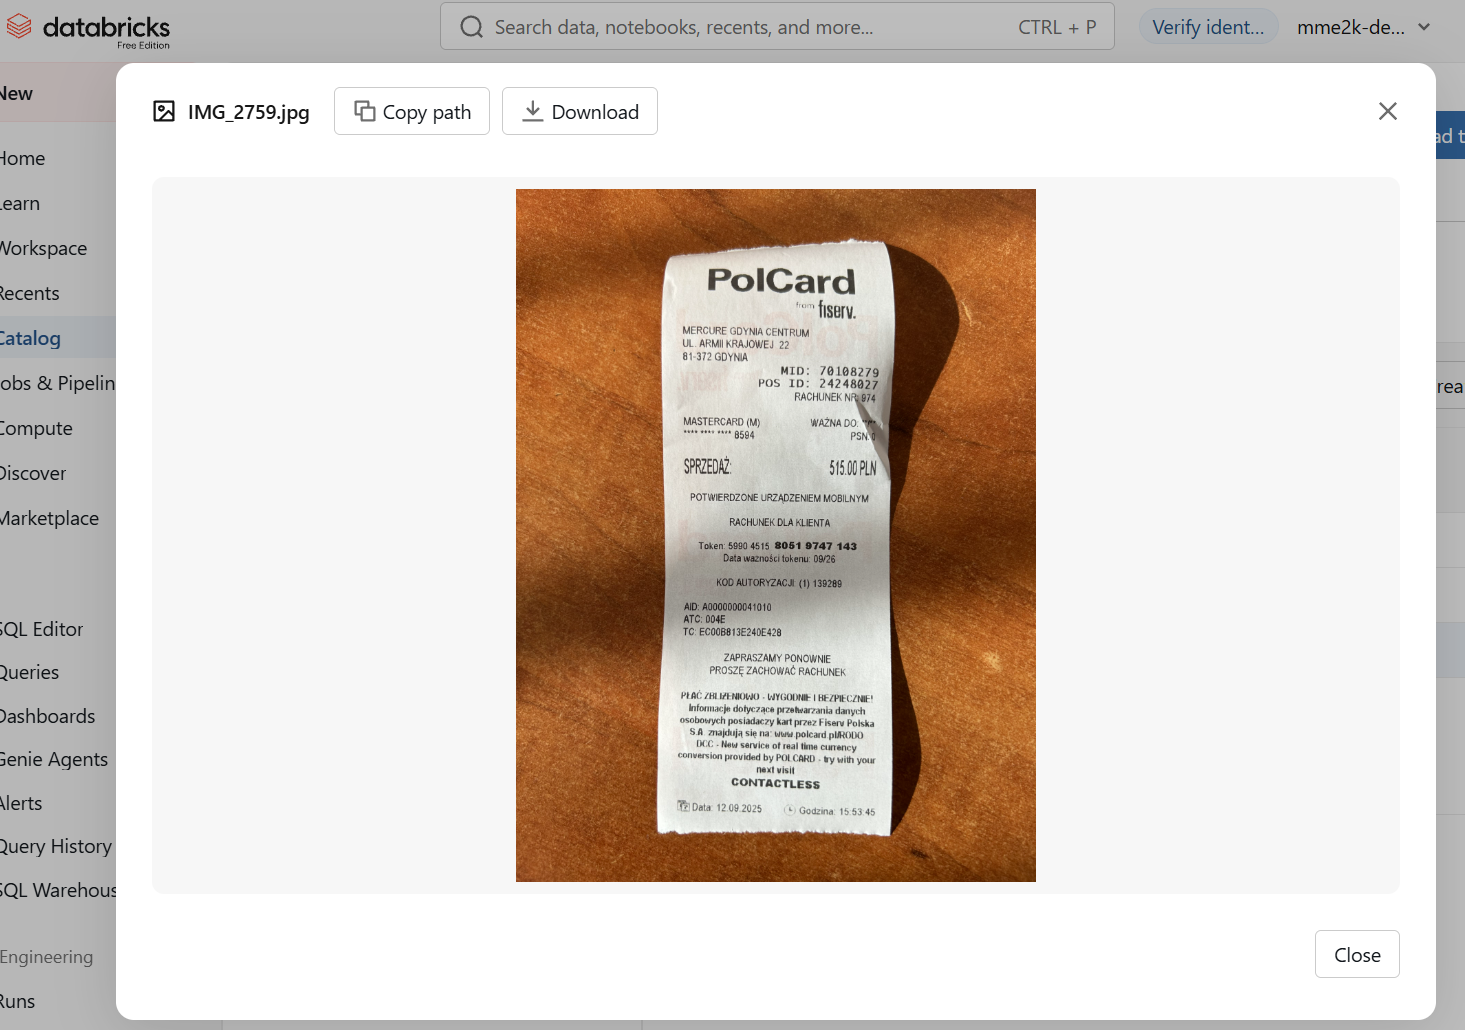
Switching over to Databricks, I opened Catalog Explorer and navigated to expense_management.bronze.dropzone. There it was: IMG_2759.jpg, 3.57 MB, uploaded six minutes earlier.
I clicked it to preview the content directly in the browser, no download required. It was a receipt, exactly as expected, and proof that the bytes made the trip from Dataverse, through Power Automate, into Databricks intact.
Summary
Two hats, one pipeline. The native Databricks connector couldn’t upload a file, so I bridged the gap myself: a personal access token for authentication, the SQL Warehouse connection details for routing, and a plain HTTP call to the Files API for the upload. Dataverse can now upload files to Databricks: a document lands in a Volume, ready for whatever comes next.
That “whatever comes next” is the interesting part. In my spec-driven development series, I already extract receipts and invoices using Azure AI Foundry Content Understanding, with results flowing back into Dataverse through the expense management system’s Agent Task automation. The next post in this mini-series swaps that extraction step for Databricks: running the analysis on the file that just landed in dropzone, and feeding the result back the same way. The plumbing is done. Now it’s time to make Databricks do some actual work.